en 3
2 5.2
3
5.3
6
6.1
6.2
4
5
5.1
Intended use Preparation
Scope of supply
Tools required
Assembly of the door opener
Assembling the rail
Tighten the belt
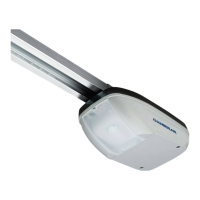
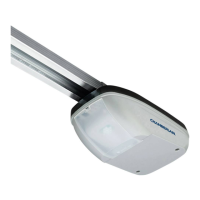
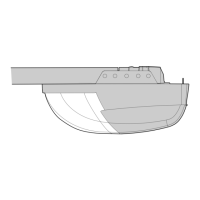
Product overview
Before you begin
Preconditions
The device is intended for the opening and closing of tilt-up and
sectional garage doors in the private sector. The device is not meant
for commercial use but solely for the use in private garage doors that
are appropriate for a single household.
Any improper use of the drive could increase the risk of accidents.
The manufacturer assumes no liability for such usage.
Only the original accessories of Chamberlain may be connected to the
drive. With this drive, automated gates must comply with the currently
valid international and country-specific standards, guidelines and regula-
tions (among other things, EN 13241, EN 12453 and EN 12604).
First, check whether your door is balanced and in equilibrium. Open
your door about halfway and let it go.
The door can now hardly change its position independently, but must
remain in this position held by the spring force alone.
Motive force: maximum 15 kg.
1. The rail of the garage door MUST be connected securely and firmly to
the supporting wall or ceiling above the garage door.
2. Additional brackets and mounting rails (not included in the supply)
might be required, if the your garage ceiling has a cladding, boards or
similar.
3. If your garage does not have a separate side entrance, an external
emergency release should be installed.
Please check the supplied parts for completeness before starting the in-
stallation. Note: The numbering only applies to the corresponding section.
This figure always offers you a complete overview of the readyassembled
system during the step by step installation of the system.
IMPORTANT NOTE
If your garage does not have a side entrance, an external emergency
release should be installed. This allows for manual operation of the
garage door from the outside during power failure.
The rail is largely preassembled and consists of 3 parts. The carriage,
push rod, release handle, the guide pulley and the lintel bracket with
belt tensioner are in the front part (A). The seating for the drive shaft
and the sprocket are in the rear part (B). Lay the front and rear rail
sections one behind the other.
1. Remove cable ties that secure the belt. Leave the transport lock
(X) still in position.
2. Pull apart the two rail sections completely in order to create a gap
for the middle section (C). This rail is designed in such a way so as
to easily add the middle section. Slide the 2 connecting pieces (D)
over the seams of the rail sections up to the markings. To secure the
connecting pieces, bend the sheet metal lugs out-wards with a suitable
tool. The assembly of the rail is complete.
Important instructions for a safe installation.
Observe all assembly instructions.
Incorrect installation can cause serious injury.
Tighten the belt of the rail until the spring (1) is compressed only by
about half. The spring must compress and be able to bounce during
operation.
The garage door opener is suitable only for installation in one-piece
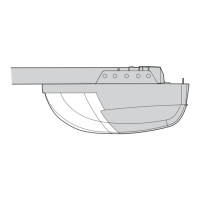
garage doors with horizontal guide rail (tilt-up door) (Fig. A) and in
sectional doors with curved guide rail (Fig. B).
NOTE:
The system cannot be used for one-piece garage doors with horizontal
and vertical guide rails and two-wing doors or overhead doors.
Tool list:
Ladder Hacksaw
Marking pen Different drill bits (8, 6, 5, 4.5 mm)
Pliers Box wrench
Drilling machine Water level
Hammer Screwdriver
Ratchet (10, 13 mm) Measuring tape
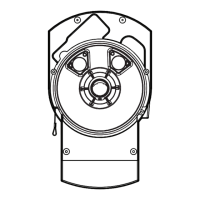
6.3 Fitting rail to the drive
1. Check if the belt is seated on the gear-wheel. If the belt has slipped off
during assembly, relax the belt, lay it and tighten again.
2. Turn around the rail (A) and completely put on the opener (C) with the
gear side (B).
3. Secure the rail on the opener with two rail brackets (5) and the short
screws (17).
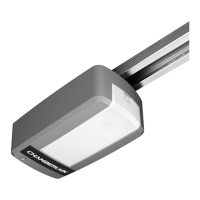
Parts overview:
1. Drive head 1x 6. Header bracket 1x
2. Handheld transmitter 1x 7. Door bracket 1x
3. Curved door arm 1x 8. Hardware bag 1x
4. Hanging bracket 2x 9. Rail 1x
5. Rail bracket 3x
a. Header bracket h. Power cable
b. Belt i. Drive head
c. Rail j. Release
d. Carriage k. Straight door arm
e. Connecting piece l. Curved door arm
f. Rail bracket m. Door bracket
g. Hanging bracket
Hardwarebag:
10. Truss head screw
6 x 80 mm
1x 15. Safety cotter pin 1x
11. Lock nut M6 1x 16. Screw
ST 6 x 60 mm
4x
12. Hexagonal head
screw
4x 17. Screw
ST 6,3 x 20 mm
8x
13. Nut M6 4x 18. Plug 4x
14. Bolt 1x 19. Adapter for gear
wheel
1x
 Loading...