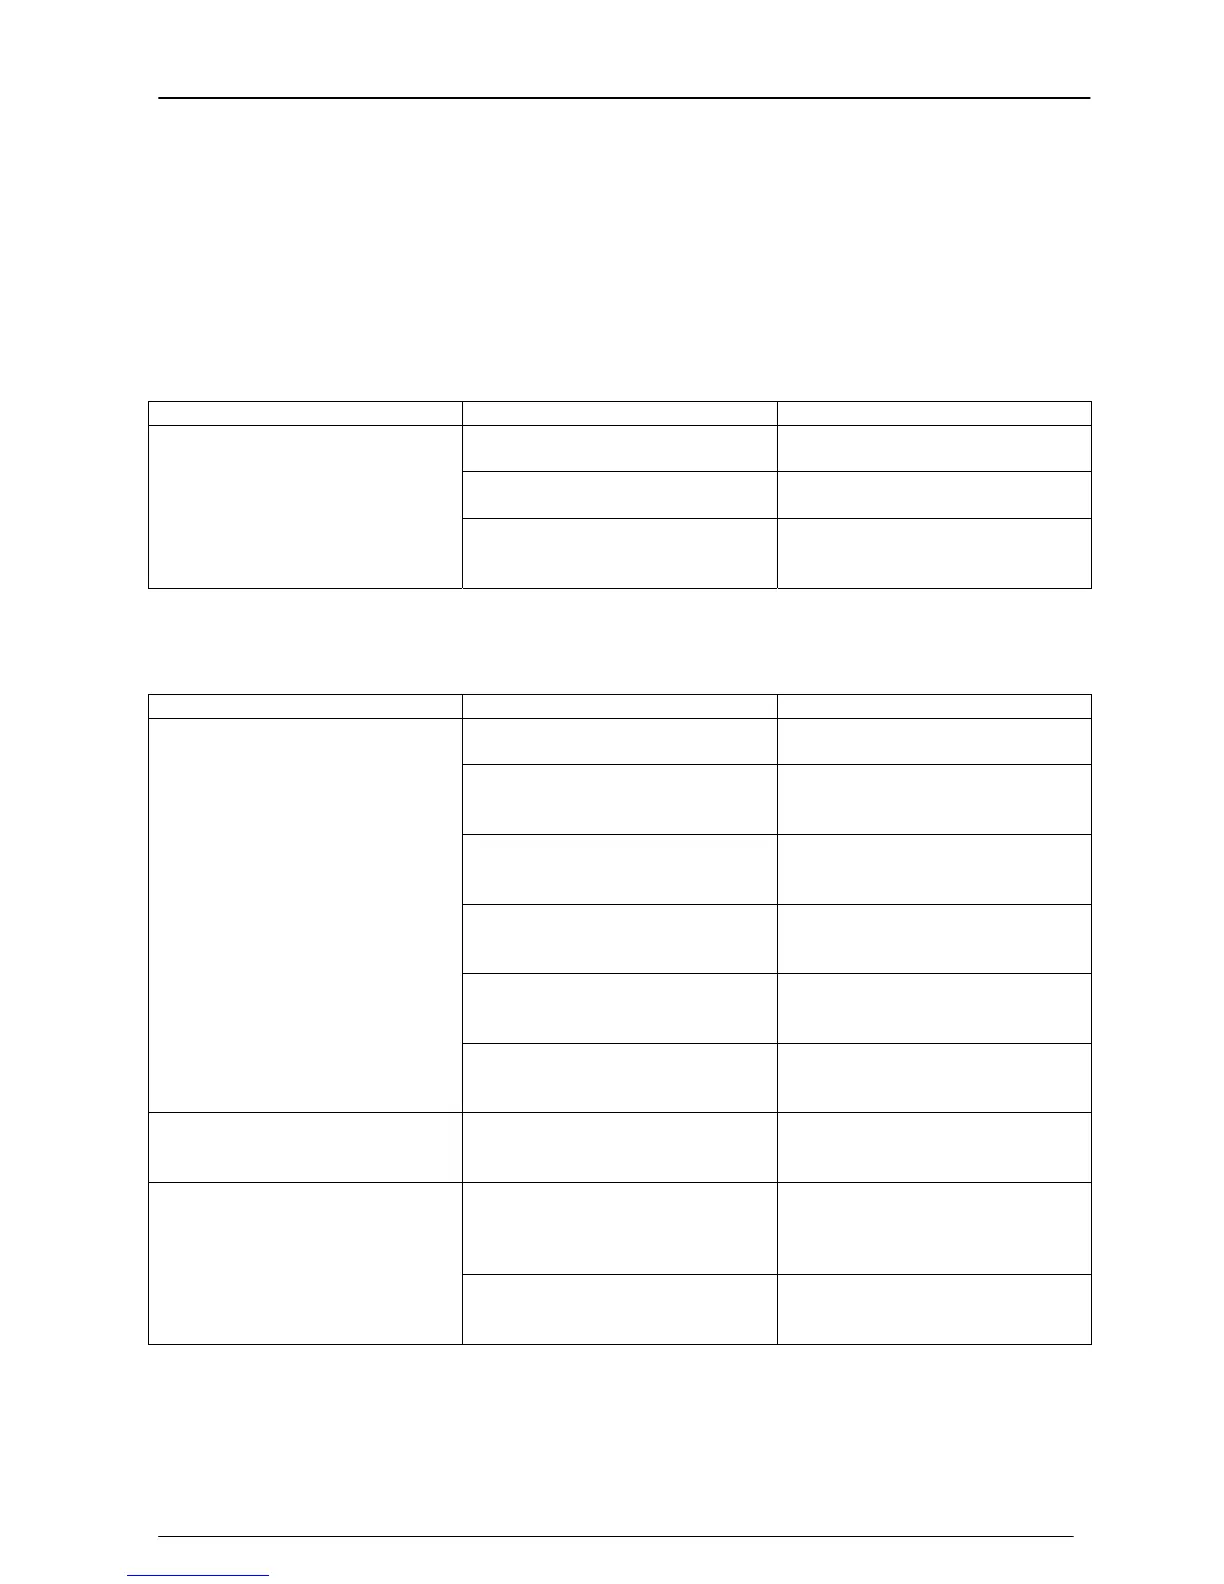
7 Troubleshooting
This section contains information which may solve simple operational problems you
may encounter. If you are unable to solve the problem or experience any problems with
the assembly or operation of the instrument contact Cirrus Research plc or your local
representative for further assistance
7.1 Basics
Symptom Possible Cause Possible Remedy
The batteries are not fitted Fit new batteries and switch
on
The batteries are flat or very
low
Fit new batteries and switch
on
The instrument does not
switch on
The batteries are not correctly
fitted
Remove the batteries and
check the polarity of the
batteries
7.2 Calibration
Symptom Possible Cause Possible Remedy
The Acoustic Calibrator is not
switched on
Switch on the Acoustic
Calibrator and retry
The Acoustic Calibrator is not
fitted correctly
Check that the Acoustic
Calibrator is fitted according to
the instructions supplied.
The Preamplifer is not fitted
correctly. Class 1 Instruments
only
For Class 1 Instruments, refer
to page 15 for details of fitting
the preamplifier.
The microphone capsule is
loose or not fitted
Check that the microphone
capsule is tight and fitted
correctly
Calibration level set to a
different level
Set the calibration level to the
value provided by the Acoustic
Calibrator. See page 37
The calibration fails: Too Low
The Microphone may be
damaged
Contact Cirrus Research plc or
your local representative for
assistance
The calibration fails: Too High The Acoustic Calibrator is set
to a higher level than the
expected level
Set the Acoustic Calibrator to
the correct level
The background noise level is
within 15dB of the calibration
level
Move to a location where the
background noise level is
more than 15dB below the
calibration level
The calibration fails: Unstable
The Microphone may be
damaged
Contact Cirrus Research plc or
your local representative for
assistance
 Loading...