3-3
Cisco IR829 Integrated Services Router Hardware Installation Guide
Chapter 3 Connecting the Router
Connecting a Terminal or PC to the Console Port
Step 3 (Optional) Connect additional servers, PCs, or workstations to the other Ethernet switch ports.
Connecting a Terminal or PC to the Console Port
Connect a terminal or PC to the Console port either to configure the software by using the CLI or to
troubleshoot problems with the router.
To connect a terminal or PC to the console port on the router and access the CLI, follow these steps:
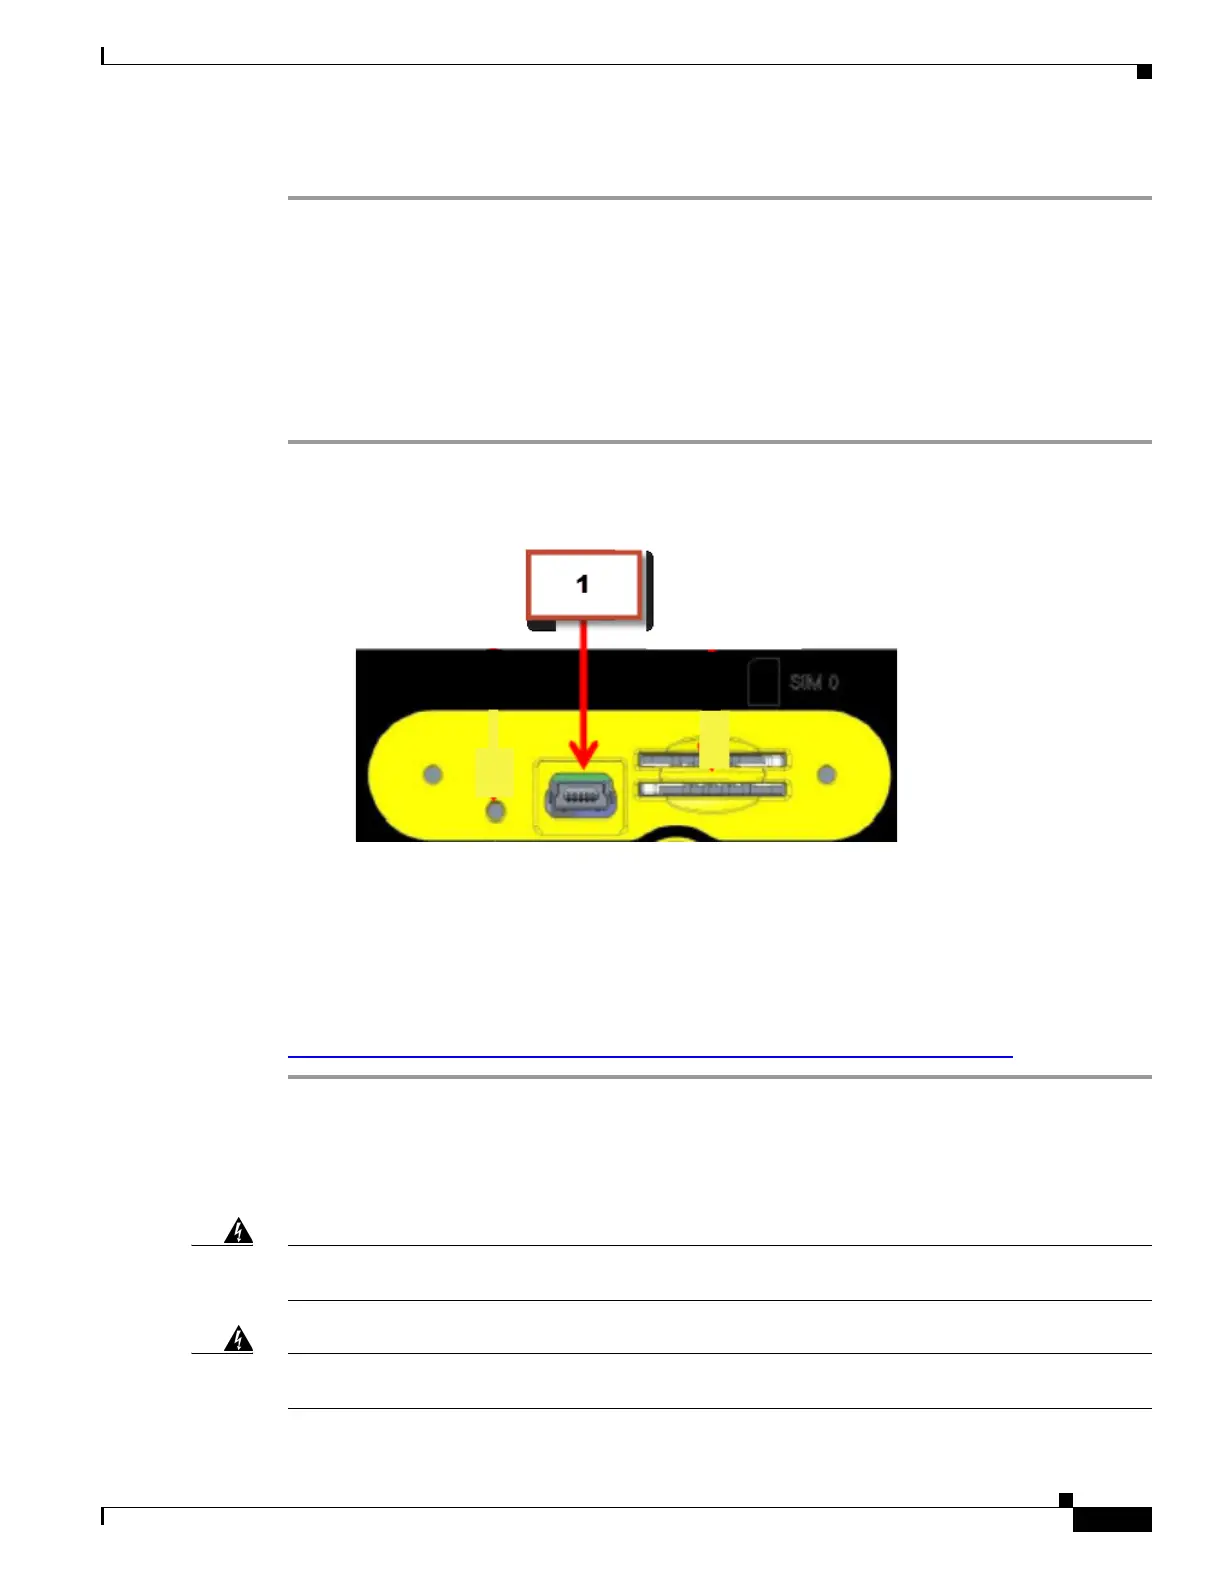
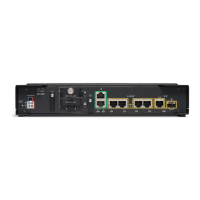
Step 1 Connect the mini-USB side of a cable to the USB Console port on the router. Figure 3-2 shows the
mini-USB location (1) for the Console port on the router.
Figure 3-2 Connecting a Terminal or PC to the Console Port
Step 2 Connect the opposite end of the mini-USB cable to the USB port on your laptop or PC.
Step 3 To communicate with the router, wait for your laptop or PC to discover the new device.
Step 4 If your laptop or PC warns you that you do not have the proper drivers to communicate with the router,
you can obtain them from your computers manufacturer, or go here:
https://www.silabs.com/products/mcu/Pages/USBtoUARTBridgeVCPDrivers.aspx
Connecting to DC Power
Warning
This product relies on the building’s installation for short-circuit (overcurrent) protection. Ensure that
the protective device is rated not greater than 36 VDC, 5A
Statement 1005
Warning
This product requires short-circuit (overcurrent) protection, to be provided as part of the building
installation. Install only in accordance with national and local wiring regulations.
Statement 1045