When installing an SFP or SFP+ module, you should hear a click as the triangular pin on the bottom of
the module snaps into the hole in the receptacle, indicating that the module is correctly seated and secured
in the receptacle. Verify that the modules are completely seated and secured in their assigned receptacles
on the line card by firmly pushing on each SFP or SFP+ module.
Note
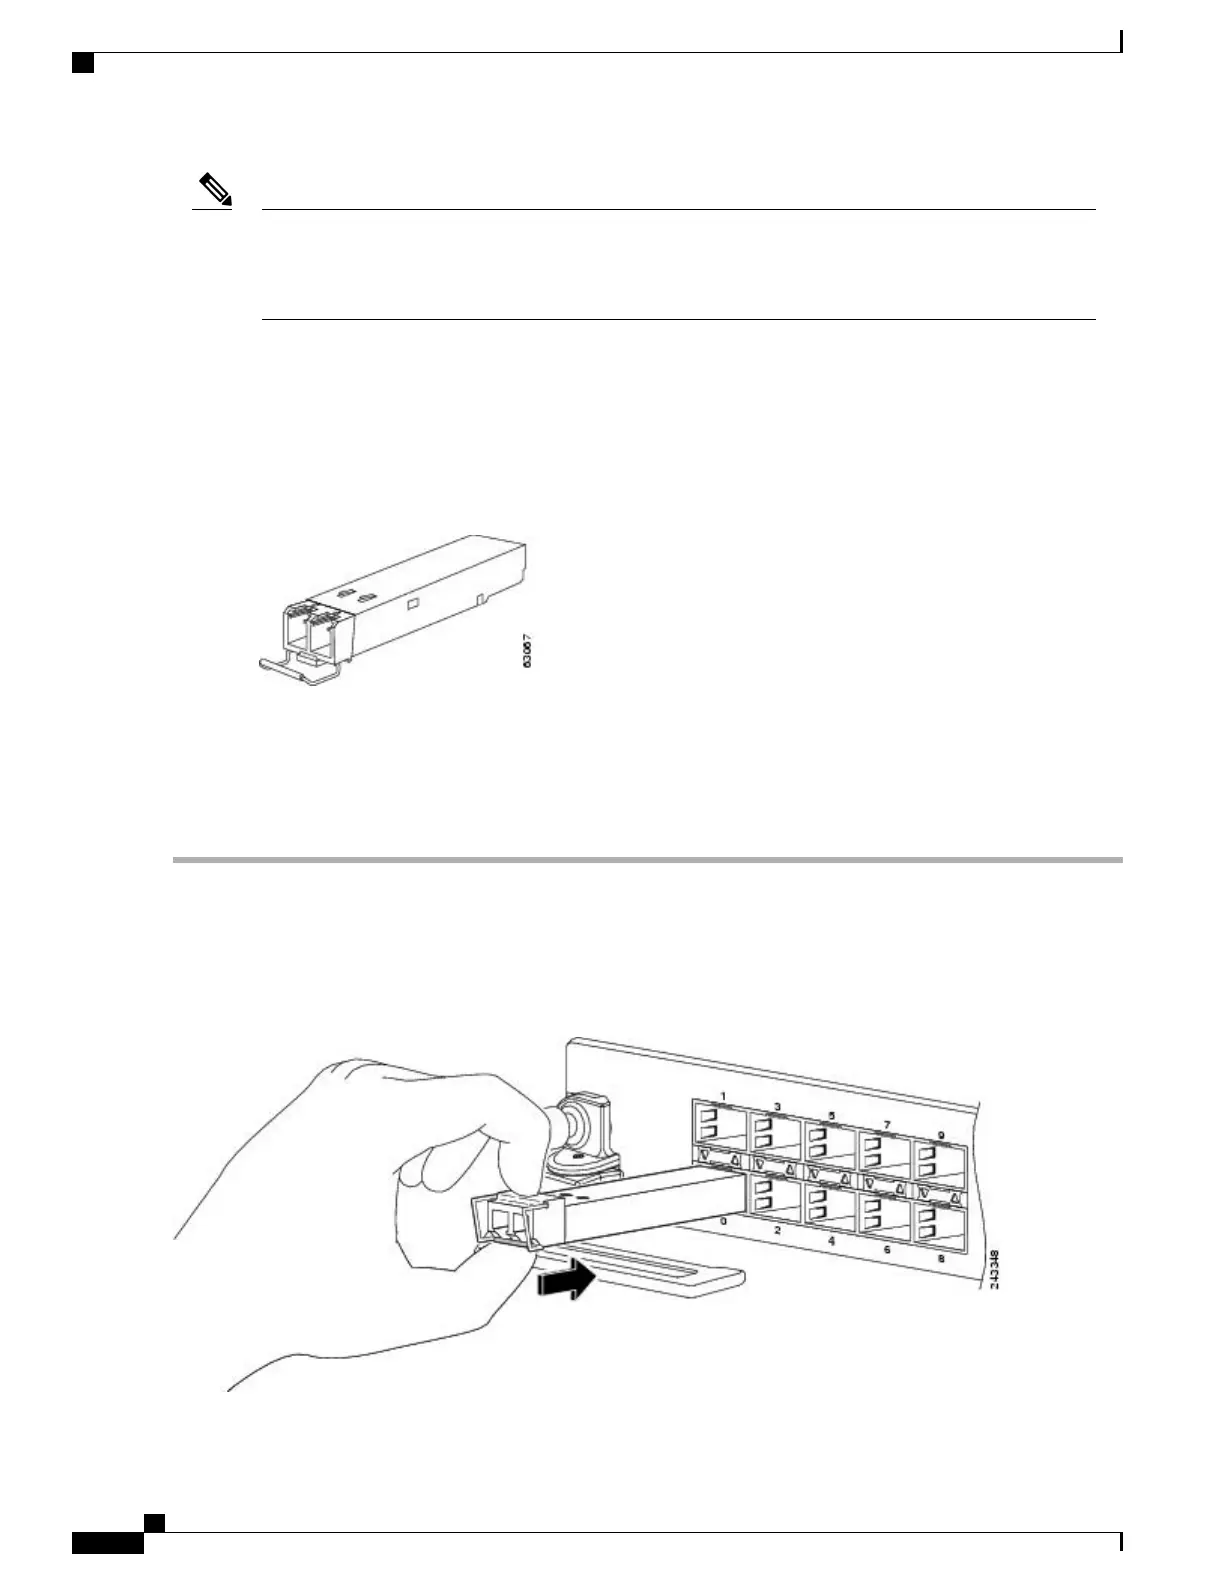
Bale Clasp SFP or SFP+ Module
The bale clasp SFP or SFP+ module has a clasp that you use to remove or install the module (see the figure
below).
Figure 23: Bale Clasp SFP or SFP+ Module
Installing a Bale Clasp SFP or SFP+ Module
To install this type of SFP or SFP+ module, follow these steps:
Step 1
Attach an ESD-preventive wrist or ankle strap and follow its instructions for use.
Step 2
Close the bale clasp before inserting the SFP module.
Step 3
Line up the SFP module with the port and slide it into the port (see the figure below).
Figure 24: Installing a Bale Clasp SFP Module into a Port
Hardware Installation Guide for Cisco NCS 5500 Series Fixed-Port Routers
42
Connect Router to the Network
Installing and Removing SFP Modules
 Loading...