Orientation topics
Cisco TelePresence Management Suite Installation and Getting Started Guide Page 47 of 70
Orientation topics
The system navigator
The System Navigator is the starting point for adding, managing, and organizing systems in Cisco
TMS. Go to System > Navigator. It is where systems are organized into a hierarchal structure of
folders, similar to your computer file system. This folder structure, known as the Navigator Tree, is
used throughout Cisco TMS when interacting with systems, including the view of systems that users
see when Scheduling calls.
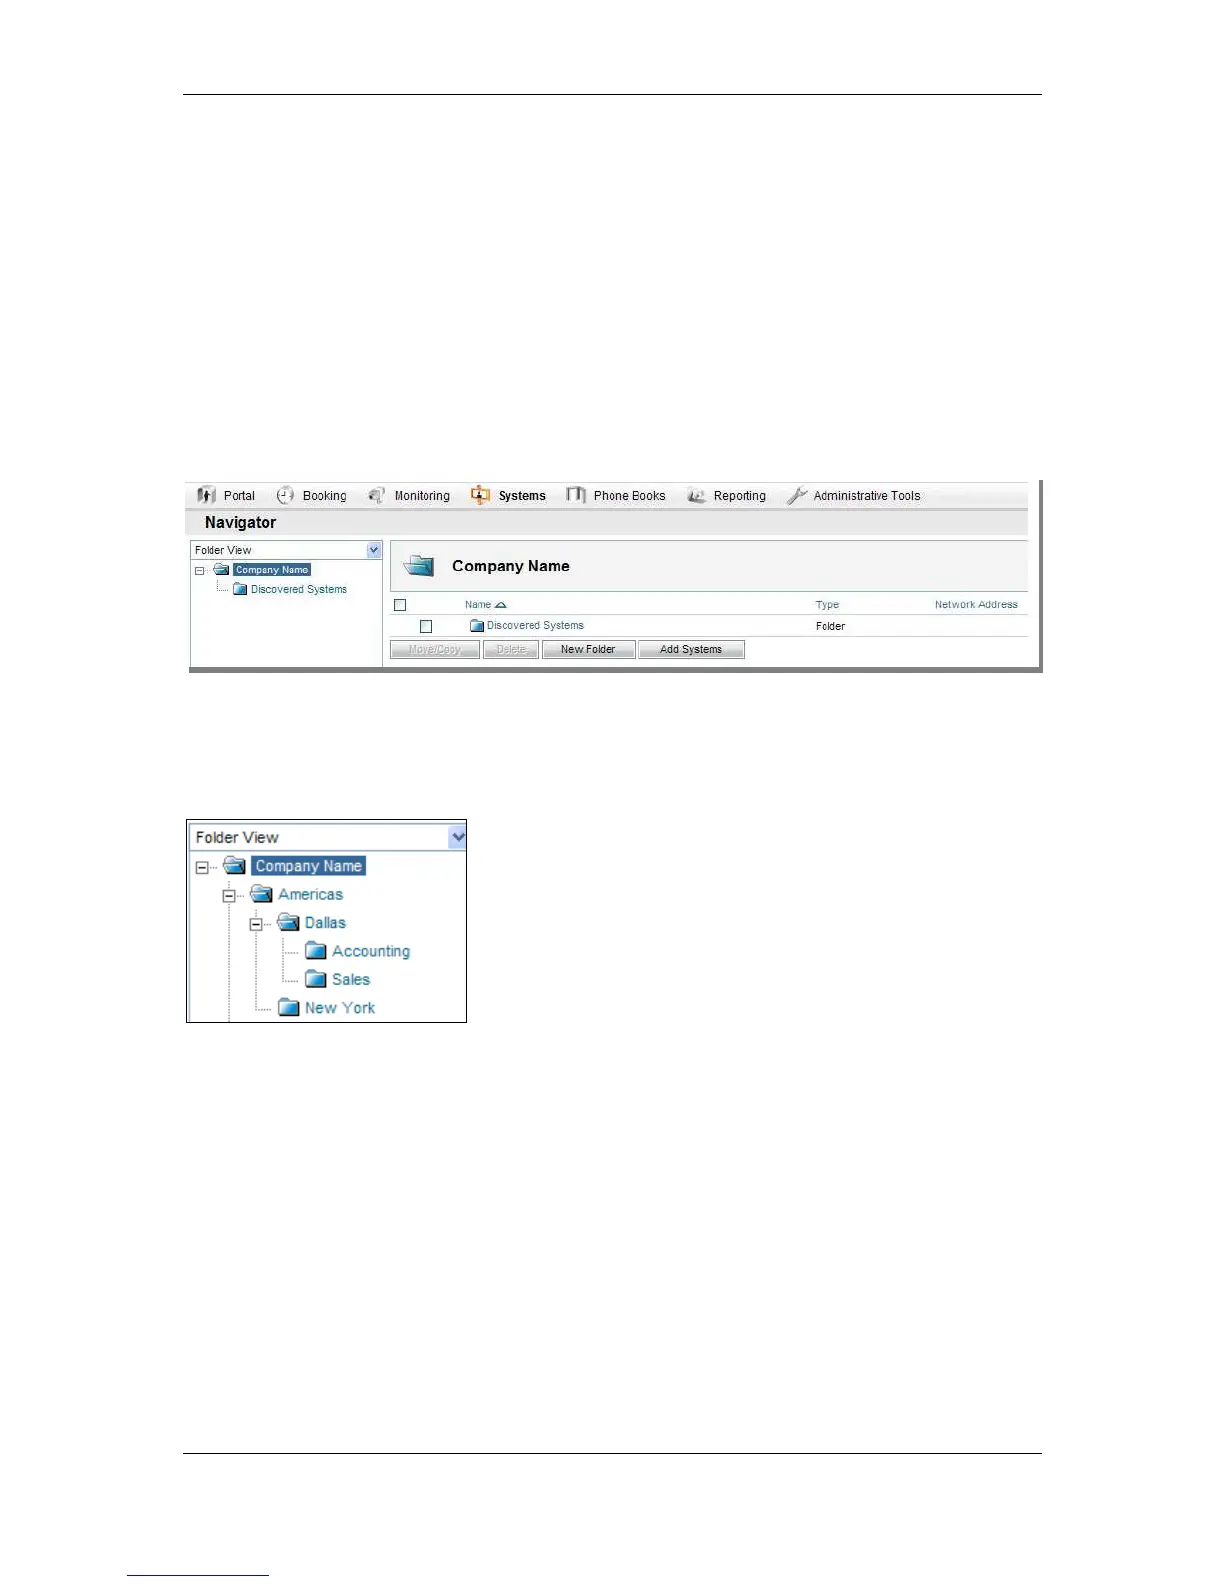
In a new installation, two default folders are displayed in the list on the left side of the page: a root (top
level) folder called Company Name and a child folder, Discovered Systems. The page is organized
into two panels: a tree view on the left, and a details panel on the right which provides information
about the selected item on the left.
Figure 28 Company Name and Discovered Systems.
You can define any folder structure under the root folder, they are purely for organizational purposes
to make it easier to find systems and to set system permissions. The same folder structure is seen by
all users, and is used throughout Cisco TMS, therefore it is recommended you design a scheme that is
meaningful for your users. A common model is one based on geography and organization; for
example:
Figure 29 A common geographical organization model
In addition to viewing systems by folder, you can change the tree to display systems by Type, Status,
and Manufacturer for example by selecting from the drop-down menu at the top of the tree. However,
you can only add, move, or remove systems in the Folder View.
Set up default folders
1. Rename the default root folder: click on the Company Name folder. The right panel shows the
contents of that folder. Click Edit this Folder at the top right-hand side of the screen. Rename the
folder with an appropriate company name and click Save.
2. Add any additional folders. Folders are not required, but are recommended for organizational
reasons. You can always add/remove folders subsequently. To add a folder, click on the folder
that will be its parent folder in the tree. Then in the right panel, click Make New Folder. Enter a
name and description (optional), and click Save.
3. Repeat the previous step for as many folders as required.
 Loading...