The heatsink must have new TIM on the heatsink-to-CPU surface to ensure proper cooling and
performance.
Note
•
If you are installing a new heatsink, it is shipped with a pre-applied pad of TIM. Go to step 5.
•
If you are reusing a heatsink, you must remove the old TIM from the heatsink and then apply new TIM
to the CPU surface from the supplied syringe. Continue with step a below.
a) Apply the Bottle #1 cleaning solution that is included with the heatsink cleaning kit (UCSX-HSCK=), as
well as the spare CPU package, to the old TIM on the heatsink and let it soak for a least 15 seconds.
b) Wipe all of the TIM off the heatsink using the soft cloth that is included with the heatsink cleaning kit.
Be careful to avoid scratching the heatsink surface.
c) Completely clean the bottom surface of the heatsink using Bottle #2 to prepare the heatsink for installation.
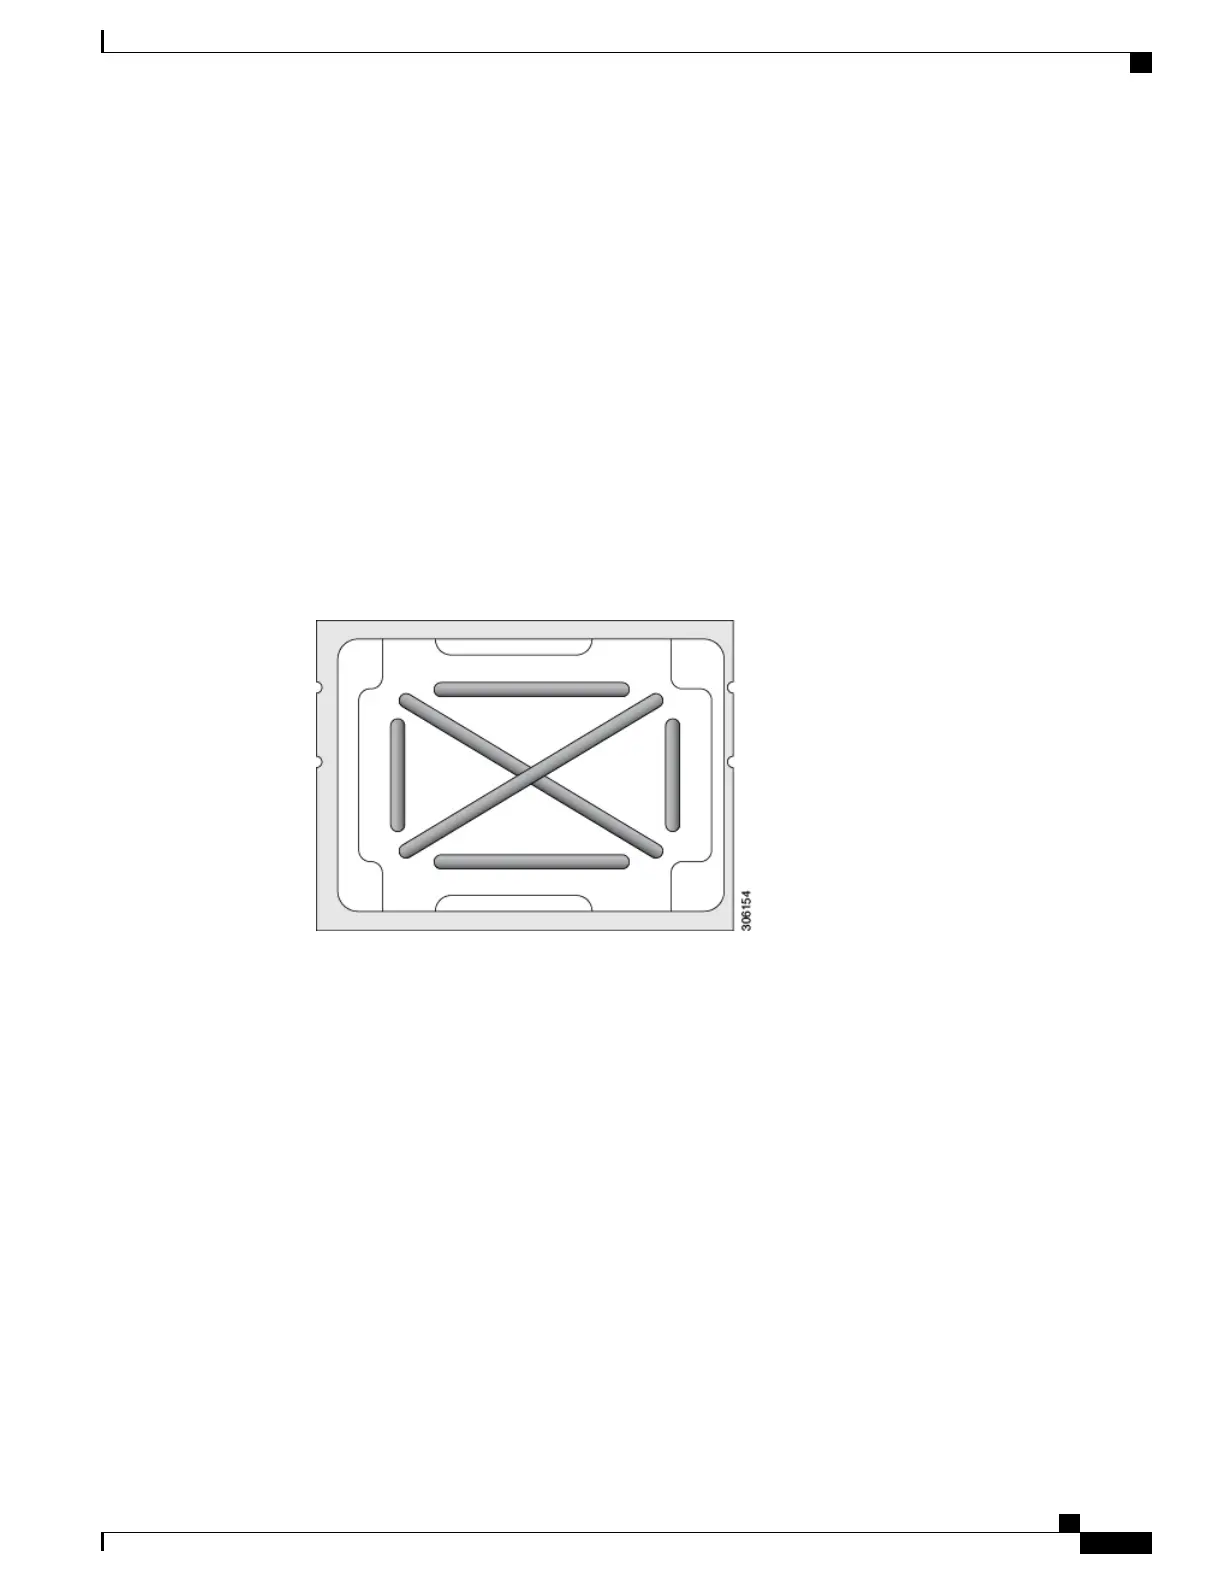
d) Using the syringe of TIM provided with the new CPU (UCS-CPU-TIM=), apply 4 cubic centimeters of
thermal interface material to the top of the CPU. Use the pattern shown in the following figure to ensure
even coverage.
Figure 13: Thermal Interface Material Application Pattern
Use only the correct heatsink for your CPU. CPU 1 uses heatsink UCSB-HS-M5-F and CPU
2 uses heatsink UCSB-HS-M5-R.
Caution
Step 5
With the CPU assembly on the CPU assembly tool, set the heatsink onto the CPU assembly.
a) Place the heatsink onto the CPU by aligning the Pin 1 corner of the heatsink with the Pin 1 tab of the CPU
carrier for the correct orientation.
b) Push down gently until you hear the corner latches of the CPU carrier click onto the heatsink corners.
c) Inspect all four latches to verify they are fully engaged.
In the following step, use extreme care to avoid touching or damaging the CPU contacts or the
CPU socket pins.
Caution
Step 6
Install the CPU/heatsink assembly to the server.
a) Lift the heatsink with attached CPU assembly from the CPU assembly tool.
Make sure to hold the heatsink along the fin edges and not the fin walls to prevent damaging the
heatsink.
Note
b) Align the CPU with heatsink over the CPU socket on the motherboard, as shown in the following figure.
Cisco UCS B200 M5 Blade Server Installation and Service Note
33
Servicing a Blade Server
Replacing a CPU and Heatsink
 Loading...