Any previously configured volume and data on the drives are preserved when the M.2 drives are transferred
to the new controller. The system will boot the existing OS that is installed on the drives.
Note
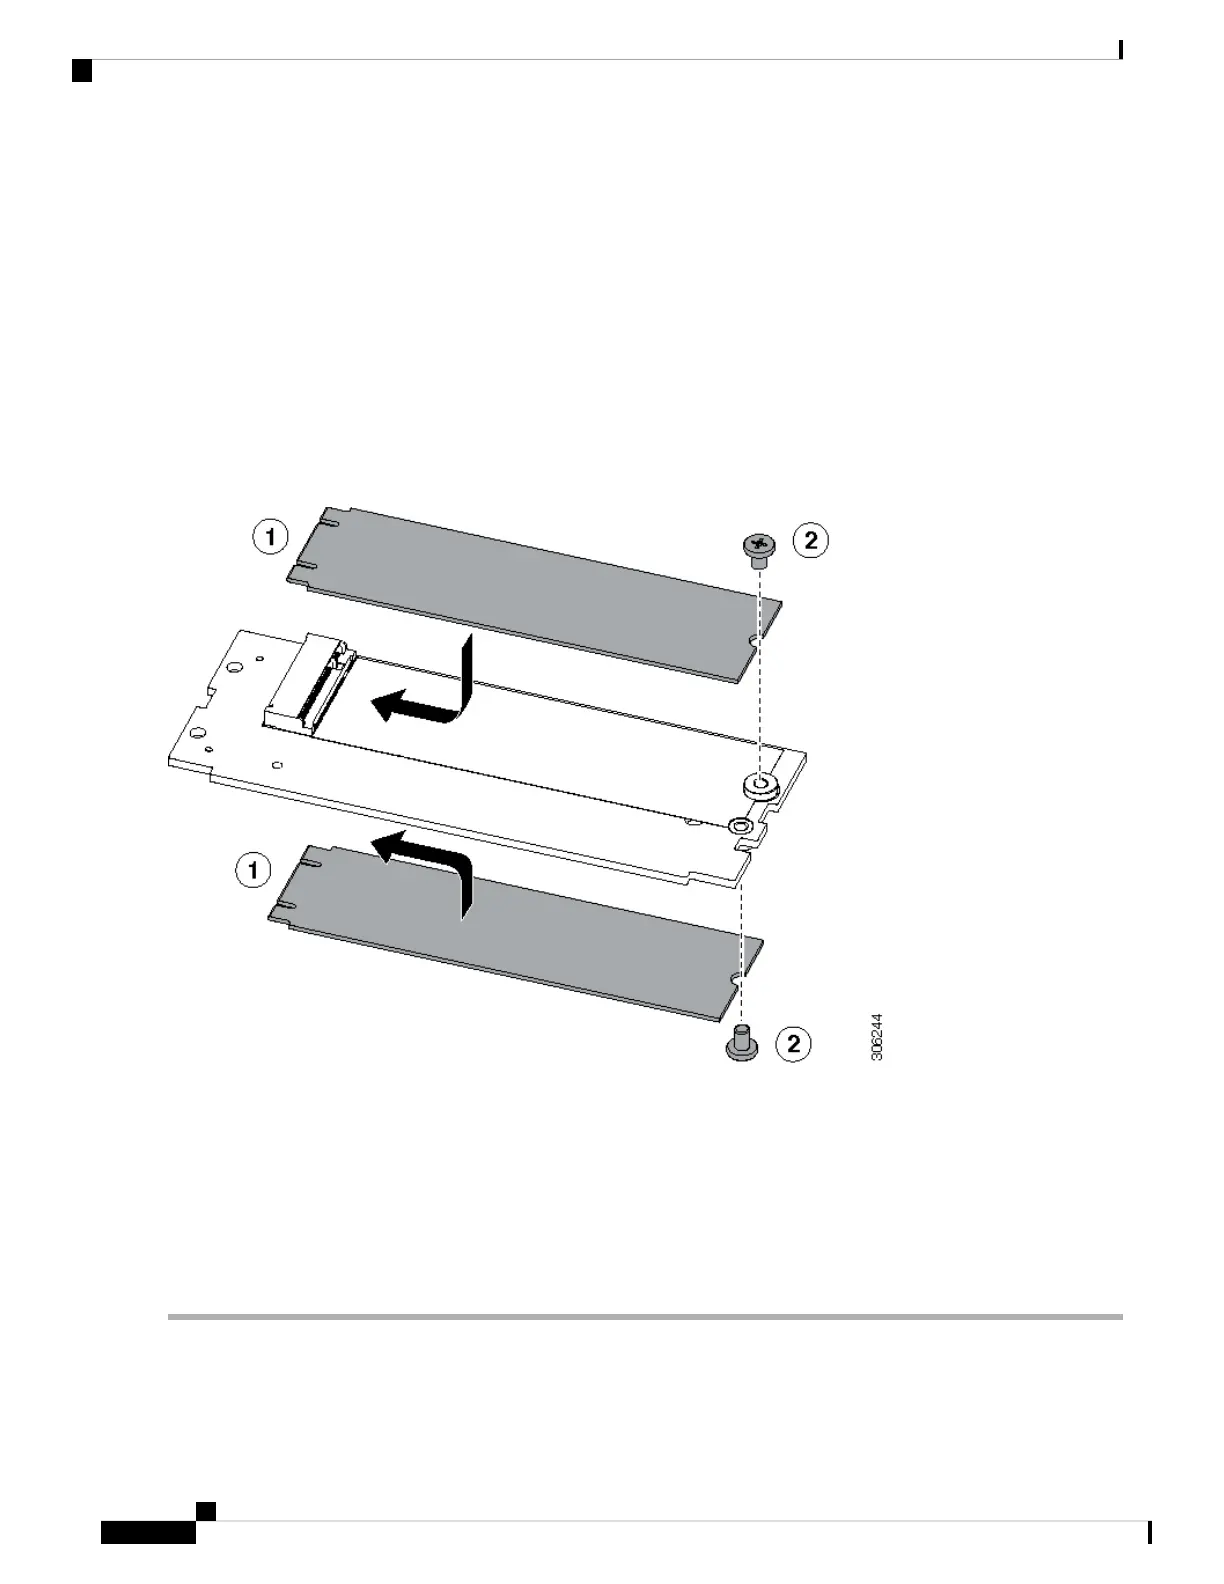
a) Use a #1 Phillips-head screwdriver to remove the single screw that secures the M.2 drive to the carrier.
b) Lift the M.2 drive from its socket on the carrier.
c) Position the replacement M.2 drive over the socket on the controller board.
d) Angle the M.2 drive downward and insert the connector-end into the socket on the carrier. The M.2 drive's label must
face up.
e) Press the M.2 drive flat against the carrier.
f) Install the single screw that secures the end of the M.2 SSD to the carrier.
g) Turn the controller over and install the second M.2 drive.
Figure 50: Cisco Boot-Optimized M.2 RAID Controller, Showing M.2 Drive Installation
Step 5 Install the controller to its socket on the motherboard:
a) Position the controller over the socket, with the controller's connector facing down and at the same end as the
motherboard socket. Two alignment pegs must match with two holes on the controller.
b) Gently push down the socket end of the controller so that the two pegs go through the two holes on the controller.
c) Push down on the controller so that the securing clips click over it at both ends.
Step 6 Replace the top cover to the server.
Step 7 Replace the server in the rack, replace cables, and then fully power on the server by pressing the Power button.
Maintaining the Server
100
Maintaining the Server
Replacing a Cisco Boot-Optimized M.2 RAID Controller
 Loading...