English
Owner’s Manual
M205/M505
21
Installation notes:
•
Before installation, please make sure proper connections are made and the unit operates normally. Incorrect
connection may result in damage to the unit.
•
Use only accessories designed and manufactured for this unit as other unauthorized accessories may result
in damage to the unit.
•
Before installation, please connect all power cables.
•
DO NOT install the unit close to hot areas to prevent damage to electrical components such as the laser head.
•
Install the unit horizontally. Installing the unit at a vertical angle of more than 30 degrees may result in poor
performance.
•
To prevent electric sparks, connect the positive pole rst and then the negative pole.
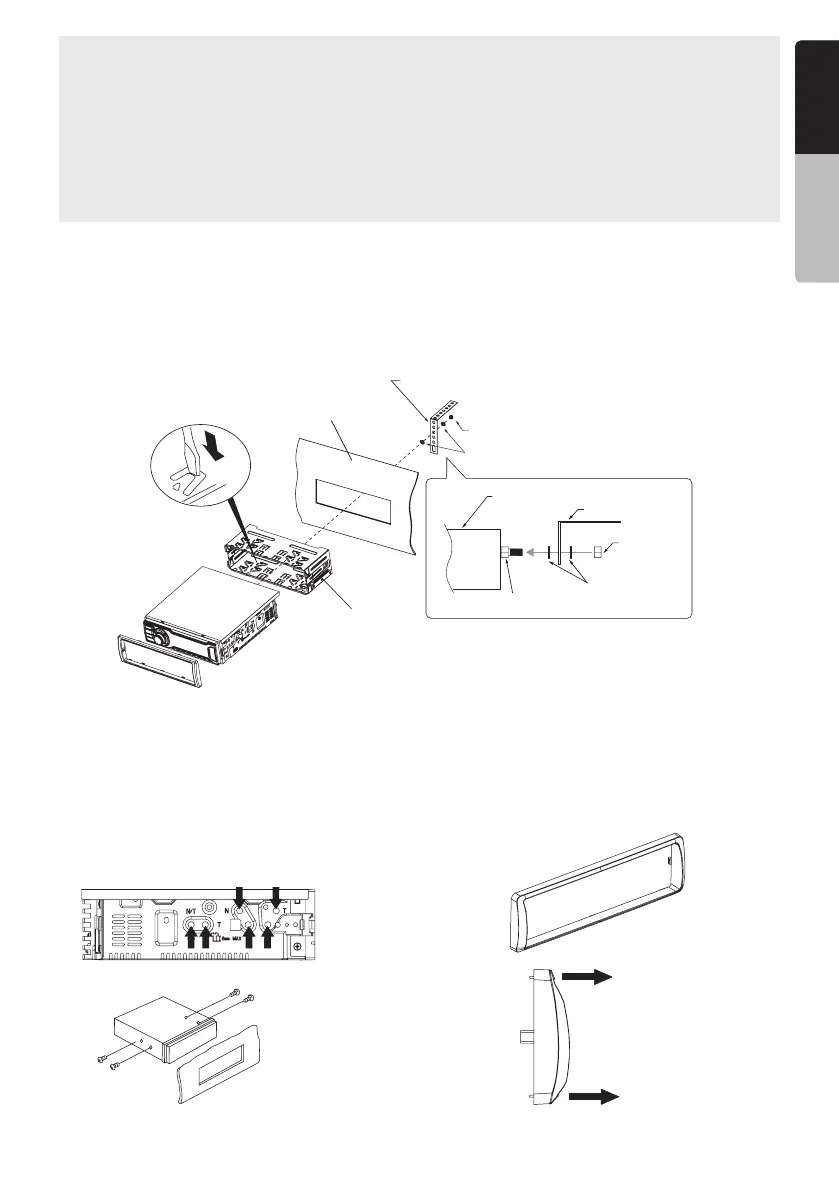
Unit installation
Method A
1. Insert the mounting bracket into the dashboard, choose the appropriate mounting tab according to the gap
widthandbendthemountingtaboutwardswithascrewdrivertoxthemountingbracketinplace.
2. Slide the unit into the bracket until you hear a click.
Screwdriver
Dashboard
Mounting Bracket
Support Strap
M4 Nut
M4 Washer
Source Unit
Support Strap
M4 Nut
M4 Washer
Stud Bolt
Method B
1. Insert this unit directly into the opening in the
dashboard.
2. Place M5 × 7 cylindrical screws through the holes
in the mounting frame located inside the opening
to the holes of the unit and fasten the screws to
left & right.
Mounting Bracket
Dashboard
M5x7
Trim ring installation
Attach the trim ring around the front panel. Take care
with the top and bottom of the trim ring and mount it
so that all the hooks are locked.
Top
Bottom
 Loading...