Disassembly
Removing the Battery 2 - 5
2.Disassembly
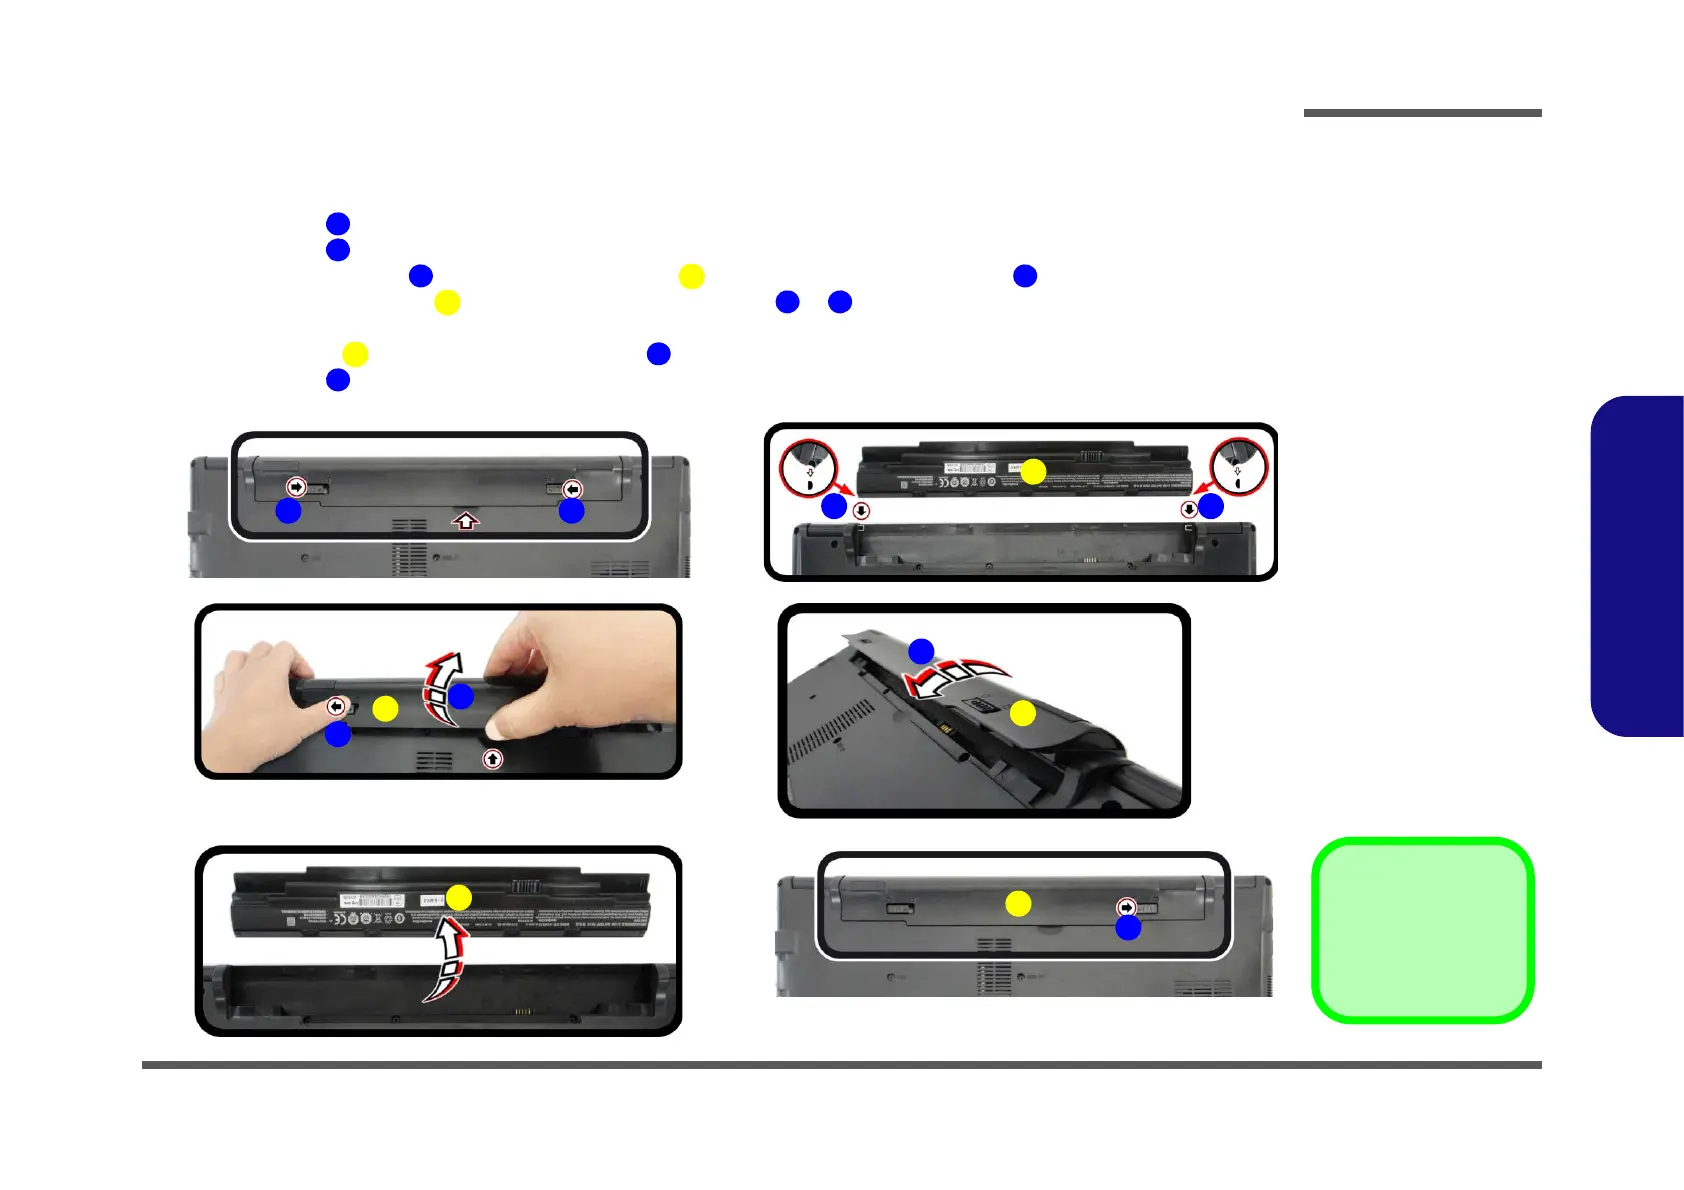
Removing the Battery
1. Turn off the computer, turn it over.
2. Slide the latch in the direction of the arrow (Figure 1a
).
3. Slide the latch in the direction of the arrow, and hold it in place (Figure 1b
).
4. While holding the latch in place, pull the battery up in the direction of the arrow and lift it out (Figure 1c).
5. Orientate the new battery as illustrated and align the pins & with the edges of the battery compartment
(Figure 1d).
6. Turn the battery in the direction of the arrow to insert it into the compartment (Figure 1e
).
7. Slide the latch in the direction of the arrow into the lock position (Figure 1f
).
Figure 1
Battery Removal
a. Slide the latch and hold it
in place.
b. Turn the battery in the di-
rection of the arrow.
c. Lift the battery out.
d. Insert a new battery by
aligning the pins.
e. Turn the battery in the di-
rection of the arrow.
f. Lock the latch in place.
a.
c.
3
12
b.
3
4
d.
f.
3
8
5 6
e.
3
6
3
2
 Loading...