Disassembly
2 - 16 Removing the CCD
2.Disassembly
Removing the CCD
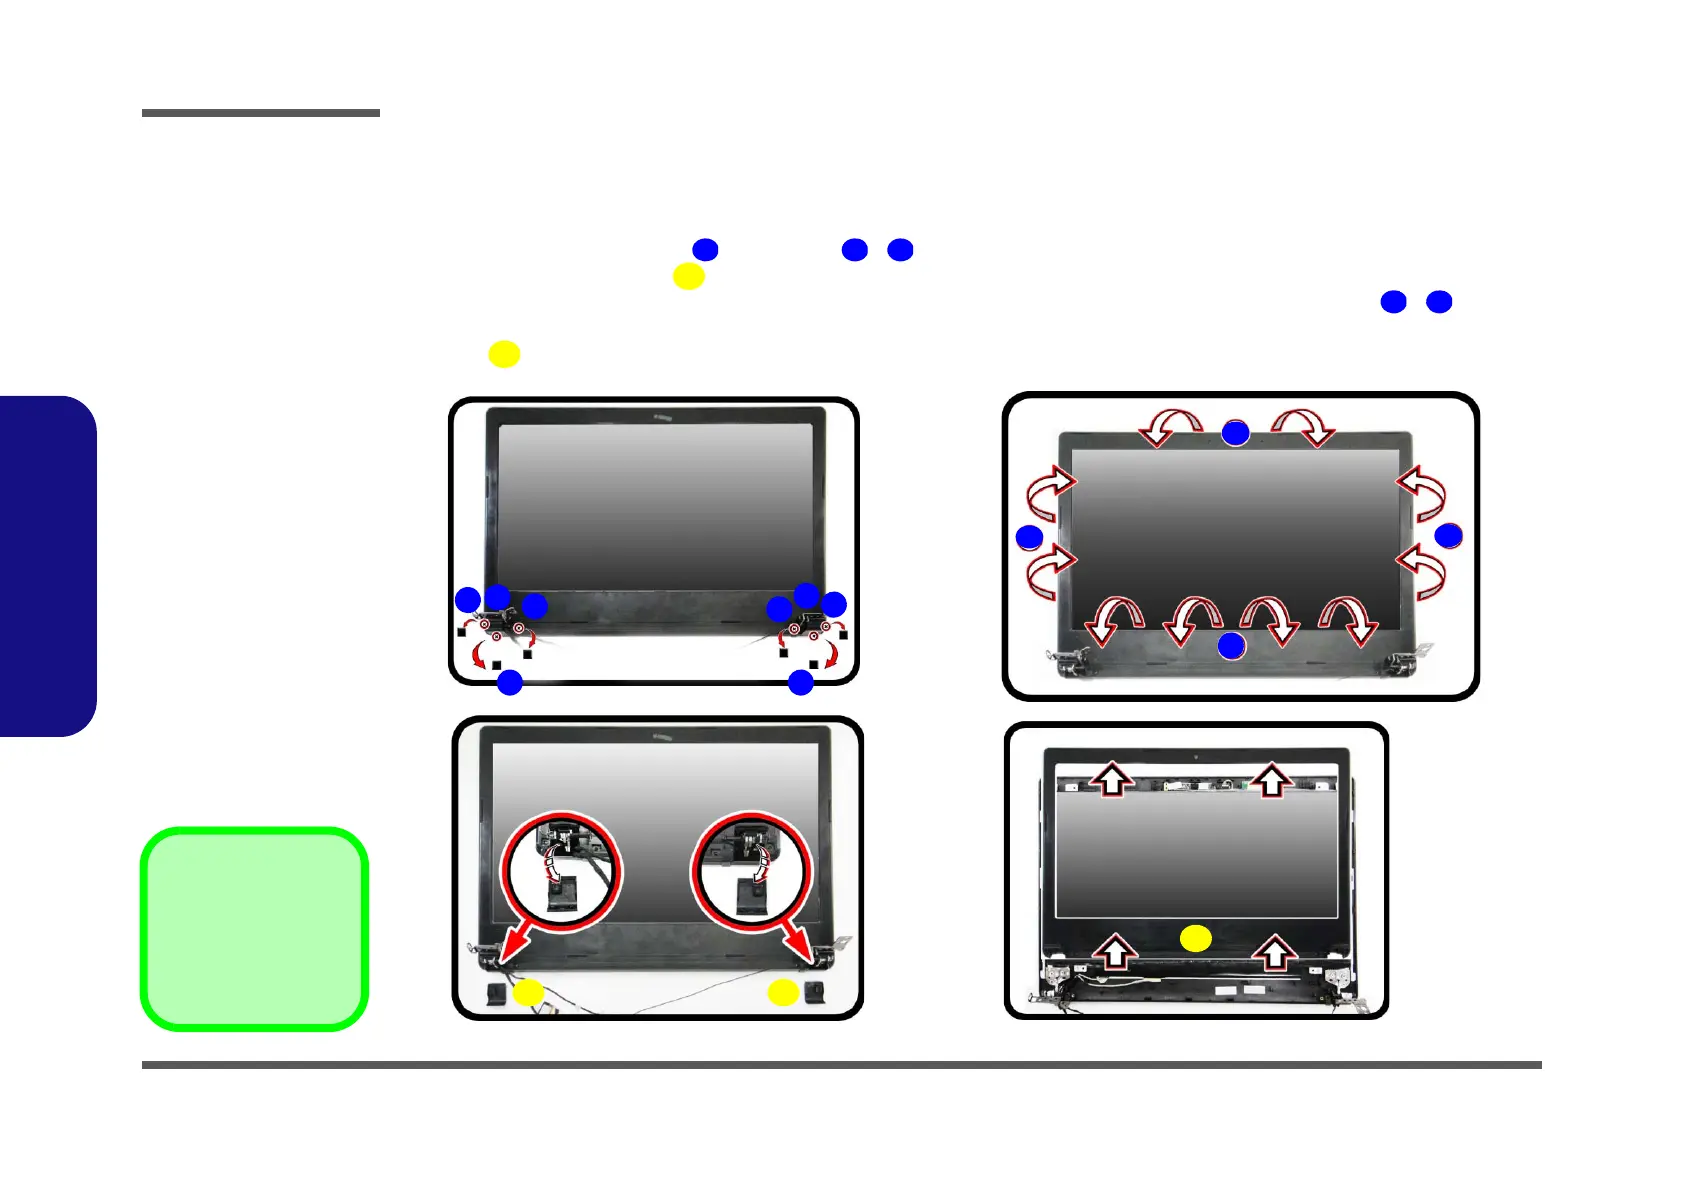
1. Turn off the computer, turn it over to remove the battery (page 2 - 5) and then separate the LCD Panel from the
bottom case.
2. Remove the rubber covers and screws - (Figure 10a).
3. Remove the hinge cover of the panel hinge (Figure 10b).
4. Run your fingers around the inner frame of the LCD panel at the points as indicated by the arrows - .
5. Lay the computer down on a flat surface with the top case up forming a 90 degree angle. Push the LCD front
cover upwards before carefully lifting it up (Figure 10d).
b.
c.
a.
3
13
2
4
d.
5
6
7
9
8 8
1 1
10
11
12
8. Hinge Cover
13. LCD Front Cover
•6 Screws
Figure 10
CCD Removal
a. Remove the rubber cov-
er and screws.
b. Remove the hinge cov-
er.
c. Run your fingers around
the inner frame of the
LCD panel at the points
indicated by the arrows.
d. Lay the computer down
on a flat surface with the
top case up forming a 90
degree angle. Push the
LCD front panel upwards
before carefully lifting it
up.
 Loading...