23 24
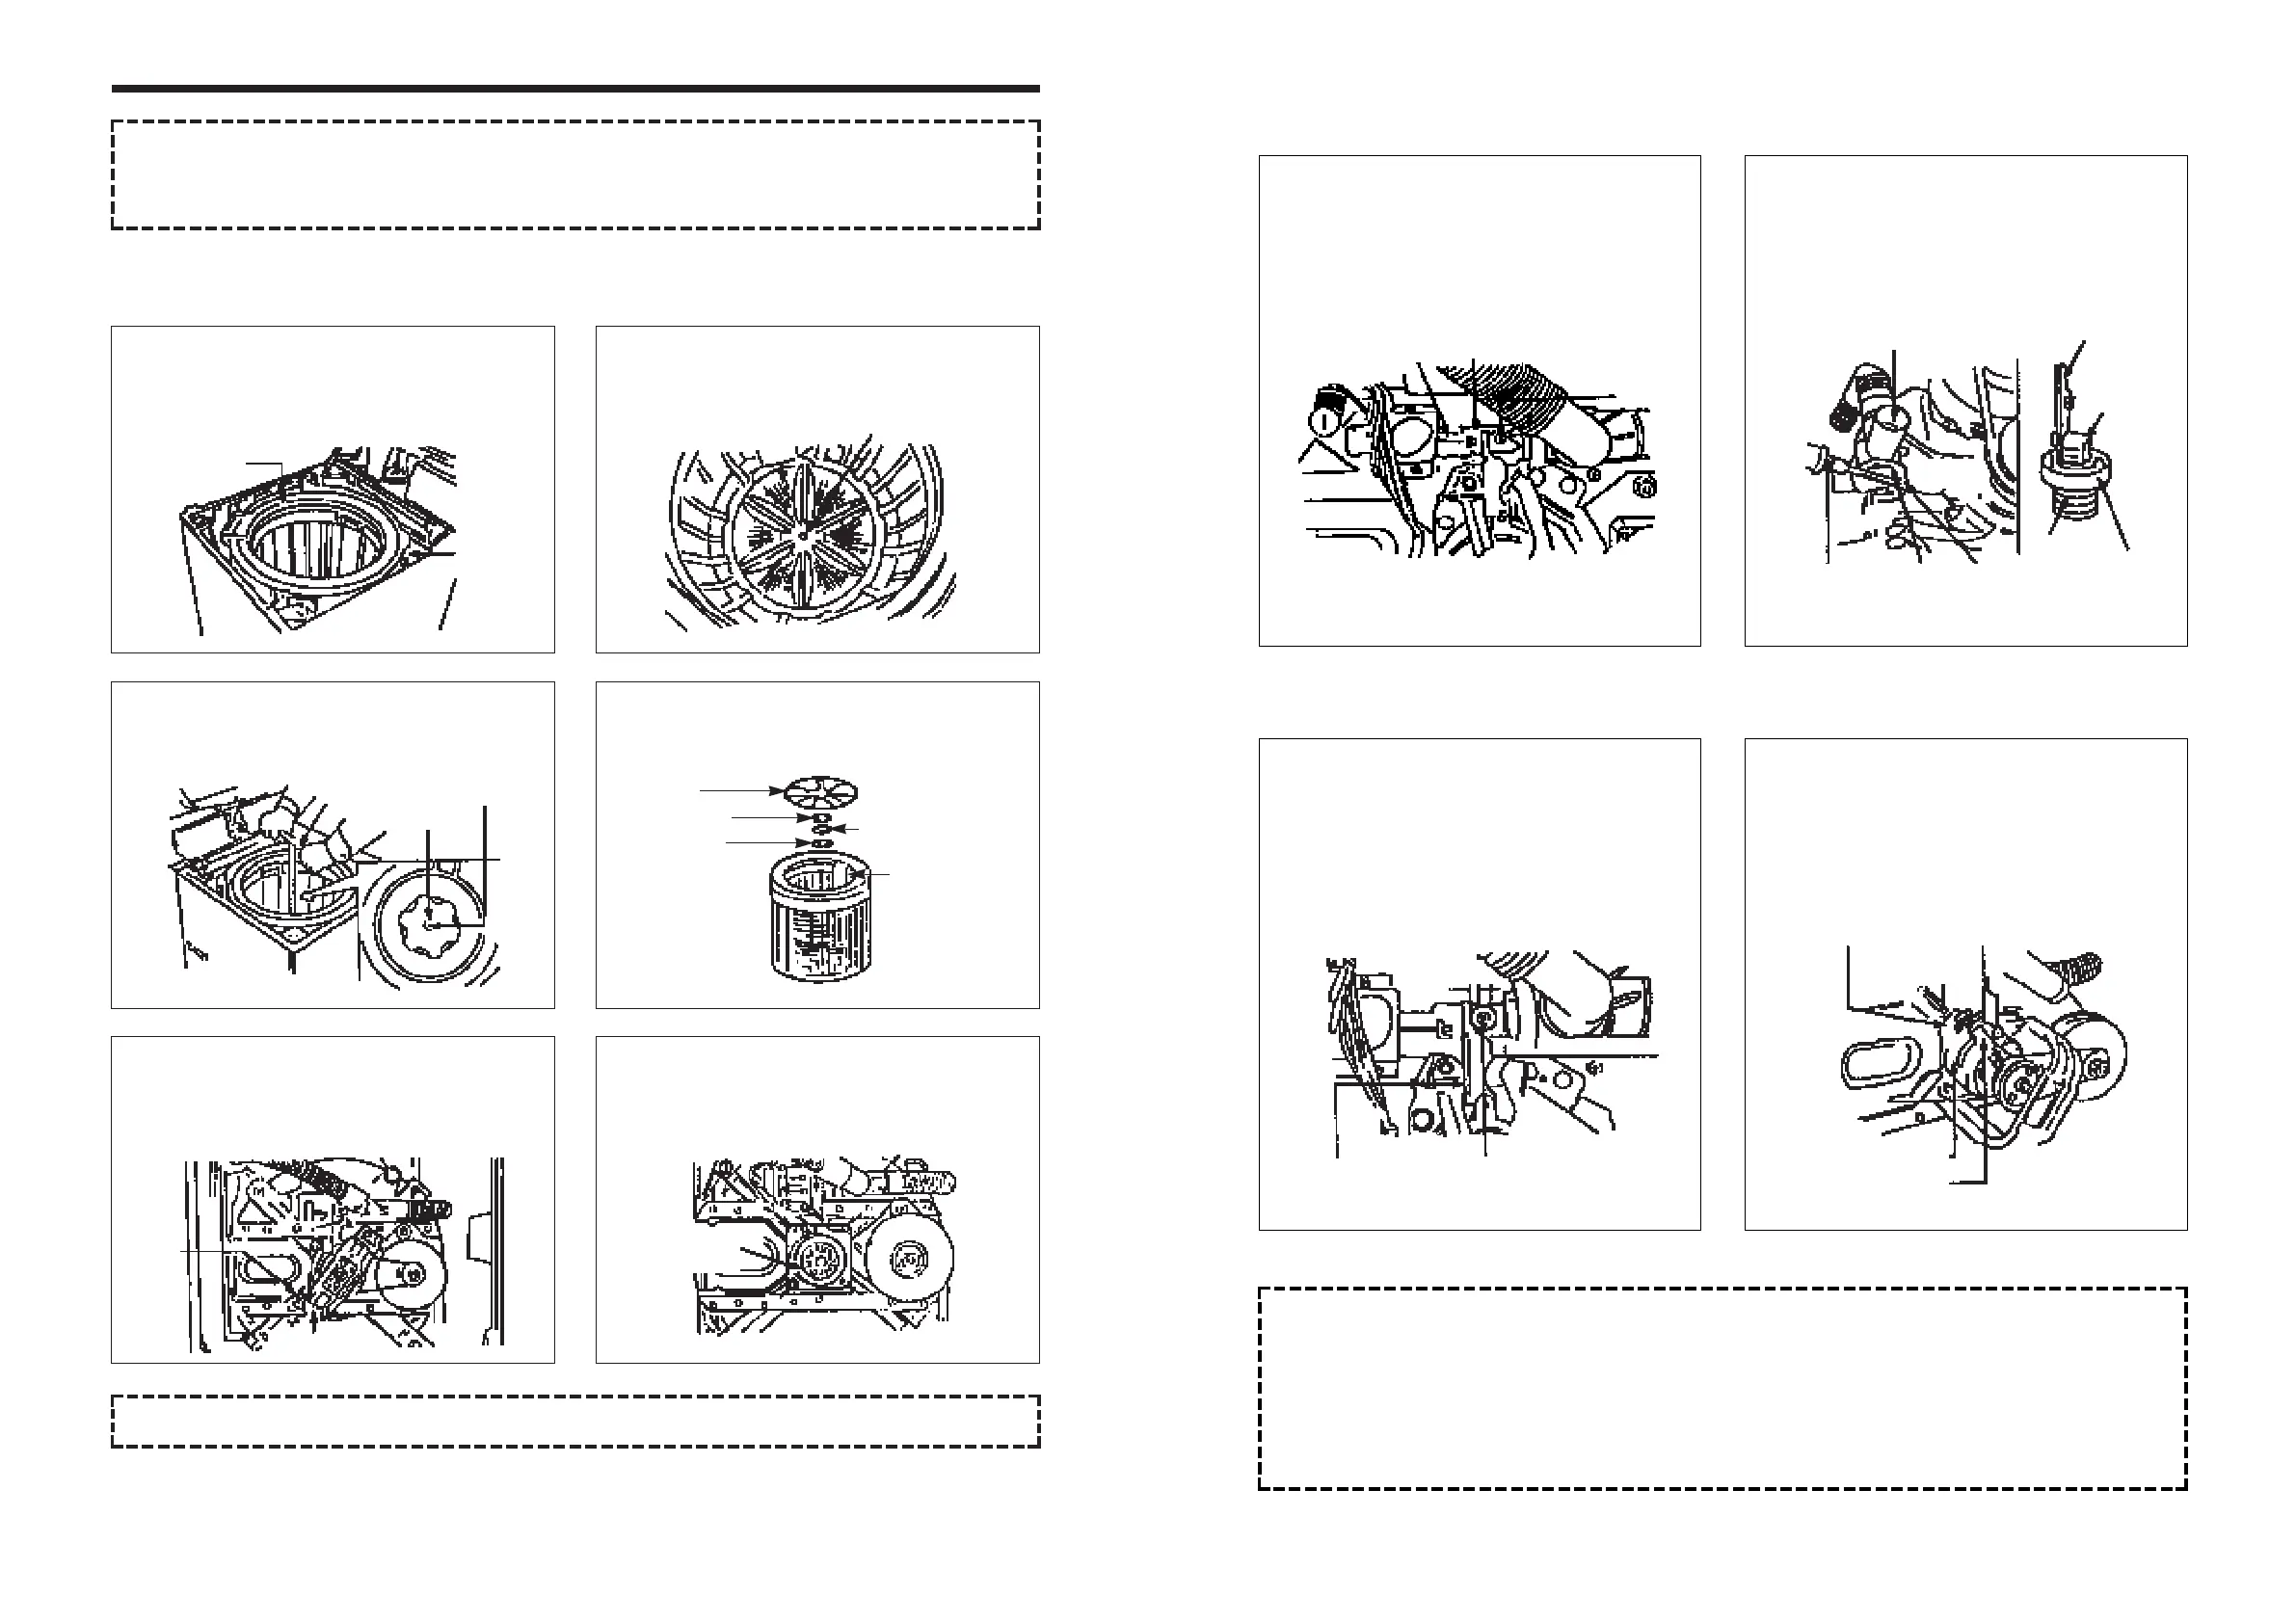
DRAIN MOTOR AND VALVE
BRAKE ADJUSTMENT
NOTE :
1. The brake adjustment has been made at the factory, so that it is not to re-adjust. However, in case
of insufficient brake operation, perform the upper procedure.
2. Overtightening of the adjustment bolt will cause poor brake performance.
3. Undertightening of the adjustment bolt will cause continuous bracking and, thereby, cause the
problems of the motor during the spin cycle.
• Lay the front of the washer on the floor.
• Loosen the adjustment screw and four bolts
mounting the drain motor.
• Take out the wire of drain motor from the bracket.
• Loosen the adjustment screw fastening the bracket
and place the adjustment screw to the brake lever
as shown in figure.
• Tighten the adjustment screw completely.
• Loosen the adjustment bolt and turn the adjustment
bolt until the end of the bolt touches to the brake
lever.
• Tighten the lock nut and apply a small amount of
paint-lock.
• Separate the drain motor from the bracket.
• Turn the valve lid by using screw driver as shown in
figure and remove the valve lid from the valve
frame.
Wire Bracket
Adjustment
screw
Drain motor
Valve frame
Screw driver
Valve lid
3mm
Brake lever
Adjustment screw
Adjustment bolt
Brake lever
Gear mechanism ass’y
Clutch lever
Pin
Valve
packing
Valve lid
Adjustemnt
screw
Bracket
7. DIRECTIONS FOR DISASSEMBLY AND ADJUSTMENT
GEAR MECHANISM ASS’Y REPLACEMENT
WARNING
BEFORE ATTEMPTING TO SERVICE OR ADJUST ANY PART OF THE WASHING MACHINE,
DISCONNECT THE POWER CORD FROM THE ELECTRIC OUTLET.
NOTE : To assemble the gear mechanism ass’y, reverse the disassembly procedure.
• Raise the top plate on the outer cabinet.
• Loosen four screws mounting outer tub cover and
remove outer tub cover from the tub ass’y.
• Remove the pulsator washer.
• Remove the spinner shaft flange nut by using ‘T’
type box wrench.
• Lay the front of the washer on the floor.
• Remove four bolts mounting the plate-gear protect
by using a box wrench and remove plate-gear
protect.
• Remove the V-belt.
• Loosen the pulsator mounting screw and remove
the pulsator.
• Remove the tub ass’y.
• Remove four bolts mounting the gear mechanism
ass’y by using a box wrench.
• Pull out the gear mechanism ass’y.
Outer tub cover
Pulsator
Mounting screw
Mounting
screw
“T” type box
wrench
Washer
Mouting bolt
Gear mechanism
ass’y
Mounting bolt
Washer
Pulsator
Insert-pulsator
Washer-spin
shaft fixing
Nut-spin
shaft fixing
Nut-spin shaft fixing
Tub ass’y
 Loading...