6 | Unit installation
Installer reference guide
27
CTXM15+FTXM20~42+ATXM20~35R2/5V1B + FTXM50~71R2V1B +
ATXM50R2V1B
Daikin room air conditioner
4P518023-8G – 2020.06
169
279
377.5
778
A
295
44.5
160
53
53
44.5
120
120
293.5
50
170
A
d
e
(mm)
a
a
f
h g
a
a
b
a
c
a
c
a
d
e
A
A
998
299
170
60
170
52
52
120.5
130
53
65
469
475
PIPING HOLE
CENTER:170mm
TO THE LEFT
PIPING HOLE
CENTER:170mm
TO THE LEFT
(mm)
A
PIPING HOLE
CENTER:170mm
TO THE LEFT
PIPING HOLE
CENTER:170mm
TO THE LEFT
e
d
e
d
b
a
c
a
c
a
a
gh
f
a
B
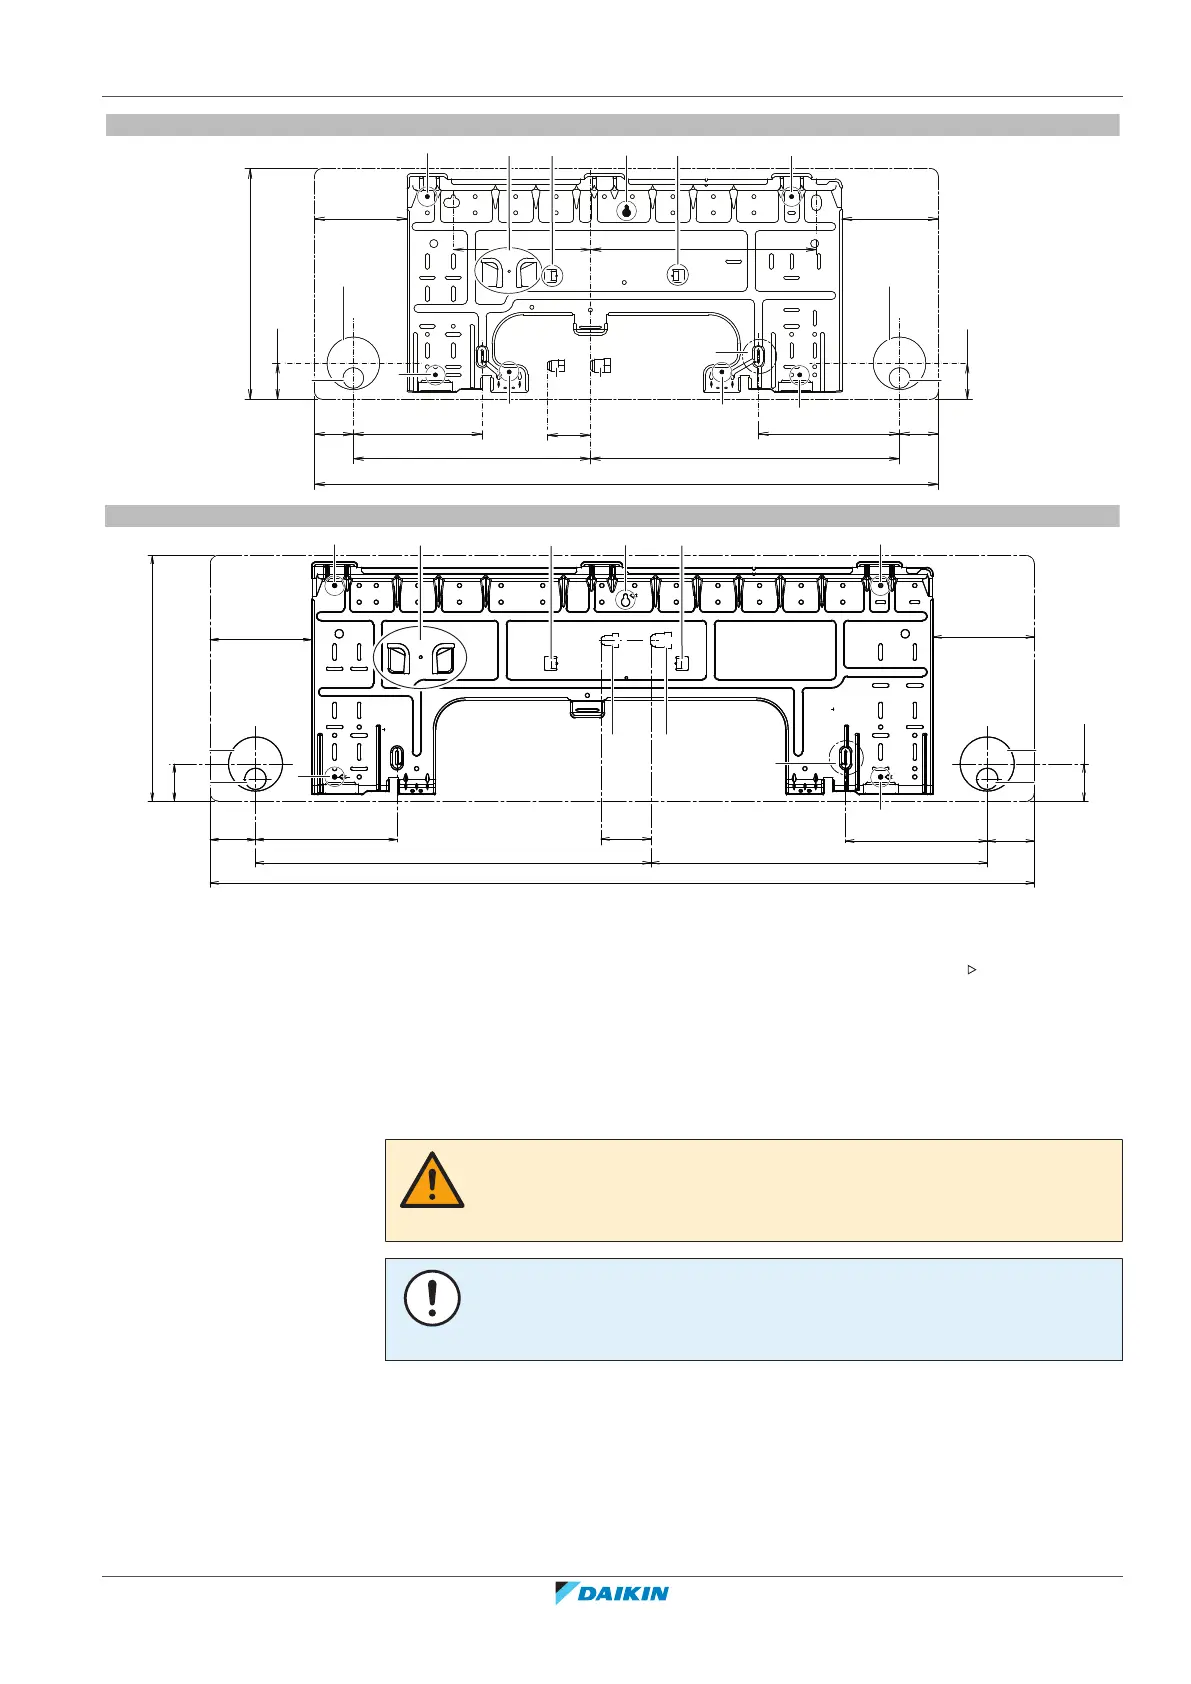
A For class: 15~42
B For class: 50~71
a Recommended mounting plate fixing spots f Position for the tape measure at symbol " "
b Pocket for the pipe port cover g Gas pipe end
c Tabs for placing a spirit level h Liquid pipe end
d Through-the-wall hole: e Drain hose position
Class 15~42 Ø65 mm
Class 50~71 Ø80 mm
6.3.2 To drill a wall hole
CAUTION
For walls containing a metal frame or a metal board, use a wall embedded pipe and
wall cover in the feed-through hole to prevent possible heat, electrical shock, or fire.
NOTICE
Be sure to seal the gaps around the pipes with sealing material (field supply), in order
to prevent water leakage.
1 Bore a 65mm (class 15~42) or 80mm (class 50~71) large feed-through hole in
the wall with a downward slope towards the outside.
2 Insert a wall embedded pipe into the hole.
3 Insert a wall cover into the wall pipe.
 Loading...