9 | Finishing the indoor unit installation
Installer reference guide
42
CTXM15+FTXM20~42+ATXM20~35R2/5V1B + FTXM50~71R2V1B +
ATXM50R2V1B
Daikin room air conditioner
4P518023-8G – 2020.06
9 Finishing the indoor unit installation
9.1 To insulate the drain piping, refrigerant piping and interconnection
cable
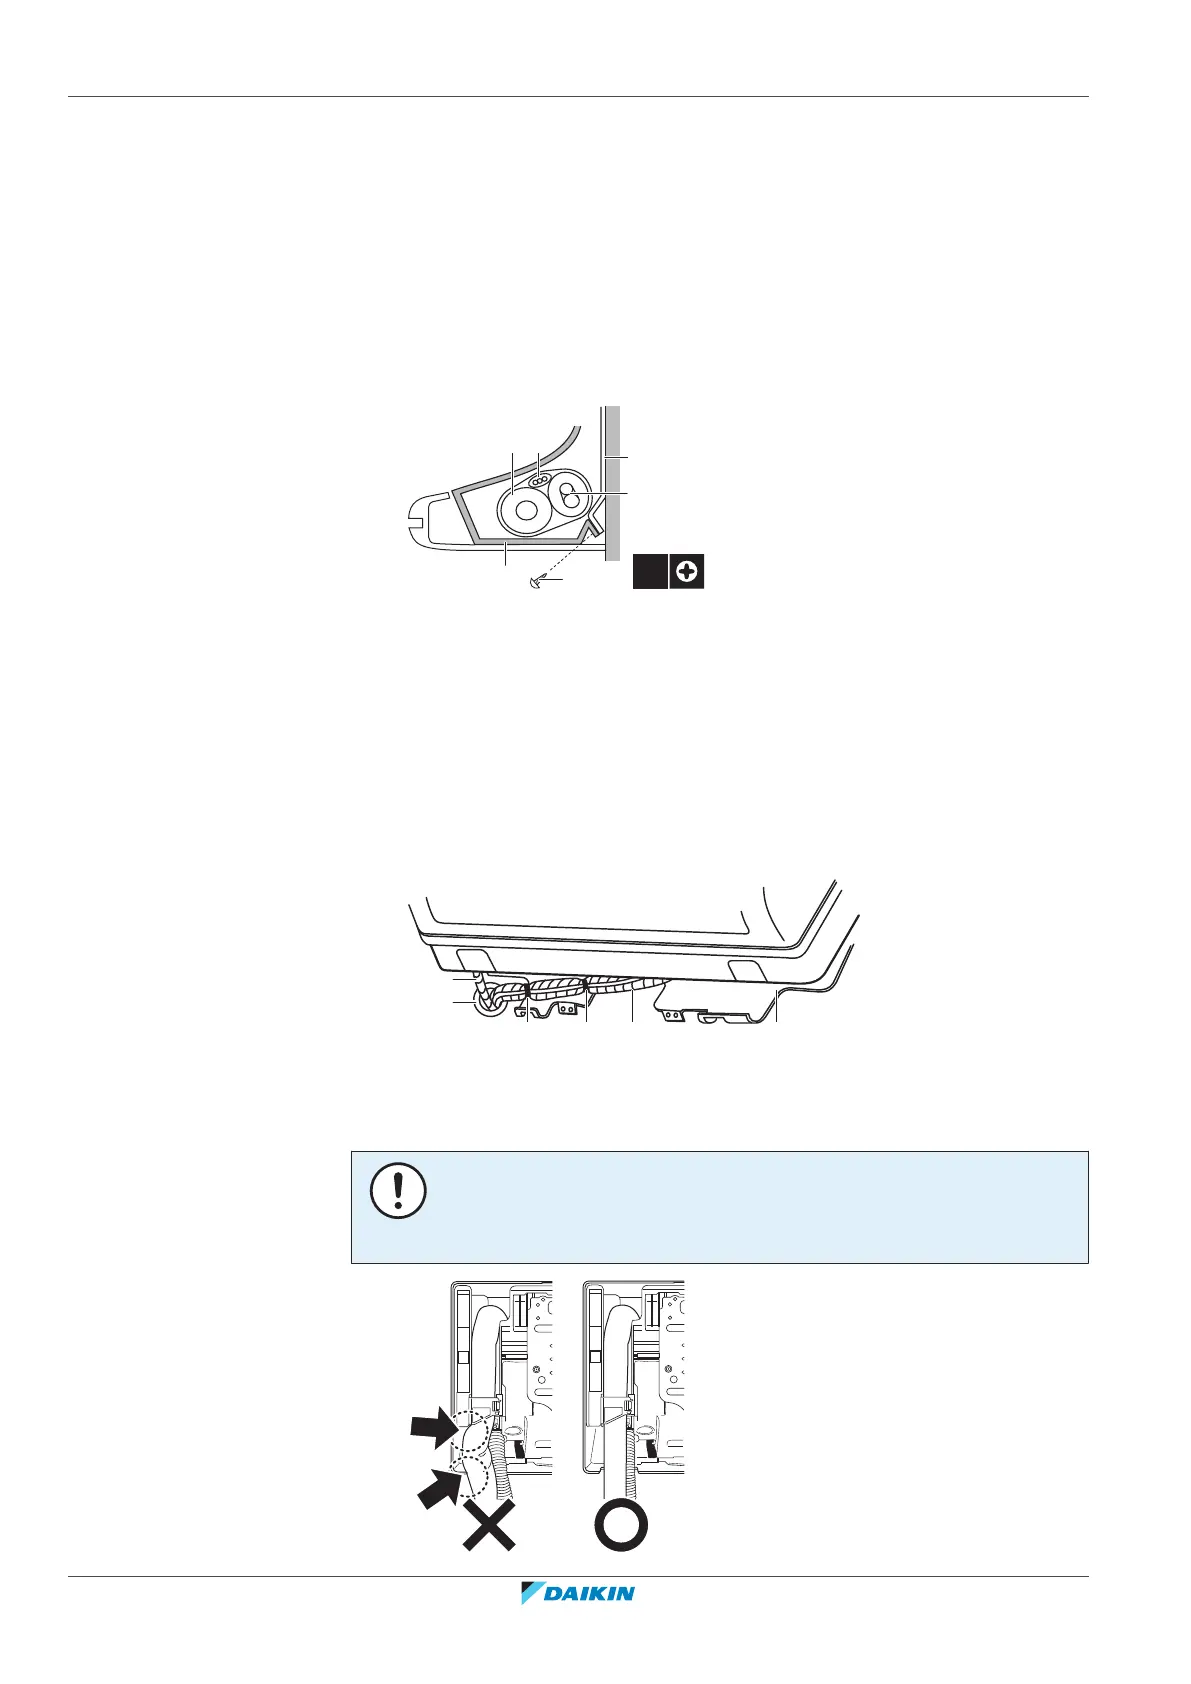
1 After the drain piping, refrigerant piping and the electrical wiring are finished.
Wrap refrigerant pipes, interconnection cable and drain hose together using
insulation tape. Overlap at least half the width of the tape with each turn.
a Drain hose
b Interconnection cable
c Mounting plate (accessory)
d Refrigerant piping
e Indoor unit fixing screw M4×12L (accessory)
f Bottom frame
9.2 To pass the pipes through the wall hole
1 Shape the refrigerant pipes along the pipe path marking on the mounting
plate.
a Drain hose
b Caulk this hole with putty or caulking material
c Adhesive vinyl tape
d Insulation tape
e Mounting plate (accessory)
NOTICE
▪ Do NOT bend refrigerant pipes.
▪ Do NOT push the refrigerant pipes onto the bottom frame or the front grille.
 Loading...