www.DaikinApplied.com 43 IM 915-13 • VISION - EXTENDED SIZES
Fan Drive Belt Adjustment
General Rules of Tensioning
1. The ideal tension is the lowest tension at which the belt
does not slip under peak load conditions.
2. Check tension frequently during the rst 24 to 48 hours
of operation.
3. Over tensioning shortens belt and bearing life.
4. Keep belts free from foreign material that can cause
slippage.
5. Inspect V-drive on a periodic basis. Adjust tension if
the belt is slipping. Do not apply belt dressing. This can
damage the belt and cause early failure.
Tension Measurement Procedure
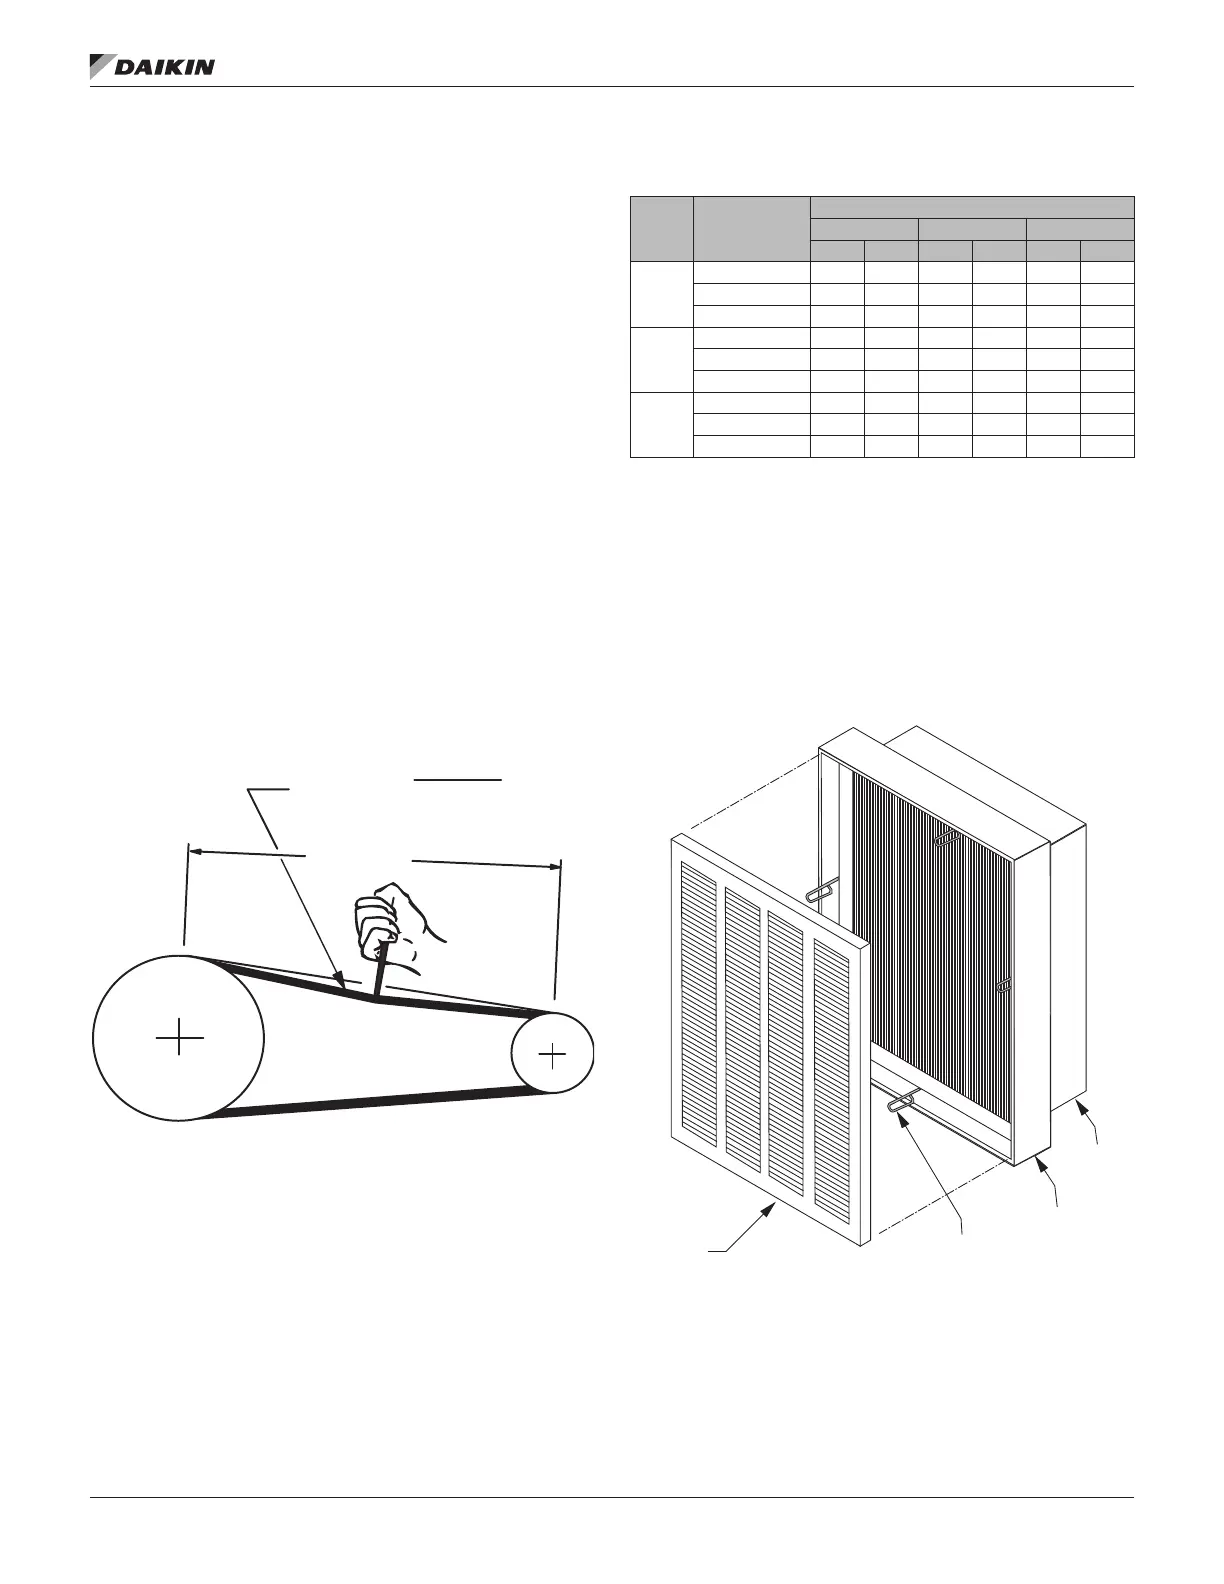
1. Measure the belt span. See Figure 66.
2. Place belt tension checker squarely on one belt at the
center of the belt span. Apply force to the checker,
perpendicular to the belt span, until the belt deection
equals belt span distance divided by 64. Determine the
force applied while in this position.
3. Compare this force to the values in Table 26.
Figure 66: Drive Belt Adjustment
Table 26: Belt Deection Force (per Browning
Specications)
section
Small sheave
diameter (in)
1 2 3 +
min max min max min max
A, AX
0.0 to 3.5 3.0 5.0 2.5 4.0 2.0 3.5
3.6 to 4.4 3.5 5.0 3.0 4.5 2.0 4.0
4.5 + 4.0 5.5 3.0 5.0 2.5 4.5
B, BX
0.0 to 5.4 5.5 8.0 4.5 7.0 3.5 5.5
5.5 to 7.6 5.5 8.5 4.5 7.5 3.5 5.5
7.7 + 6.5 9.0 5.0 8.0 4.0 6.5
5V, 5VX
0.0 to 8.5 7.0 11.0 5.5 9.0 4.0 7.0
0.6 to 12.0 8.5 13.0 6.5 10.5 5.0 8.0
12.1 + 10.0 15.0 7.5 11.5 5.5 9.0
Front loaded lter options require that the lters be removed
and replaced from inside the unit.
To remove lters, rotate the wire clips. This releases both the
prelter and the nal lter. When installing clean lters, check
to verify the lters are fully seated in the frame. See Figure 67.
Figure 67: Frame and Filters with Holding Clips
B
el
t
s
pan
Deflection =
Belt span
64
 Loading...