20 Installing the Printer Driver
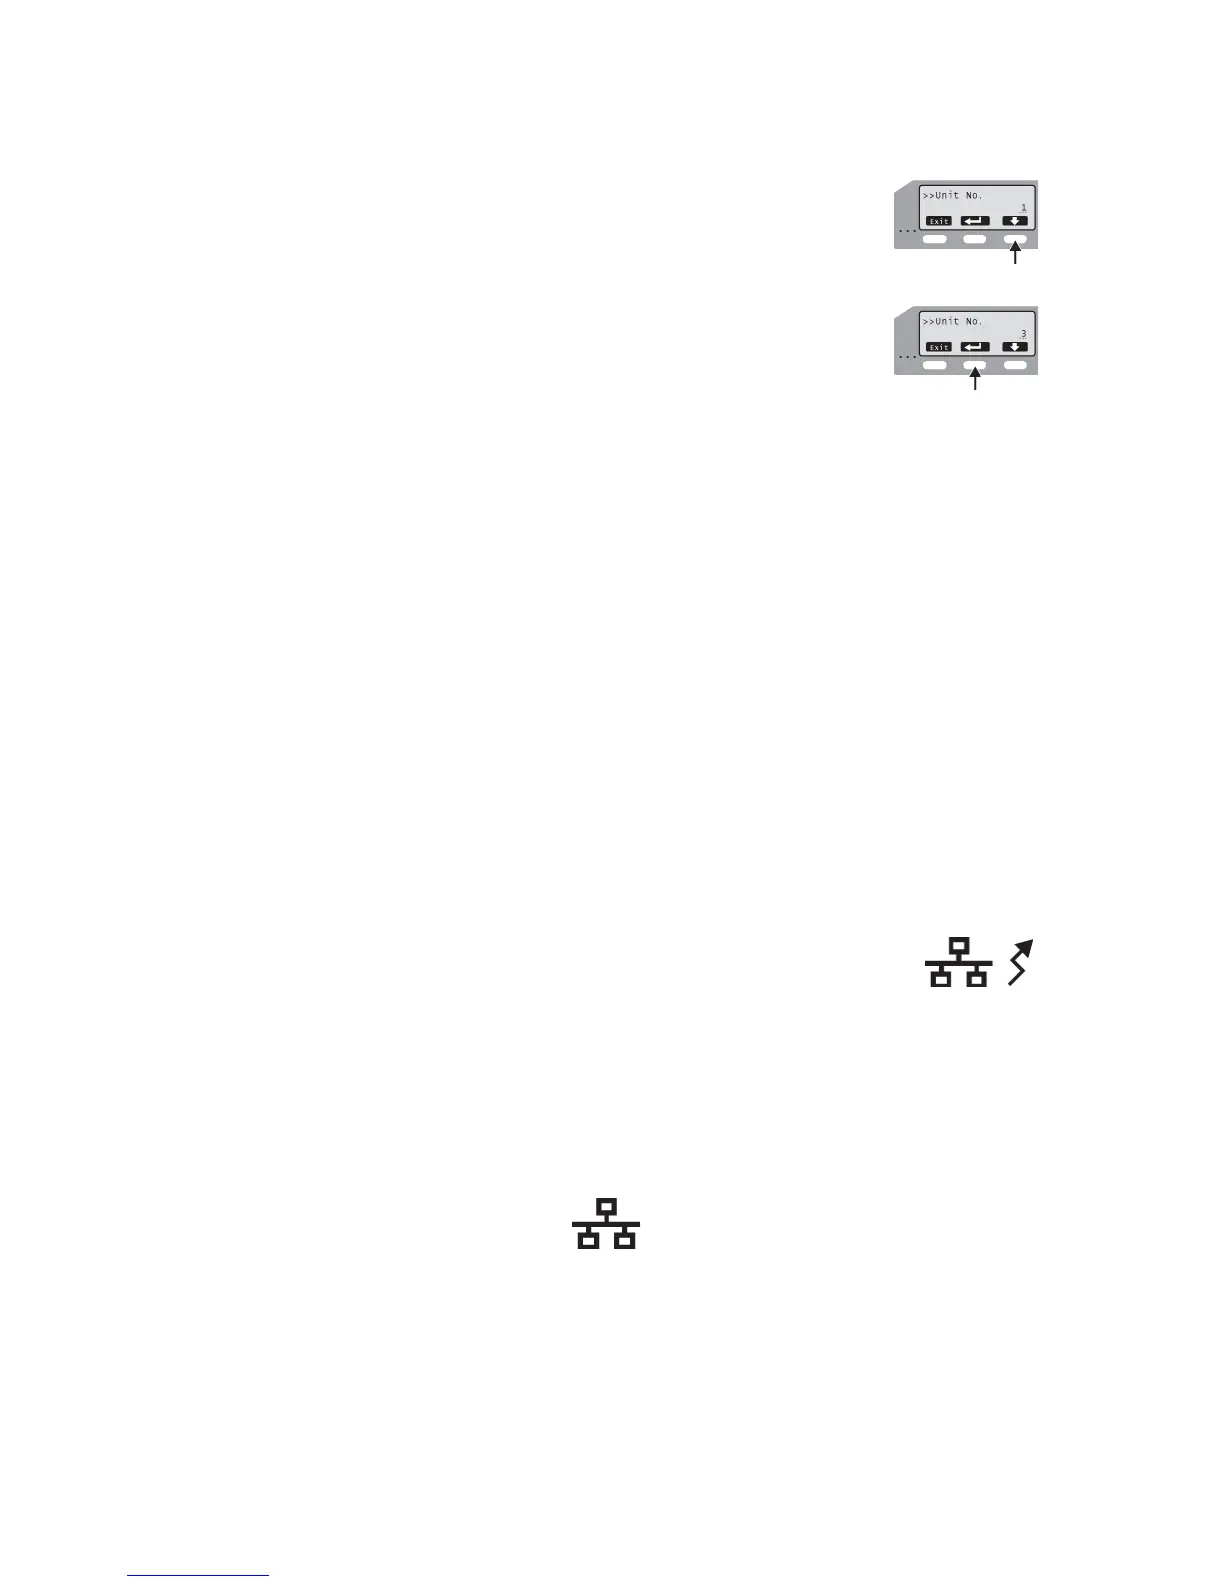
F. Press the down-arrow key to scroll to the unit number to
assign.
To choose a lower number, scroll to 10 and then press the
down-arrow key again. The number rolls over to 1.
G. Press the Return key two times to assign the number.
H. Press Exit twice to leave the menus.
I. Power off the printer. Wait 30 seconds or more. Power on
the printer.
6. Open the Status Monitor as an Administrator. See the Printer Settings > Status
Monitor section of the User Guide. Choose the Printer Select tab.
7. Make sure the identifier from step 4 is chosen on the Printer Select tab. Choose
Refresh to get the new unit number from the printer.
8. Change the printer name to correspond with the unit number. For example, if you
set the Unit number to 3, change the printer name to PRINTER03.
9. Change the Default Interface value and network settings, if needed.
• If the printer is set to USB and you plan to install the printer with a Network
connection, change the value to Network.
• If the printer is set to Network, and you plan to install the printer with a USB
connection, click Scan Printer if needed and then change the value to USB.
You can use only one method to connect a printer.
• If you plan to install the printer with a Network connection, set up the network
details, including whether to use IPv4 or IPv6, automatic IP addressing
(DHCP) or assigned addresses, and address values if needed.
10. Choose Update to send the new information to the printer. The
Unit number and printer name should now correspond in the
printer. You can verify all the settings changed by viewing them
on the printer front panel. See the Printer Settings > Using the
LCD Menus section of the User Guide.
11. Disconnect the printer and power it off.
12. Return to step 3 to assign the unit number and printer name to the next printer.
13. If you plan to use any SR200 or SR300 printers from this PC, do not remove the
Status Monitor.
About Network Installation
You can install the printer over the network with the following choices:
• Use DHCP or static addressing
This choice can be set using the Status Monitor. It does not affect the procedure
you use to install the printer. See “Choosing How to Assign the Network Address”
on page 21 for information about the choices.
 Loading...