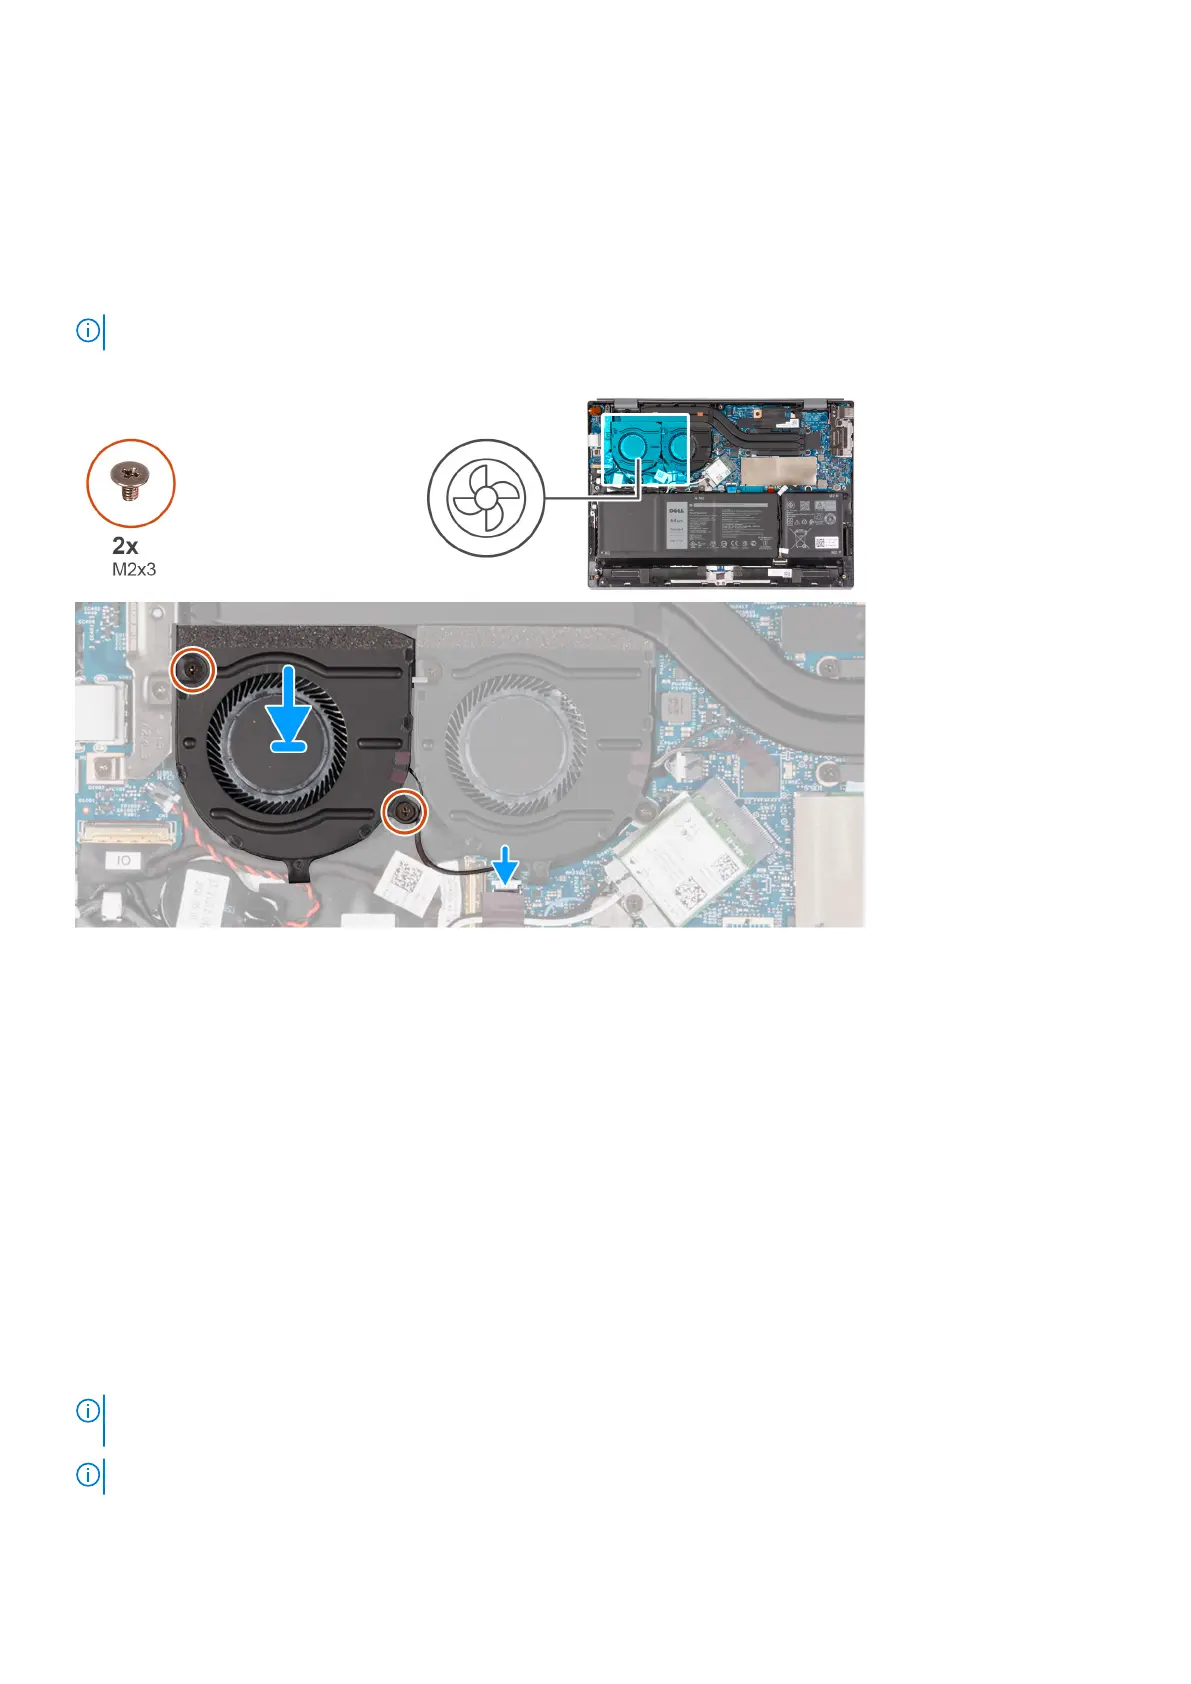
Installing the left fan
Prerequisites
If you are replacing a component, remove the existing component before performing the installation process.
About this task
NOTE: The left fan and right fan have the same specifications.
The following image(s) indicate the location of the left fan and provides a visual representation of the installation procedure.
Steps
1. Align and place the left fan on the palm-rest and keyboard assembly.
2. Align the screw holes on the left fan with the screw holes on the palm-rest and keyboard assembly.
3. Replace the two screws (M2x3) that secure the left fan to the palm-rest and keyboard assembly.
4. Connect the left-fan cable (FAN2) to the system board.
Next steps
1. Install the base cover.
2. Follow the procedure in After working inside your computer.
Removing the right fan
Prerequisites
1. Follow the procedure in Before working inside your computer.
2. Remove the base cover.
NOTE:
Ensure that your computer is in Service Mode. For more information see, step 6 in Before working inside your
computer.
NOTE: The left fan and right fan have the same specifications.
Removing and installing components 23
 Loading...