General Installation Guidelines
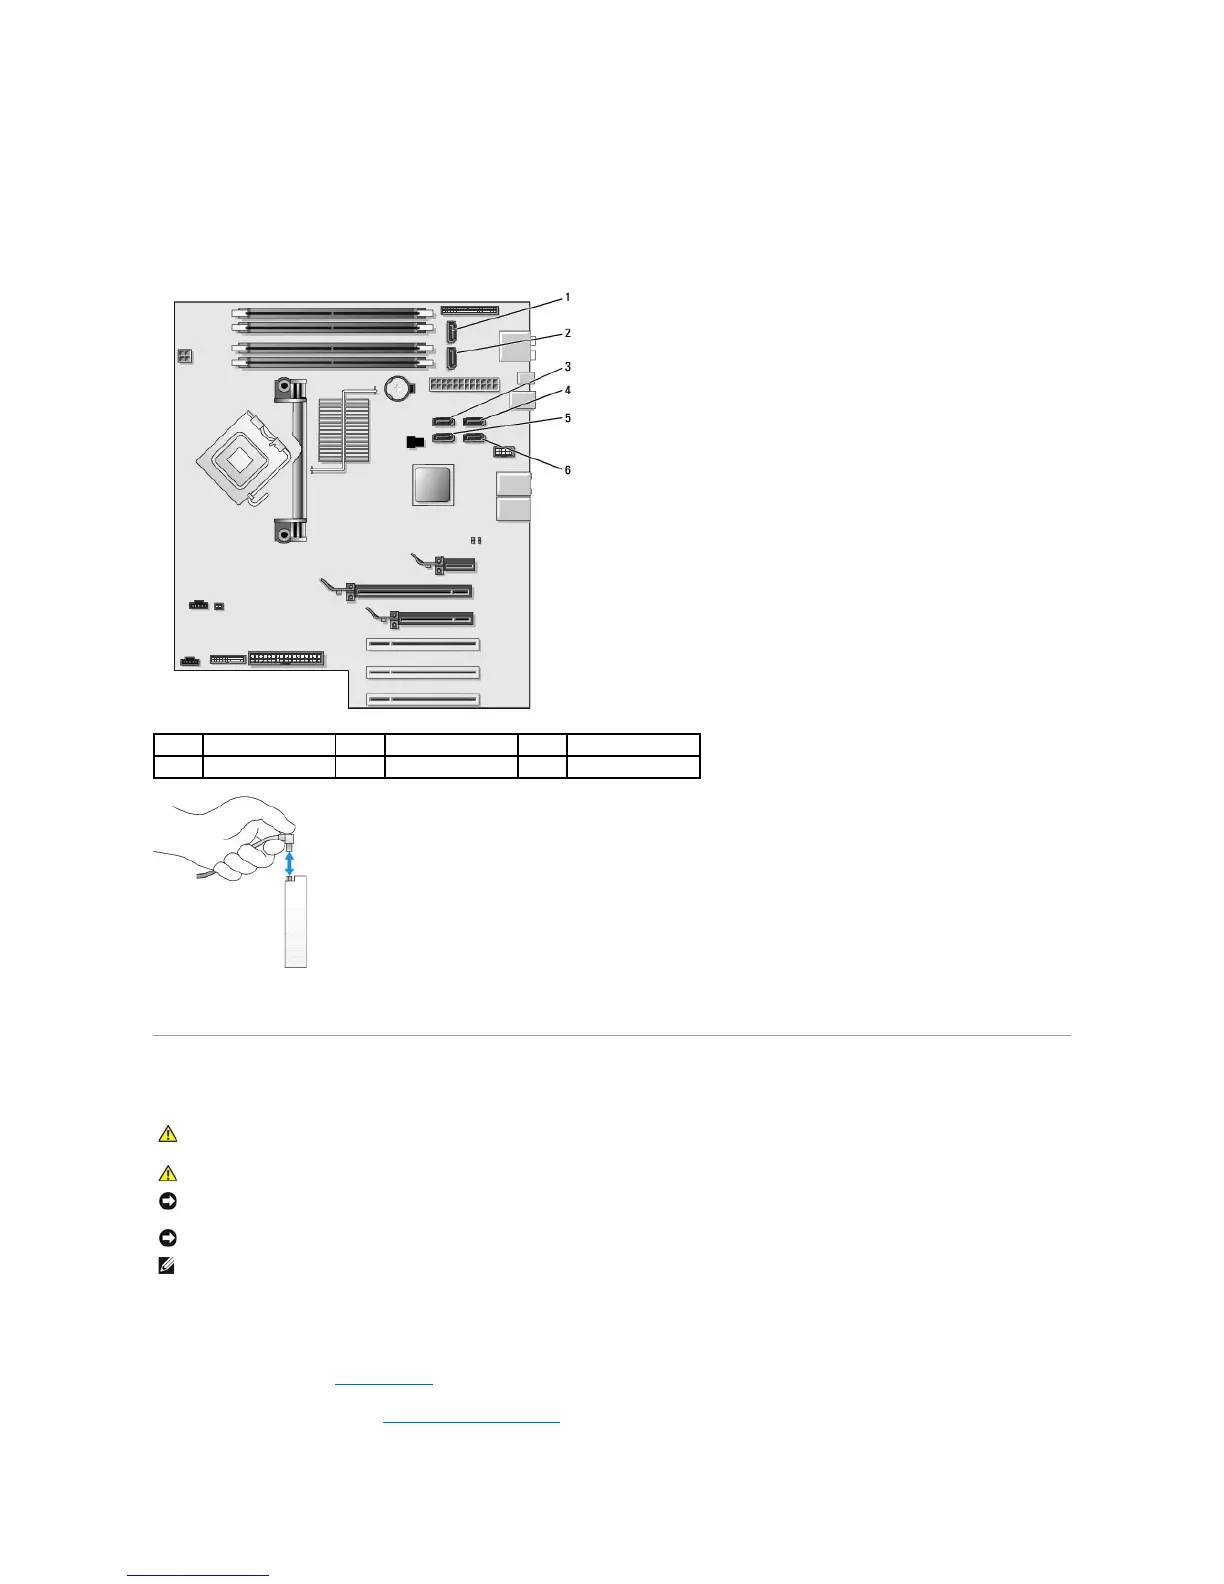
Connect hard drives to the connectors labeled "SATA0" and "SATA1", starting with SATA0. Connect CD/DVD drives to the connectors labeled "SATA4" and
"SATA5", starting with SATA4.
Serial ATA hard drives and CD/DVD drives are connected to connectors labeled "SATA0" to "SATA5" on the system board.
WhenconnectinganddisconnectingaSATAcable,holdthecablebytheconnectorateachend.
Hard Drive
Removing a Hard Drive
1. Follow the procedures in Before You Begin.
2. Remove the computer cover (see Removing the Computer Cover).
CAUTION: Before you perform any of the procedures in this section, follow the safety instructions in the Product Information Guide.
CAUTION: To guard against electrical shock, always unplug your computer from the electrical outlet before opening the cover.
NOTICE: To avoid damage to the drive, do not set it on a hard surface. Instead, set the drive on a surface, such as a foam pad, that will sufficiently
cushion it.
NOTICE: If you are replacing a hard drive that contains data, back up your files before you begin this procedure
NOTE: If removing or installing the hard drive changes the drive configuration, you must reflect the changes in the BIOS. Go to the "Drives" section of
the BIOS and under SATA 0 through 5, set the SATA ports to the correct configuration.
 Loading...