17
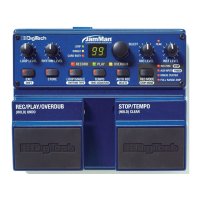
This section explains how to use the aUx INPUT for phrase recording and
looping. You should have an audio source connected to the aUx INPUT
before proceeding.
1. Select an empty memory location using the SELECT knob (the LOOP and
SINgLE LEDs will be off).
2. Press the RECORD MODE button repeatedly to cycle through the available
Record Modes. Choose one that lights the aUx INPUT LED. There are four
possible recording modes for the aUx INPUT:
a. aUx INPUT only lit: The unit will record the program material just as it
comes from the source (any stereo material will be mixed to mono).
b. aUx INPUT and CENTER CaNCEL lit: Any material that is common to
both stereo channels (usually lead vocals or instruments) will be
removed from the recording. Any stereo processing of the center
channel (reverb, for instance) might not be removed completely.
c. aUx INPUT and FULL RaNgE SIM lit: The program material will be
recorded with an equalization curve so that when it is played through
a guitar amp it will more closely retain its original frequency response.
d. aUx INPUT and CENTER CaNCEL and FULL RaNgE SIM lit: This will
remove center channel material and apply a compensating
equalization as in the two previous modes.
3. Playback the audio source and set its output level so that the PEak LED
lights only occasionally.
4. (Optional) Set the Time Signature to something other than 4/4, if desired.
(See page 28 for more information about Time Signatures.)
5. (Optional) Turn the aUTO REC button on if you want the JamMan to begin
recording when the audio source begins playback
6. Press the REC/PLaY/OVERDUb footswitch to start recording. The RECORD
LED will then light solid and recording will begin instantly after the
REC/PLaY/OVERDUb footswitch is pressed. If Auto Record is enabled, the
RECORD LED will flash after the footswitch is pressed indicating it is armed
for recording. Recording will automatically begin once the audio source
starts playing.
Recording with the Aux Input
 Loading...
