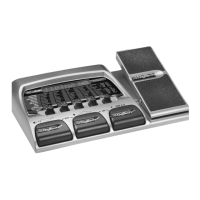
To r e-amp a track back through the RPx400, follow these steps:
1. Put the RPx400 footswitches in Recorder mode by pressing and holding the UP and AMP A/B
footswitches until the display reads
rec fs.
2. From the Pro Tracks menu bar, select File>New. The New Project File window will open.
3. Select the Normal-Hands Free Session project template.
4. Select the SETUP row in the RPx400’s matrix.
5. Use the USB 1-2 Source knob to select
drygtr and USB3-4 Source to off.
6. Press the RECORD footswitch. The RPx400’s display reads
record.A track is automatically
inserted in the current session of the Pro Tracks software and recording on this track begins.
7. To stop recording, press the STOP/UNDO footswitch. The RPx400’s display reads
stop and
recording will stop. Press Stop again to rewind to the beginning of the track.
8. In the Out box of the track you just recorded, select B(Digitech USB 1-2 In/Out).
9. In the tool bar press the Console View button to see the mixing console.
10. Pan the B - Mains Output hard left and the A - Mains Output hard right.
11. Select the SETUP row again and use the USB 1-2 Source knob to select
REAMP. This configures
the recording software to playback audio through the RPx400’s effects processing.
12. Press the PLAY footswitch. Put the footswitches back to Performance mode by pressing and holding
the UP and AMP A/B footswitches simultaneously until the display reads
updown.You can nowo
audition presets until you find one you like . Once you have done so, return to Recorder footswitch
mode.
13. Press the STOP/UNDO footswitch twice to rewind to the beginning of the track.
14. Press the RECORD footswitch and the recorder will now insert and record a stereo track of
processed guitar.
15. To stop recording, press the STOP/UNDO footswitch.
33
The RPx400 and Recording

 Loading...