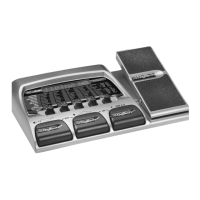
footswitches simultaneously until the display reads rec fs.
5. From the preset display, press and hold the SELECT button to enter the SETUP row in the
RPx400’s matrix. Otherwise, press the SELECT button several times until the setup row is selected.
6. Select the sources to record using the USB 1-2 Source knob (additional sources can be selected
using the USB 3-4 Source knob).
7. Press the RECORD footswitch. The RPx400’s display reads
record.A track or tracks are
automatically inserted in the current session of the Pro Tracks software and recording on these tracks
begins.
8. To stop recording, press the STOP/UNDO footswitch. The RPx400’s display reads
stop and Pro
Tracks stops recording. The wave data for the track(s) can now be viewed on your computer monitor.
Playing Back a Recorded Track
After a track or tracks have been recorded, playing them back is easy. If you want to start playback at the
beginning of a track or song but are someplace other than the end of the song, follow these steps:
1. Press the STOP/UNDO footswitch once. The RPx400 display will read
rewind Pro Tracks will
rewind to the beginning of the current song.
2. Press the PLAY footswitch. The recorded track(s) will begin playing back.
Recording Multiple Tracks
After tracks have been recorded, you may want to record other tracks that play along with them. To
record a new track or tracks with previously recorded tracks, follow these steps:
1. From the preset display, press and hold the SELECT button to enter the SETUP row in the
RPx400’s matrix.
2. Select the sources to record using the USB 1-2 Source knob (additional sources can be selected
using the USB 3-4 Source knob).
3. Press the STOP/UNDO footswitch twice. This will rewind to the beginning of the current song.
4. Press the RECORD footswitch. The RPx400’s display reads
record.A track or tracks are
automatically inserted in the current session of the Pro Tracks software and recording on these tracks
begins.
5. To stop recording, press the STOP/UNDO footswitch.
Using the UNDO Footswitch to Erase a Track
You can undo the last take or previous tracks using the RPx400’s footswitches. To undo tracks, follow
these steps:
1. Press and hold the STOP/UNDO footswitch. The RPx400’s display reads
undo,indicating the last
recorded track(s) are being deleted.
Re-Amping a Guitar Track
Using one of the Dry Guitar configurations for recording gives you the opportunity of playing that dry
take back into the RPx400 for re-processing. The advantages of having this feature are you can
experiment playing the dry guitar take back through different amp models, effects, or entirely new presets
once you have your other tracks recorded. This helps when trying to fit a guitar sound into a mix after
the song is assembled rather than relying on tricky EQ settings that can tarnish the tone you originally
recorded.
32
The RPx400 and Recording

 Loading...