DJI Osmo Action 4
User Manual
22
©
2023 DJI All Rights Reserved.
Webcam Mode
Osmo Action 4 can work as a webcam on a computer. Power on the camera and connect it to
the computer using a USB-C cable. The camera will go into USB mode. Tap Webcam to enter
the Webcam mode, and the camera will function as a webcam input device. The bottom of the
screen displays Webcam. Press the shutter/record button to start recording. Tap the Image
Parameter Settings icon on the right side of the screen to set the exposure, white balance, and
FOV parameters. Users can preview recorded videos after exiting the Webcam mode.
Microphone Connection
Osmo Action 4 can be linked to an external microphone, including DJI Mic or any third-party
digital USB-C microphones that support 48K/16bit.
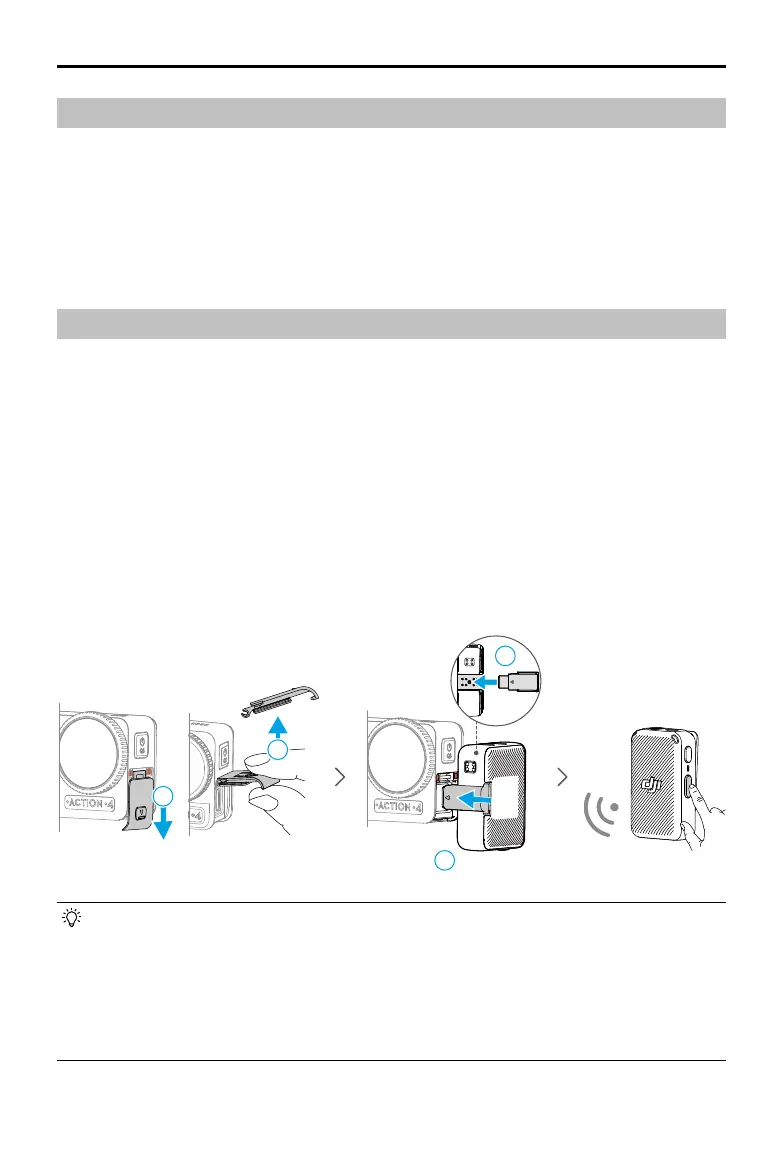
Follow the steps below (with DJI Mic as an example) to connect to a microphone:
1. Press the release button on the USB-C port cover and slide it downward. Lift the cover
upward until it is detached from the device.
2. Power on the receiver and transmitter, and make sure the receiver and transmitter are
linked.
3. Attach the receiver to the USB-C port of the camera using the USB-C adapter. A microphone
icon will be displayed on the screen.
4. Press the linking button on the transmitter to start recording while using the transmitter for
audio. Press the linking button again to stop recording.
• The transmitter and the receiver are linked by default. Follow the steps below to link if
the transmitter and receiver are disconnected.
a. Place the transmitter and the receiver in the charging case to link automatically.
b. Power on the transmitter and the receiver, press and hold the link button on the
transmitter, slide down on the screen of the receiver, select Settings and scroll
through and tap Link Device to start linking. The status LED glows solid green to
indicate linking was successful.
REC
2
2
1
1
 Loading...