36
CLUTCH SYSTEM
CS-370ES
CS-420ES
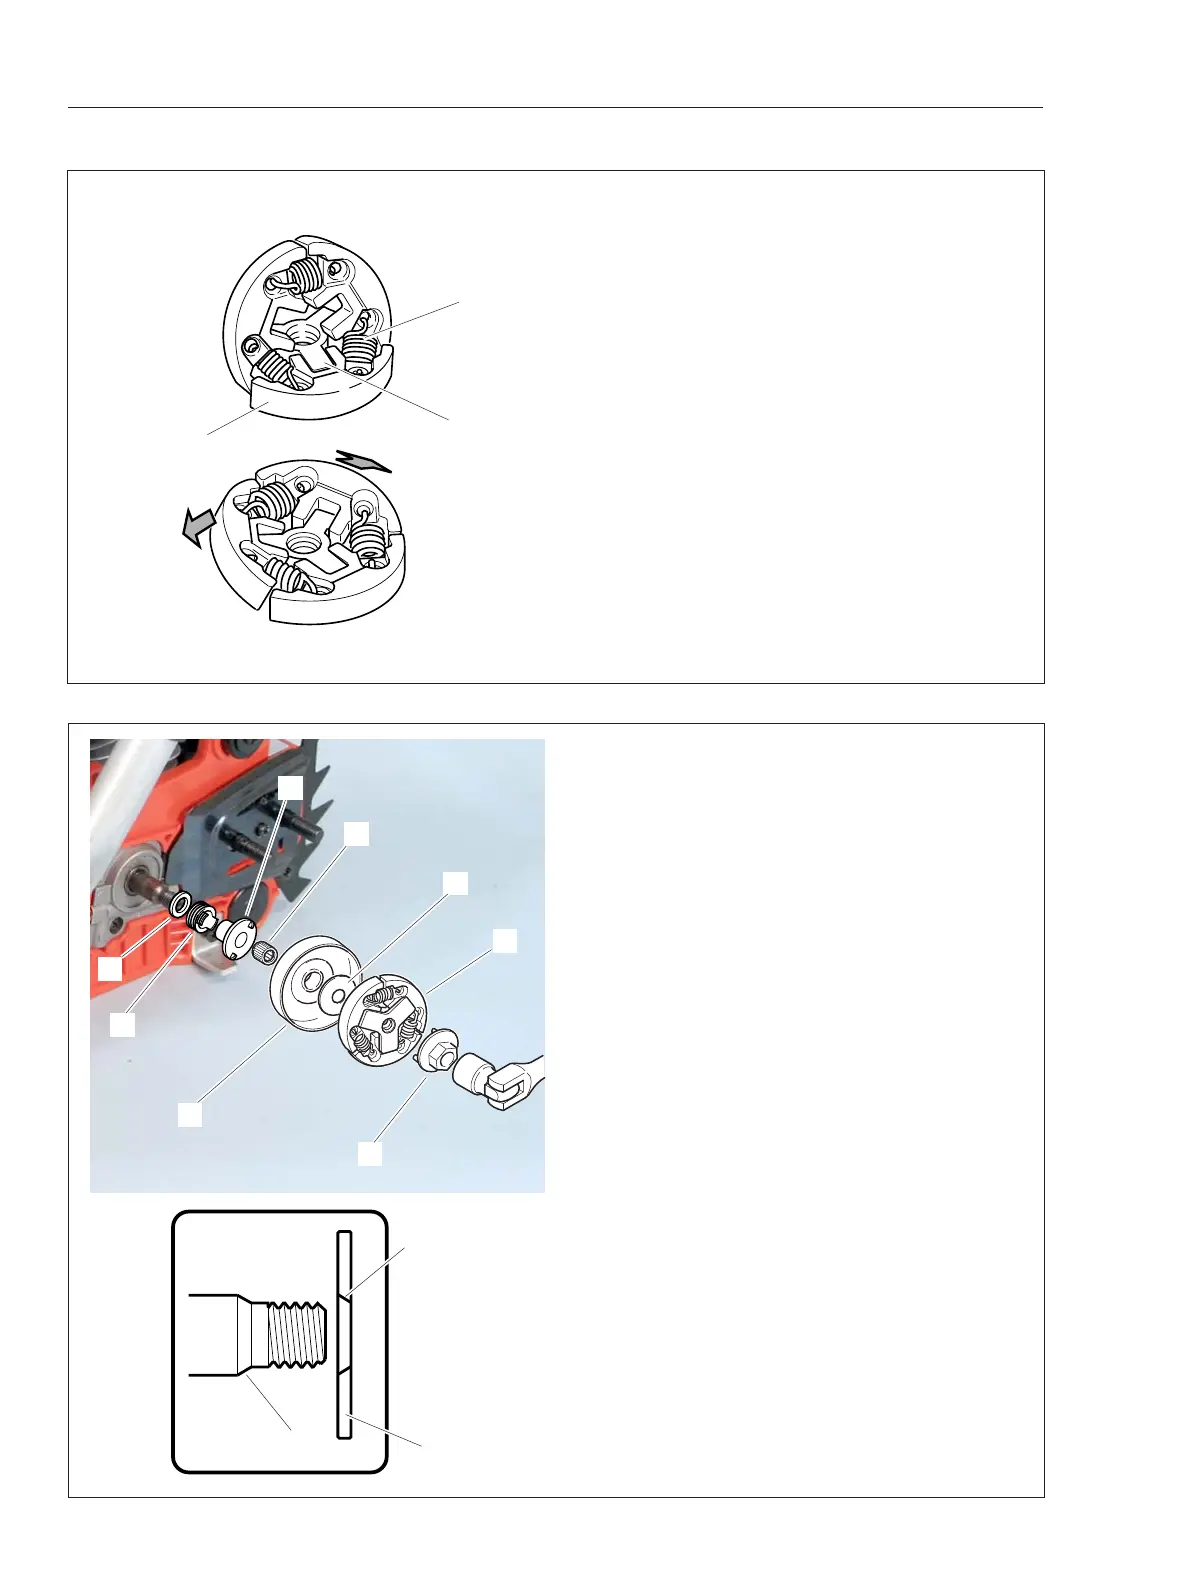
5-3 Installing clutch assembly
1. Apply lithium-based grease to needle bearing (D)
and install circular washer (A), worm gear (B), collar
(C), needle bearing and clutch drum (E) on
crankshaft as shown order.
2. Install clutch plate (F) and clutch assembly (G) to
crankshaft turning counterclockwise by hand.
NOTE: Chamfered corner (f) of clutch plate (F)
should face inside, against crankshaft chamfer (J).
NOTE: If starter assembly is installed, untie
temporary knot in the first NOTE of “5-1 Inspecting
clutch parts”. Hold starter grip as the rope is pulled
out.
3. Turn clutch assembly counterclockwise using
clutch tool 897505-16133 (H) by hand until it can
not be turned further.
4. Tighten clutch assembly (Left-hand thread) with
clutch tool 897505-16133.
NOTE: If starter assembly is installed, release starter
grip to return starter rope into starter assembly.
5. Remove piston stopper and reinstall all removed
parts.
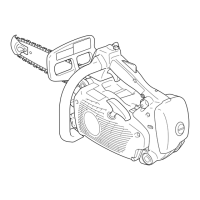
5-2 Replacing clutch parts
1. Install tension spring (C) to clutch shoes (B).
2. Set one arm of clutch hub (A) to one clutch shoe.
3. Install other two clutch shoes on two arms as
shown.
A
C
B
F
f
A
B
D
E
F
J
C
H
G
 Loading...