Tinyhawk III Plus
Note:
1. Before adjusting parameters, hold down the CH button or FR button for 3
seconds.
2. Ensure that the power of the Tinyhawk III Plus is turned on. When cycling
through channels, using the video goggles of the Tinyhawk III Plus will
make it easier to identify the correct channel.
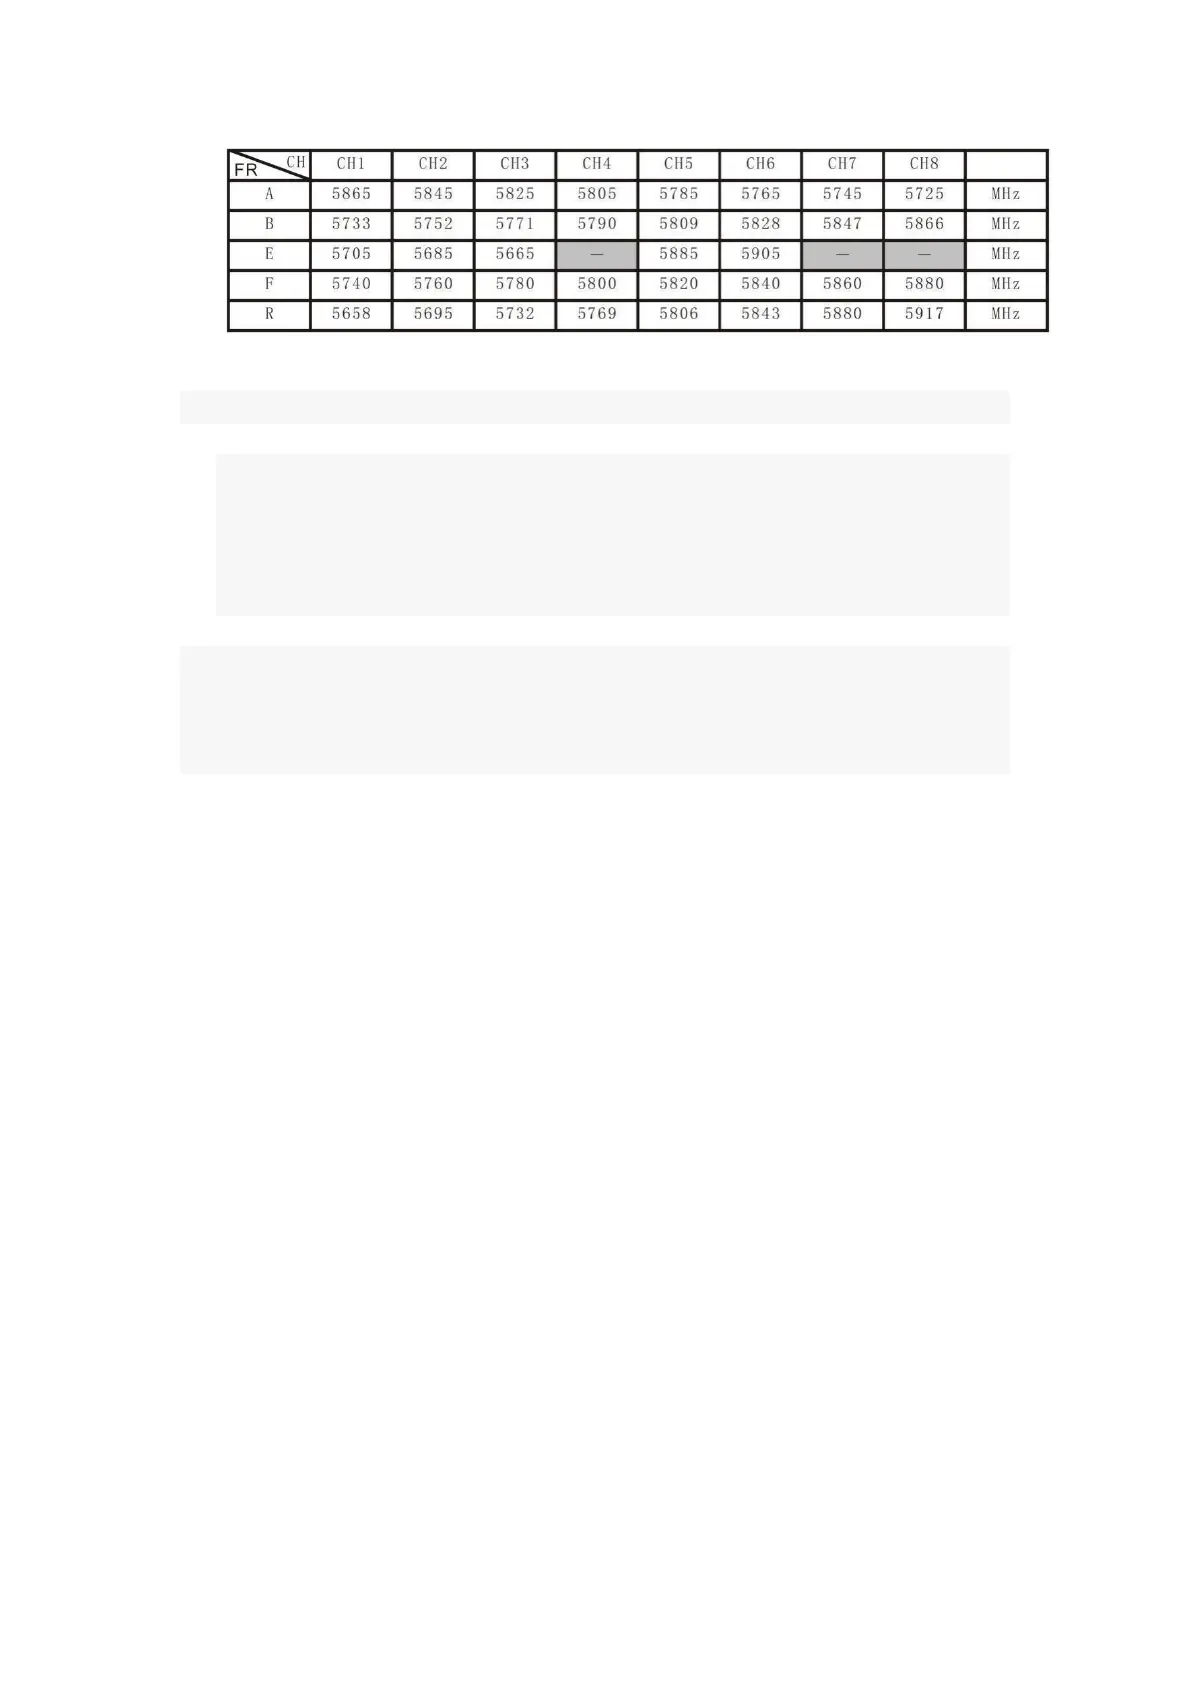
Attention: Please make sure the Transporter II is set to the correct channel of
the Tinyhawk III Plus. The current selected frequency band and channel of the
Tinyhawk III Plus will be displayed on the top left corner of the screen
3.3.2 Video Channel Auto Search
The Transporter II features an "Auto Search" function (labeled "A") to assist
in finding the channel of the Tinyhawk III Plus. Power on the Tinyhawk III Plus
and then press the "A" button on the Transporter II to initiate the auto search
mode. This mode will scan through all channels and select the one with the best
video reception. Once all channels are scanned, the best channel number,
frequency group, and frequency will be displayed on the top left corner of the
screen.
Warning: If multiple Tinyhawk III Plus drones (or other drones with video
transmission) are operating simultaneously, using this function might lead to
selecting the wrong drone's channel. We recommend manually selecting the
correct channel to avoid incorrect matching!
For comprehensive guidance on using the Auto Search function and other
features, refer to the manufacturer's user manual for the Transporter II goggles.
3.3.3 Recording On & Off
 Loading...