- 20 -
SECTION 2: GETTING STARTED
Ethernet Connection
The Ethernet Port is a standard 10BaseT connection. Your Epilog Laser has all of the versatility of a network
capable peripheral. As such, there are many dierent ways that the laser can be connected to a computer
or a network. A direct connection using an Ethernet cable is the only method that will be described in this
manual. Connect the Ethernet cable (included in the accessories kit) to the Ethernet port, located on the
right-hand side of the machine. Plug the cable into the Ethernet port on the laser, then plug the other end
into the Ethernet port on your computer.
The Epilog Dashboard is the print driver that allows your computer to talk to your Epilog Laser system
when either the USB or Ethernet cables are connected. The driver is included in the accessories kit on
a CD-ROM or on our website at www.epiloglaser.com. To see detailed instructions on installing the print
driver, see “SECTION 3: SOFTWARE INSTALLATION” on page 23.
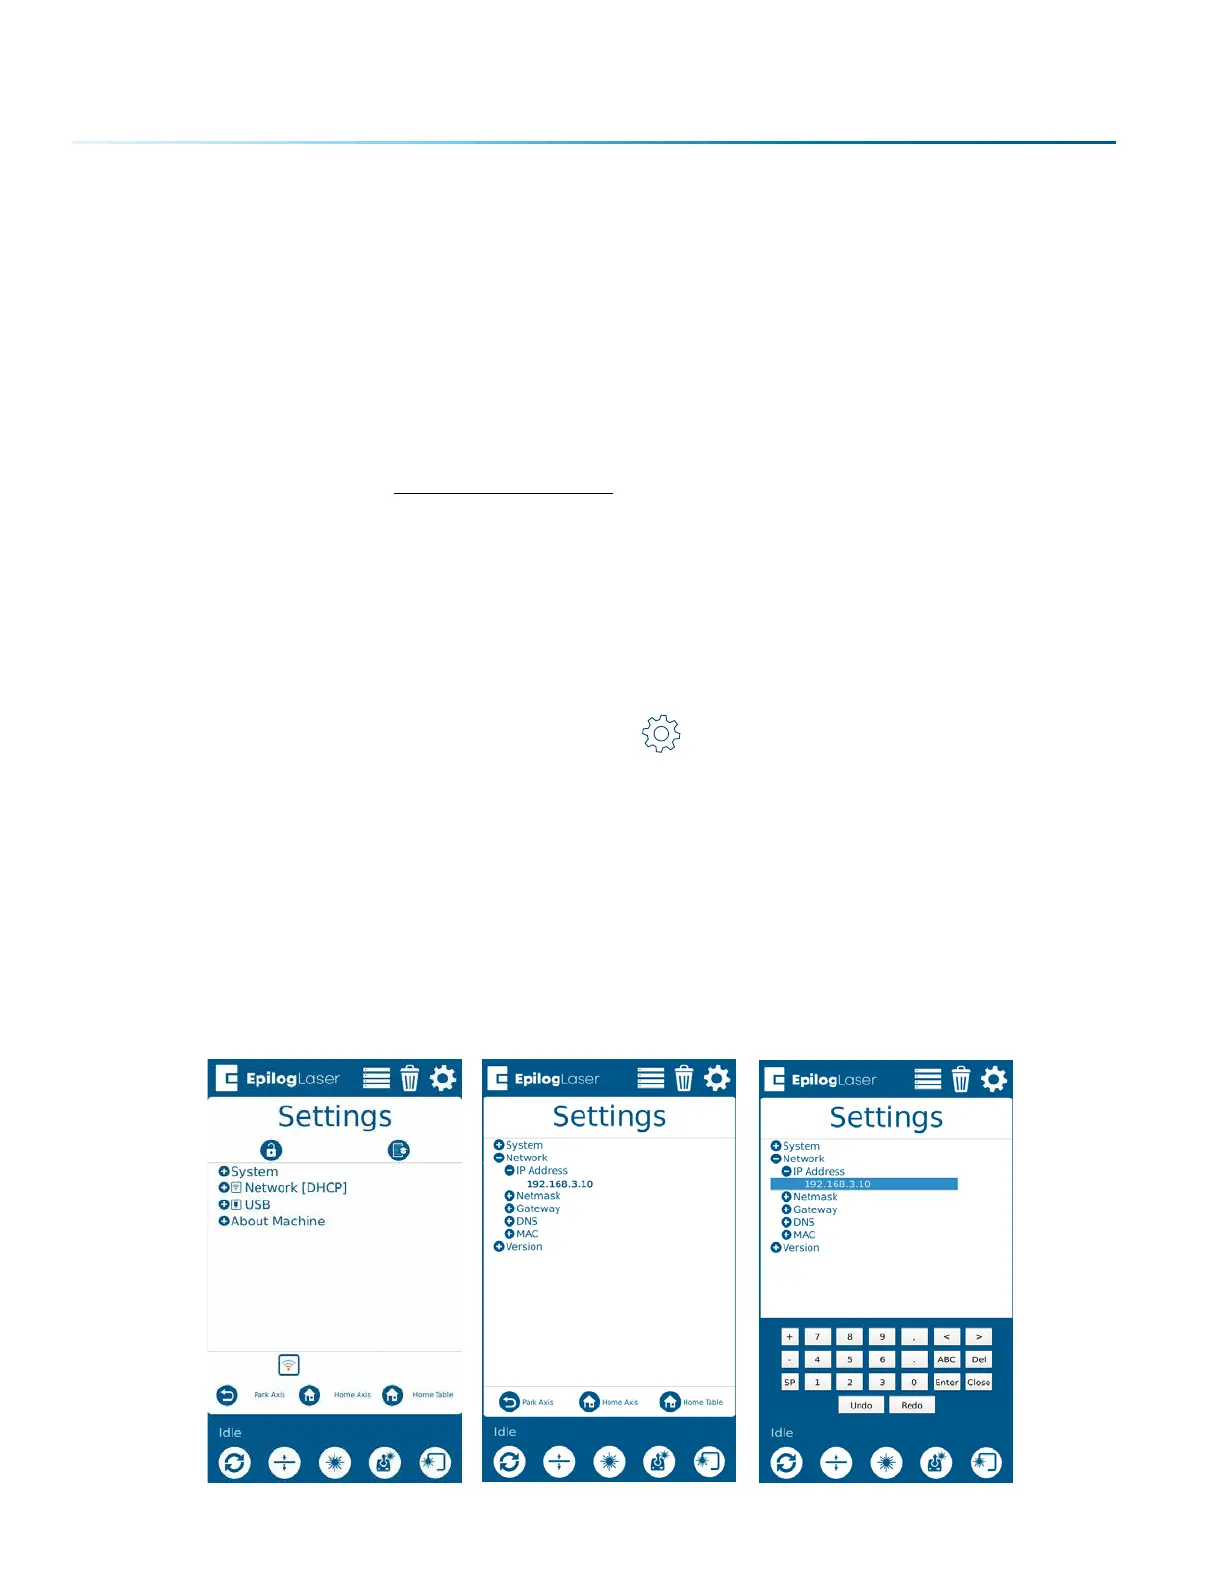
6. Set the Fusion Pro’s IP Address
Ethernet Cable Setup
1. Once your machine is booted up, select the Settings button in the upper right corner of the
touchpad.
2. Select Network in the settings list.
3. Under Network you will see “IP Address” and “Netmask”, press “IP Address” and then press the
numbers that appear next to them. A keyboard should show up at the bottom of the screen.
4. Press the “123” Button in the bottom le corner of the keyboard to access the numerical keypad.
5. Type in whichever IP Address you prefer to use. Most Epilog users will use the IP Address of
192.168.3.10 which is what we use in this manual.
6. Press the Close key to close the keyboard, then press the Job Menu Button to return to the main
screen and your settings should be saved.

 Loading...


