6
Drilling
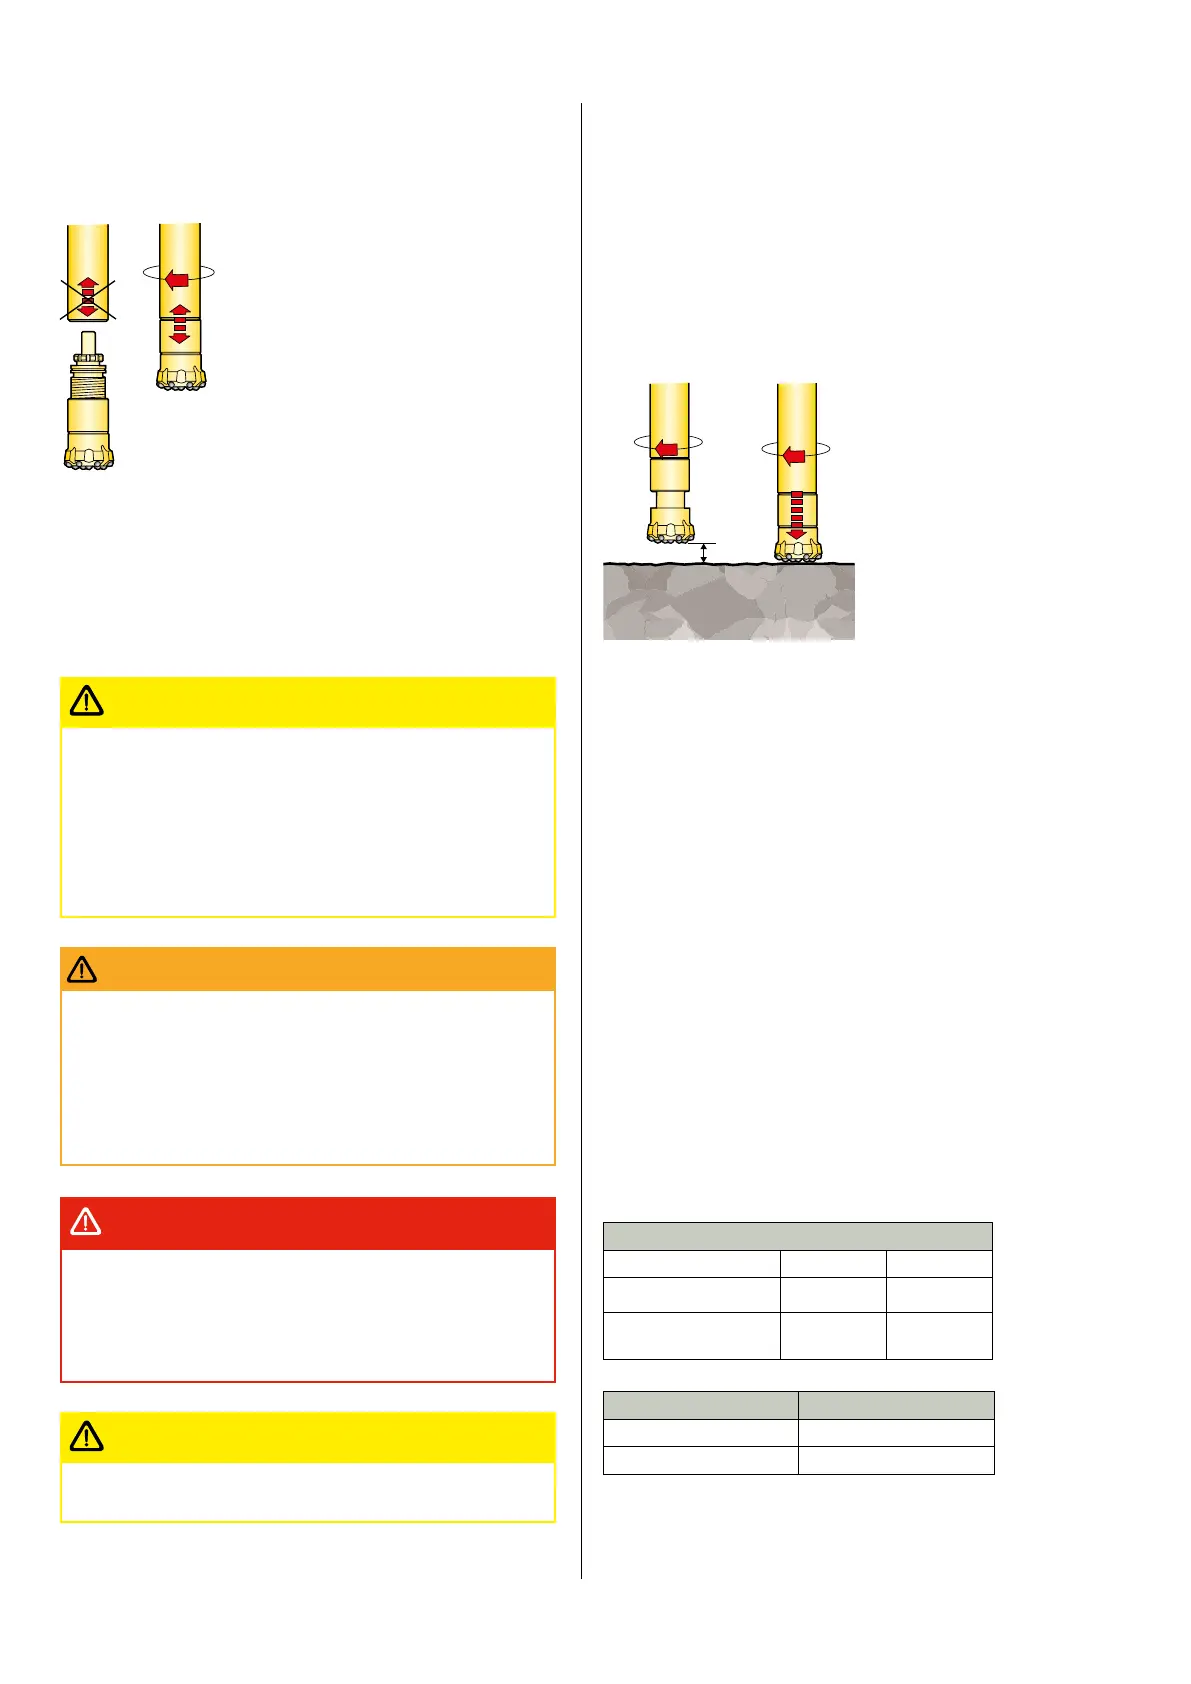
Rotation to the right
DTH hammers must be rotated to the
RIGHT (clock wise) during drilling, since the
driver chuck and top sub are threaded into
the cylinder with RIGHT-HAND THREADS.
Rotation must always be to the right when
the hammer is operating. Left-hand rotation
(or no rotation) will cause the driver chuck
to loosen, which could mean losing the drill
bit (or even the entire hammer) down the
hole.
The drill string should be rotated to the
right even when the hammer is not operat
-
ing. For example, this should be done when cleaning the drill hole
and when lifting up the drill string. It can be said that rotation to
the right should be switched on as long as other operations are
in progress with the hammer in the hole. The risk of the drill bit
working loose should also be considered when breaking the joints
between drill pipes. When adjusting the breaking wrenches, bear
in mind that the drill string must not be rotated anti-clockwise any
more than is absol utely necessary.
• Always switch on rotation to the right before starting the
feed or hammer.
• Let the hammer rotate to the right (clockwise) even during
lifting or lowering of the hammer.
• Do not switch off rotation to the right until all other func-
tions have been switched off.
IMPORTANT
• Take great care when jointing drill pipes. Make sure there
is no danger of your fingers being pinched or clothing being
entangled when the drill string is rotated.
• When a pipe wrench is used during jointing, there is a risk
of the wrench flying off and causing injury when rotation is
applied.
WARNING
• When drilling on soft or unstable ground, great care must
be taken because the flushing air from the hammer can
erode the material around the drill hole, and so undermine
the ground beneath the drill rig. This can pose a great danger
to personnel and risk damaging the equipment.
DANGER
• Always wear ear protectors during drilling.
CAUTION
Collaring
• Feed the hammer downward until the drill bit is about 5 cm from
the collaring point.
• Start rotation to the right at low speed (creeping).
• Feed the hammer on to the rock using minimal feed force, so that
the bit is pressed into the hammer, and into the impact position.
• Start collaring the hole with reduced impact and feed, until the bit
has entered the rock.
• Open the impact mechanism control fully and adjust the rotation
and feed so that the hammer drills smoothly and steadily.
5 cm
Feed and rotation
With holes of relatively shallow depth, the setting of feed and rota-
tion is usually a simple matter in DTH drilling, since the hammers
are comparatively insen sitive to small variations in the “normal”
flow and pressure settings. The settings can be regarded as correct
when the drill string turns evenly without jerks or jamming, and a
steady penetration rate is obtained.
Feed force
When drilling with COP DTH-hammers, the feed force should be
high enough to keep the shank of the drill bit pressed into the ham-
mer during drilling.
• Too low a feed force will give easy rotation, excessive vibration
and reduced penetration. The resultant reflex shock waves can
damage the rotation unit and feed beam.
• Too high a feed force causes the rotation to jam (either erratically
or completely) and can subject the drill string to severe bending
stresses. It can also damage the rotation unit and feed beam.
The feed force often needs to be corrected during drilling, depend
-
ing on the rock formation and the weight of the drill string, which
obviously varies with the hole depth.
A rough guide to drill pipe weights for different sizes of DTH-ham
-
mer are given in the table below:
Feed force – recommendations
COP 32 COP 42
Feed force 2-6 kN 3-8 kN
Feed force, normal
approx.
3,5 kN 5 kN
Pipe dimension, mm Approx� weight
76 mm 9 kg/m
89 mm 15 kg/m
Bit diameter, rock formation, hole depth and available rotation
torque will have a considerable influence on the setting of the feed
force. What is important is that the feed force is adjusted to give
 Loading...