© Safe Fleet | September 2018 | All rights reserved
Document #: XE-SNB1-Install-PM-R0A
p. 12
inView 360 Fusion Installation Guide
Installing Video Components
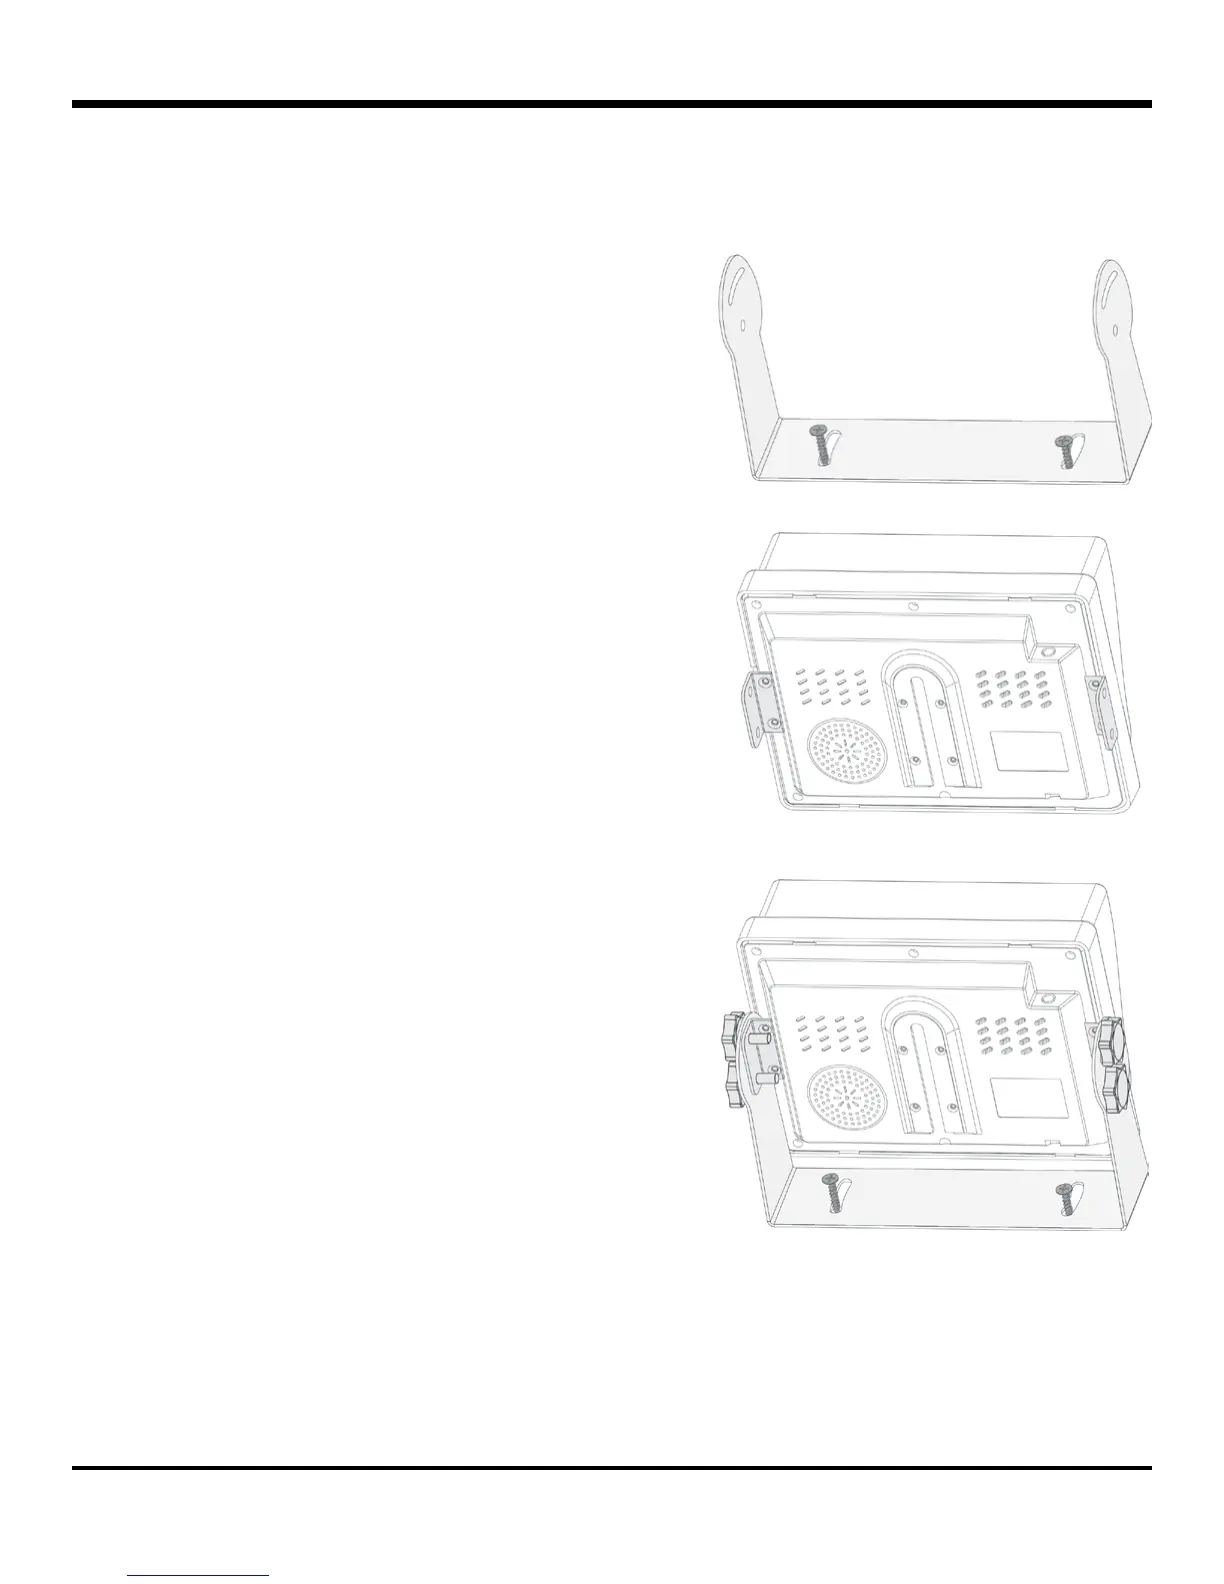
Mounting the Monitor
When mounting the monitor, ensure that it is in a location that doesn’t obstruct the driver’s view� To install the monitor:
1� Choose a mounting location for the monitor� When in place, the
monitor is supported between the vertical arms of the mounting
bracket.
2� Position the bracket and use the 2 self-tapping screws
from the hardware kit to attach the bracket to the mounting
surface�
3� Install the “L” brackets on the back of the monitor housing
(one bracket on each side):
a� As shown in the following diagram, position the “L”
bracket so the holes line up with the holes in the
housing. The bracket only ts one way, and you’ll need
to slide the inner edge slightly toward the center and
underneath the slot in the housing�
b� Use 2 countersunk screws to attach each bracket to
the housing�
4� Attach the sun shade:
a� Position the sun shade frame around the front of the
monitor, with the shade at the top�
b� Fit the bottom of the monitor into the shade frame rst,
then snap the rest of the frame onto the monitor housing
until it ts snugly.
5� Use 4 knob-head screws through the “L” brackets to attach the
monitor to the mounting bracket.
6� Adjust the monitor tilt as required and tighten the mounting
screws�
 Loading...