69
Advanced Features
3
68
RECREC
0.30.3M
REC
REC OK? OK?
CANCELCANCEL
5
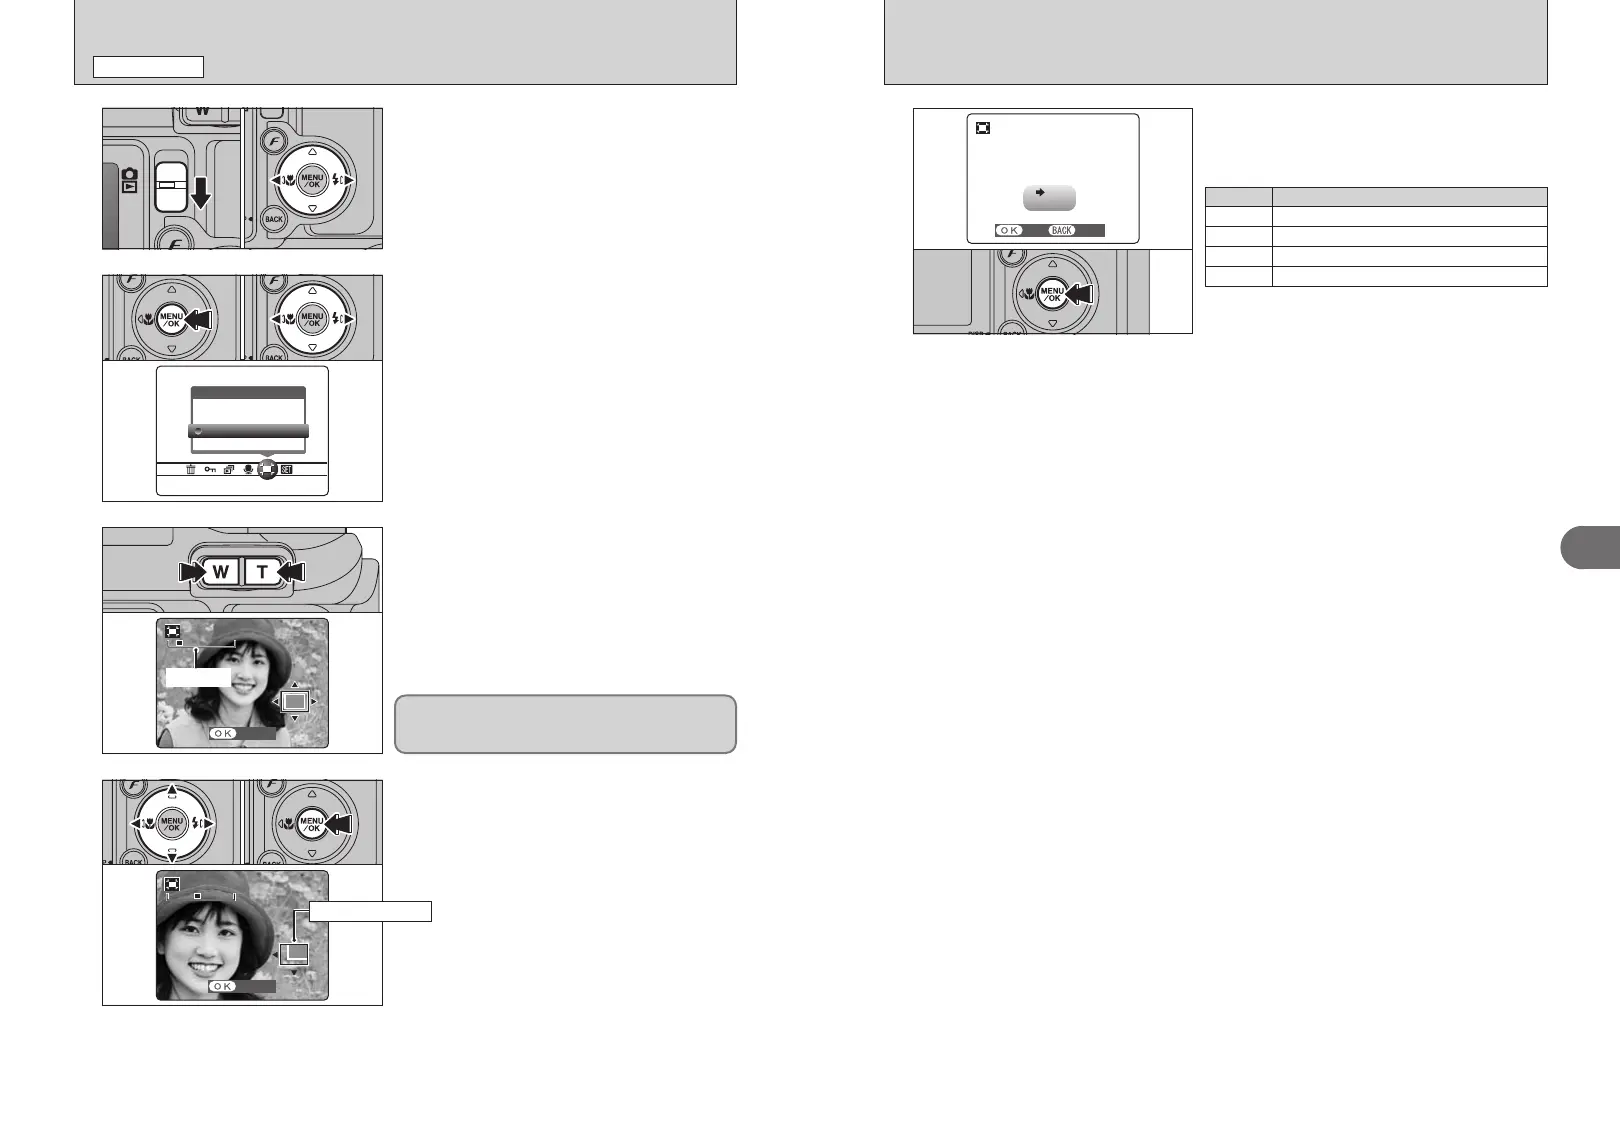
Check the saved image size and press the
“MENU/OK” button. The trimmed image is added
as a separate file in the final frame.
5
2
■ Image sizes
Printing at up to 10R (25.4 × 30.5 cm) / A4 size
3
Printing at up to 6R (15.2 × 20.3 cm) / A5 size
Sample Uses
Printing at up to 4R (10.2 × 15.2 cm) / A6 size
`
To use for e-mail or web site
Y TRIMMING
PLAYBACK MENU
1Set the Mode switch to “w”.
2Press “d” or “c” to select the trimming frame
(file).
1
2
1Press the “MENU/OK” button to display the
menu on the LCD monitor.
2Press “d” or “c” to select “Y” TRIMMING.
3Press the “MENU/OK” button.
02
3
Press the “T” button or “W” button to zoom in
(enlarge) or out on a still image. A zoom bar
appears.
●
!
Press the “BACK (DISP)” button to return to single-frame
playback.
●
!
Press the “BACK (DISP)” button to return to single-frame
playback.
4
1Press “a”, “b”, “d” or “c” to display another
area.
The current displayed image appears on the
navigation screen.
2Press the “MENU/OK” button to trim the image.
01 02
01 03
Navigation screen
01 02
A saved image size varies depending on the zoom
scale. For 0.3M, the “
fl TRIMMING” option
appears in yellow.
 Loading...