81
Settings
4
80
RECREC
CANCELCANCEL
FRAMEFRAME
PREVIEWPREVIEW
RECREC
CANCELCANCEL
PREVIEWPREVIEW
●
!
A ruined image can not be saved from the preview function.
●
!
Preview zoom works in the same way as the playback zoom
(➡P.28).
01 02
●
!
If the “BACK (DISP)” button is pressed, recording of images
stops.
01 02
IMAGE DISP.IMAGE DISP.
POWER SAVEPOWER SAVE
FORMATFORMAT
LCDLCD :ON:ON
:OK:OK
:2 MIN:2 MIN
ONON
1
3 42
SET−UP
SET−UP
SETSET CANCELCANCEL
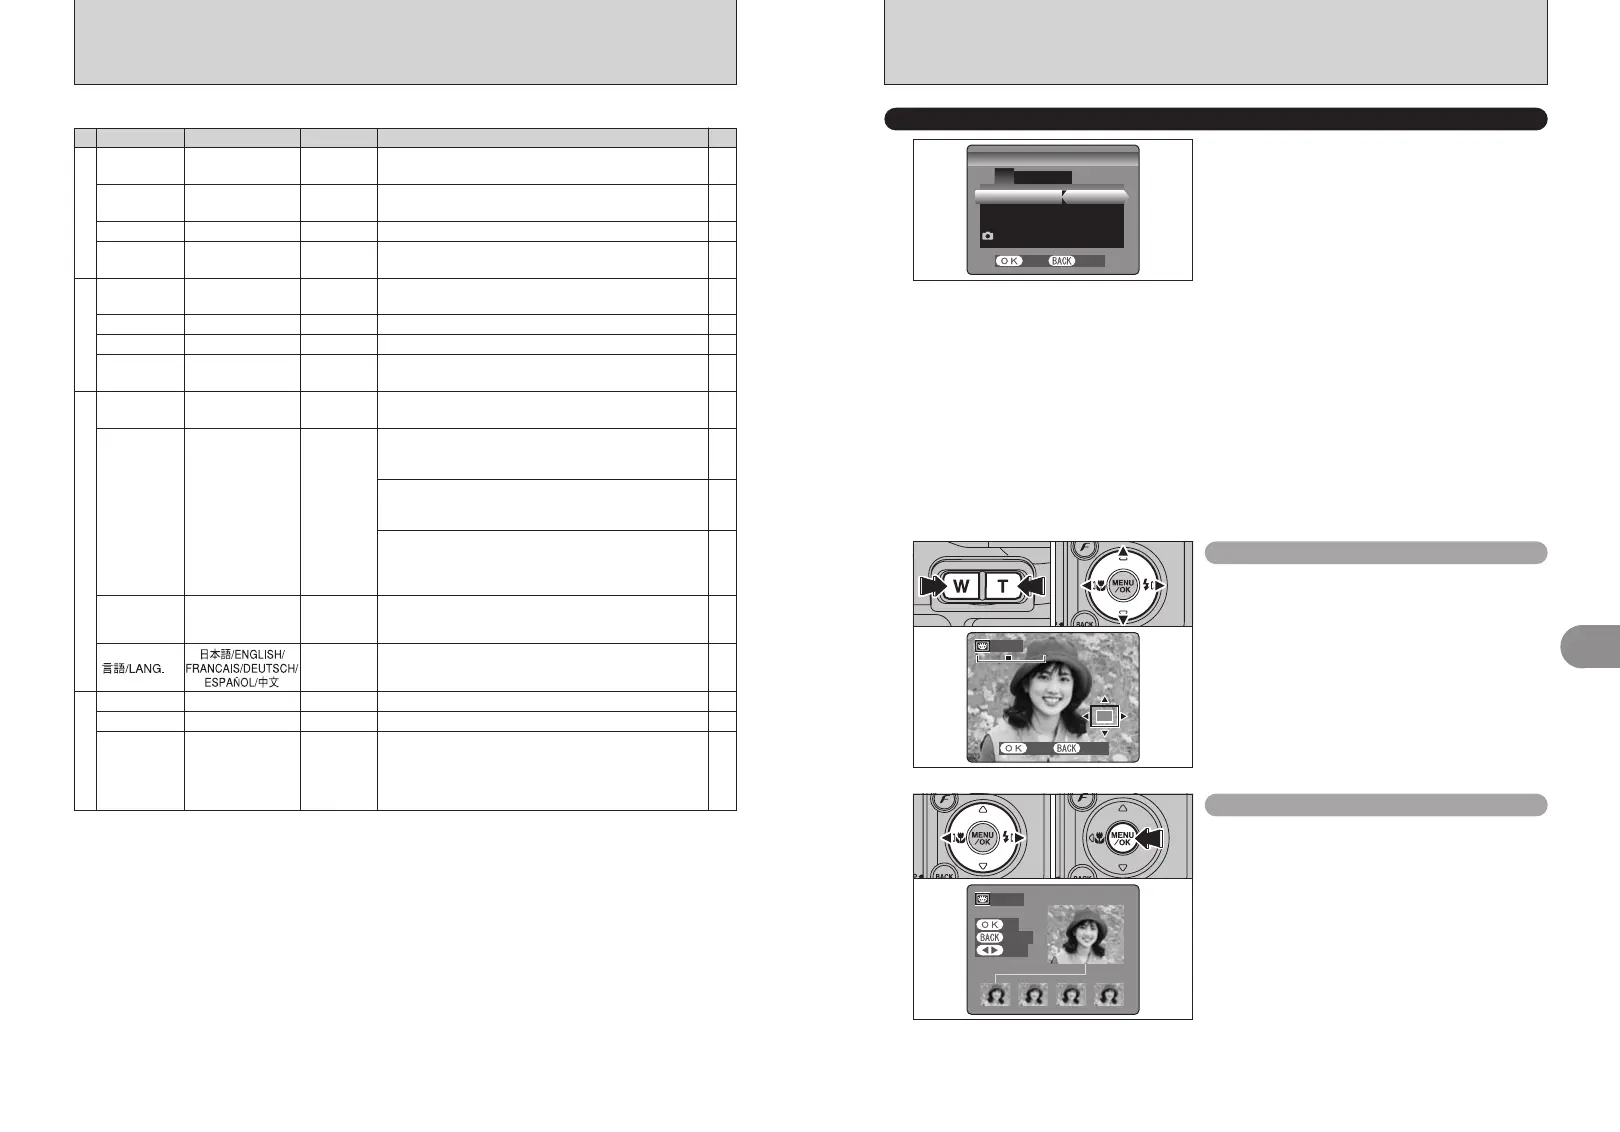
Use this setting to specify whether images are
displayed after shooting.
ON: Images are displayed for 2 seconds
and then automatically recorded.
OFF: Images are recorded without being
displayed.
PREVIEW: The results of your shot are shown as a
preview (for image checking) and you
can then choose whether or not to
record the image.
h To record the image:
Press the “MENU/OK” button.
h To discard the image:
Press the “BACK (DISP)” button.
The preview zoom can also be used.
●
!
In Long-period continuous shooting the images do not
appear.
●
!
In top 4-frame continuous shooting, and final 4-frame
continuous shooting, the images appear for a set time before
being recorded even when “OFF” is selected.
●
!
The color tones in images displayed when “ON” is selected
may differ slightly from those in the images actually recorded.
IMAGE DISPLAY
Preview zoom
When the “PREVIEW” setting is selected, this
function lets you enlarge images for detailed
checking.
1Press the Zoom button to zoom in or out.
2Press “a”, “b”, “d” or “c” to display another
part of the image.
Continuous shooting preview
(
image checking
)
When the “PREVIEW” setting is selected, images
shot can be checked in the top 4-frame continuous
shooting, final 4-frame continuous shooting or auto
bracketing modes.
However, you cannot use the preview zoom.
1Press “d” or “c” to check the images.
2Press the “MENU/OK” button to record all the
images.
SET-UP
■ SET-UP menu options
IMAGE DISP.
1
2
3
4
ON/OFF/PREVIEW ON
Specifies whether the preview images (the photographed
images) are displayed after taking a picture.
81
82
82
–
–
–
15
83
84
99
98
95
16
–
–
POWER SAVE
2 MIN/5MIN/OFF 2 MIN
Reduces the camera’s power consumption and sets the
time when camera turns off.
FORMAT OK – Erases all files.
q LCD
ON/OFF ON
Specifies whether the LCD monitor is ON or OFF when the
camera is turned on in Photography mode.
§ BEEP
OFF/1/2/3 2
Sets the volume of the tone emitted when the camera
controls are used.
§ SHUTTER
OFF/1/2/3 2
Sets the volume of the sound emitted when the shutter operates.
DATE/TIME SET – Corrects the date or time.
TIME
DIFFERENCE
SET – Specifies the time difference settings.
FRAME NO. CONT./RENEW CONT.
Specifies whether frame numbers are assigned
consecutively from previous numbers or begin again.
USB MODE
¶/qWEB/®
¶
¶: DSC (Mass storage device) mode
Provides a simple way to read images from an xD-Picture
Card and store images onto an xD-Picture Card.
q WEB: WEB Camera
Allows you to conduct videoconferencing sessions between
PCs connected to the Internet. ✽ Windows XP SP1 only
®: PictBridge
If a printer that supports PictBridge is available, images can
be printed by connecting the camera directly to the
PictBridge-compatible printer without using a computer.
ENGLISH Specifies the language used for LCD monitor display.
VIDEO SYSTEM
NTSC/PAL – Specifies whether video output is set to NTSC or PAL.
q RESET
OK –
Resets all the camera settings (other than the DATE/TIME,
TIME DIFFERENCE, LANG. and VIDEO SYSTEM) to the
factory default values set at shipment. A confirmation
message appears when you press “c”. To reset the camera
settings, press the “MENU/OK” button again.
Settings Display
Factory default
Explanation
page
17DISCHARGE OK – Discharges rechargeable batteries.
85
~
CCD-RAW
OFF/ON OFF
Sets the image quality to CCD-RAW. Because no image
processing is performed on the camera for CCD-RAW
images, images must be processed on a PC.
 Loading...