6. RC1840 Equipment Installations
6-2
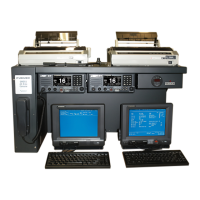
6.2 DP-6 NBDP Terminal
Refer to the Installation Manual, DP-6
6.2.1 Main Unit
1) Mount the DP-6 Main Unit. Route the provided cables from the console to the
Main Unit. The following cables are provided in the console for the Main Unit
(Refer to Pg. 9 of the Installation Manual, NBDP Terminal DP-6)
a) Power cable
b) NMEA cable
c) Remote A cable
d) Remote B cable
e) Terminal cable
(This is a DB-9M to DB-9F and is provided in the DP-6 Terminal, IB581/6, box.)
2) Attach the provided ground wire between the rear of the Main Unit and the
ship’s ground system.
6.2.2 Terminal Unit
1) Install the DP-6 Terminal hanger bracket on the left side of the console.
2) Attach the provided cables to the Terminal.
(Refer to Pg. 9 of the Installation Manual, NBDP Terminal DP-6)
a) Power Cable
b) Printer Cable
c) Terminal Cable-COM1
(This is the other end of the DB-9M to DB-9F connected to the Main Unit.)
d) Keyboard
3) Attach the provided ground wire between the rear of the Terminal and the
ship’s ground system.
4) Set the Terminal into the hanger bracket and secure using the Terminal knobs.
5) Mount the keyboard with the provided velcro fasteners.
 Loading...