4. Check that all parts for the installation are included.
See
Product overview on page 5
.
• Robotic lawnmower
• Charging station
• Loop wire for boundary loop and guide wire
• Power supply
• Low voltage cable
• Pegs
• Connectors for the loop wire
• Screws for the charging station
• Measurement gauge
• Couplers for the loop wire
• Cable markers
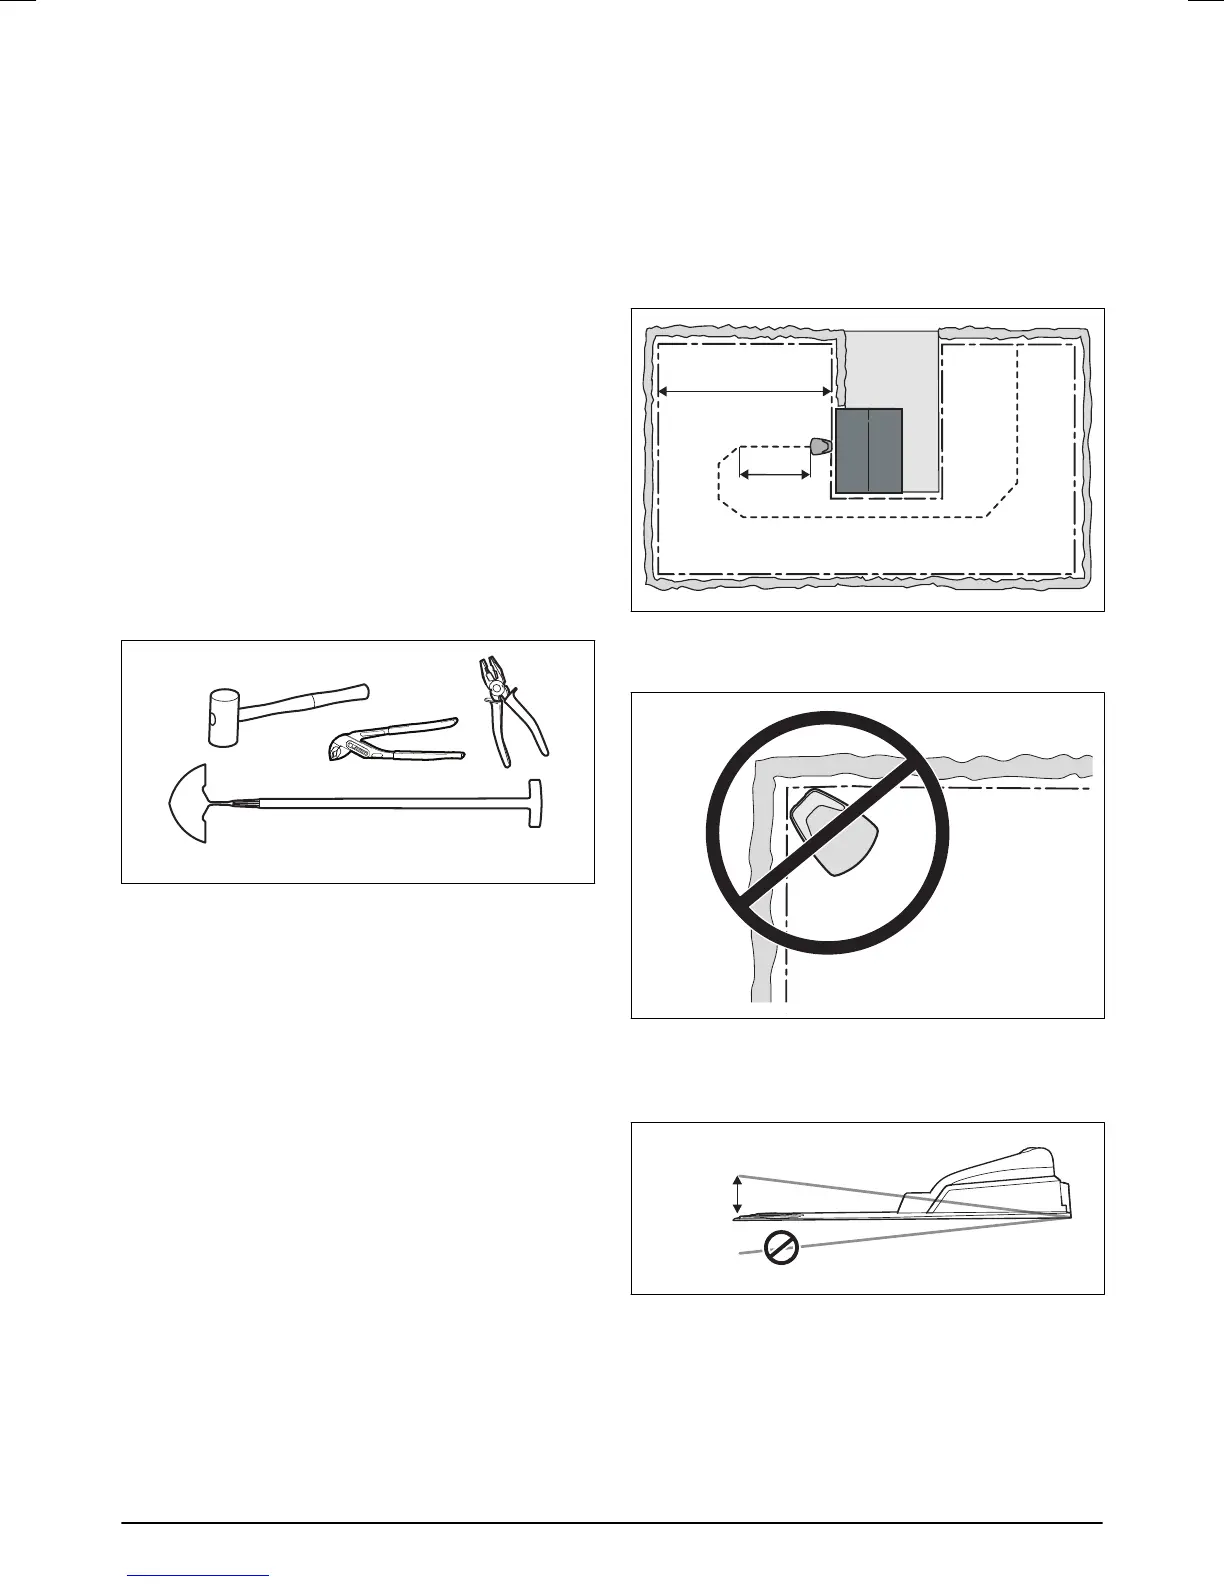
3.2.1 Installation tools
During installation you will also need:
• Hammer/plastic mallet (to simplify putting the pegs
in the ground).
• Combination pliers for cutting the boundary wire and
pressing the connectors together.
• Polygrip (for pressing the couplers together).
• Edge cutter/straight spade if the boundary wire must
be buried.
3.3 Charging station
The charging station has 3 functions:
• To send control signals along the boundary wire.
• To send control signals in the guide wire so that the
robotic lawnmower can find the charging station.
• To charge the robotic lawnmower battery.
3.3.1 Best charging station location
Take the following aspects into consideration when
identifying the best location for the charging station:
• Allow minimum 3 m of free space in front of the
charging station.
• It must be possible to lay minimum 1.5 m of
boundary wire straight out to the right and left of the
charging station. Any other location can mean that
the robotic lawnmower enters the charging station
sideways and will have difficulty docking.
• It must be close to a wall socket. The supplied low
voltage cable is 10 m long.
• A level surface free from sharp objects to place the
charging station on.
• Protection from water spray for instance from
irrigation.
• Protection from direct sunlight.
• Place it in the lower part of a working area that has a
major slope.
• Possible requirement to keep the charging station
out of sight for outsiders.
The charging station must be positioned with free space
in front of it (minimum 3 m). It should also be centrally
placed in the working area to make it easier for the
robotic lawnmower to reach all areas in the working
area.
Do not put the charging station in confined spaces or in
a corner. This can make it difficult for the robotic mower
to find the charging station.
The charging station must be positioned on relatively
level ground. The front end of the charging station
cannot be positioned higher or lower than the back end
according to picture below.

 Loading...