5
INITIAL SETUP:
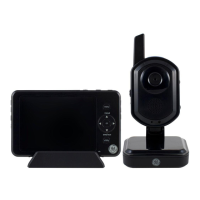
CAMERA
NOTE: Before use, remove the plastic fi lm protecting the night
vision LEDs (around lens).
Supply power to the camera using one of the following options:
• AC Adapter-
1. Plug-in one of the two AC power adapters into an
electrical outlet.
2. Insert the other end of the power adapter into the base
of the camera.
3. Locate the power switch on the left side of the camera.
4. Slide the power switch to the ‘on’ position. The power LED
will illuminate green below the OFF position.
• AA Batteries-
1. Locate the rear battery compartment underneath
the base of the camera.
2. Push the tab towards the batteries to release the cover.
3. Insert the batteries, following the polarity diagram shown
inside the battery compartment.
4. Locate the power switch on the left side of the camera.
5. Slide the power switch to the ‘on’ position. The power LED
will illuminate green below the OFF position.
NOTE: A fl ashing POWER LED indicates a low battery.
Special Note: In the event of a power outage, having standard AA
batteries installed in the camera WILL NOT act as a ‘battery backup’
for the absence of AC power. An optional rechargeable LI-polymer
battery pack is available that WILL serve as a battery backup during
a power outage. Optional rechargeable Li-polymer battery packs
can be ordered online at www.jascoproducts.com or by contacting
our sales department at 800-654-8483.
Camera Placement - Built-in Tabletop Stand and/or Wall Mount
NOTE: It is recommended to complete the ‘Initial Setup’ procedures
for the monitor before proceeding with mounting the camera.
To simplify the mounting process, a custom wall mounting plate is
included with the mounting hardware.
1. After selecting an ideal location, use the supplied mount as a
template. Drill 3/16” holes where indicated.
2. Insert wall anchors (unless screwing directly into a stud).
3. Secure the mounting plate to the wall.
4. Disconnect AC power adapter (if connected).
5. Slide the base of the camera onto the mounting plate.
6. Connect the AC power adapter.
Notes on Installation: For a cleaner-looking installation, cord
management clips are available for securing your power cords
along walls and baseboards. Special power cable extension cords
are available for in-wall rated installation. A maximum of (2) cables
can be used (approximately 10 ft each). To order, please visit
www.jascoproducts.com or contact our sales department at
800-654-8483.
MONITOR
NOTE: Before use, remove the plastic fi lm protecting the screen.
Supply power to the monitor using one of the following options:
• AC Adapter into Monitor-
1. Plug-in one of the two AC power adapters into an
electrical outlet.
2. Insert the other end of the AC power adapter into the right
side of the monitor.
Tabletop
stand
Wall
mount
wall
mounting
plate
CAUTION
Batteries may leak harmful liquids or
ignitable materials or explode causing
injury or product damage.
• Do not mix old and new or other
battery types
• Replace all batteries at the
same time
• Replace fully discharged batteries
immediately
• Remove batteries if product is to be
unused for extended period of time
WARNING
Strangulation Hazard
Children have been strangled in cords.
Keep away from children
• Keep all cords at least 3 ft. away
from infant cribs
• Do not use with household
extension cords
• Do not remove warning tags
 Loading...