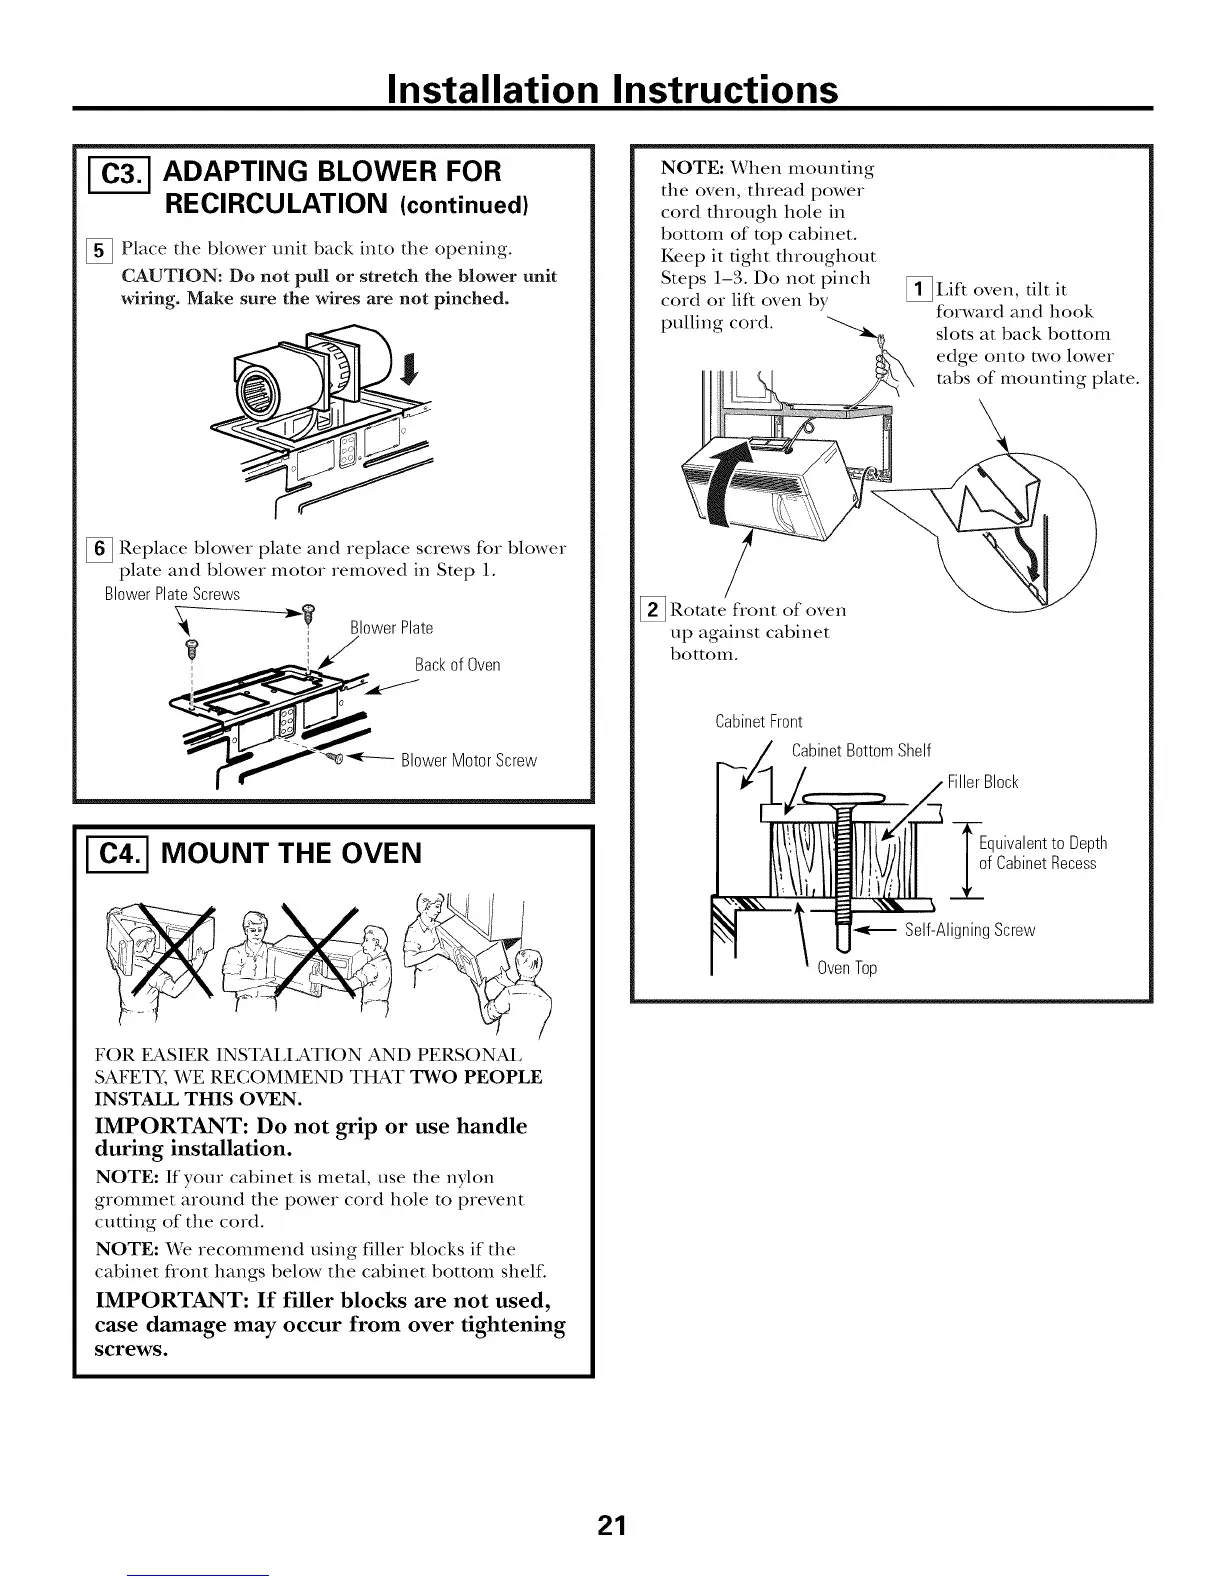
Installation Instructions
ADAPTING BLOWER FOR
= =
RECIRCULATION (continued)
_] Place the blower unit back into the opening°
CAUTION: Do not pull or stretch the blower unit
wiring. Make sure the wires are not pinched.
[] Replace blower plate and replace screws for blower
plate and blower motor removed in Step 1.
Blower Plate Screws
BlowerPlate
,j
i Backof Oven
---- Blower MotorScrew
I-_ MOUNT THE OVEN
FOR EASIER INSTALIzATION AND PERSONAL
SAFETY, WE RECOMMEND THAT TWO PEOPLE
INSTALL THIS OVEN.
IMPORTANT: Do not grip or use handle
during installation.
NOTE: If your cabinet is metal, use tim nylon
grommet around the power cord hole to prevent
cutting of the cord.
NOTE: We recommend using fillet blocks if the
cabinet flont hangs below the cabinet bottom shelf.
IMPORTANT: If filler blocks are not used,
case damage may occur from over tightening
screws.
NOTE: When mounting
the oven, thread power
cord through hole in
bottom of top cabinet.
Keep it fight ttuoughout
Steps 1-3. Do not pinch
cord or lift oven by
pulling cord.
I,ift oven, tilt it
forward and hook
slots at back bottom
edge onto two lower
tabs of mounting plate.
_ Rotate flont of oven
up against cabinet
t)ottom.
CabinetFront
CabinetBottomShelf
Block
Equivalentto Depth
f CabinetRecess
Self-AligningScrew
OvenTop
21
 Loading...