2
1
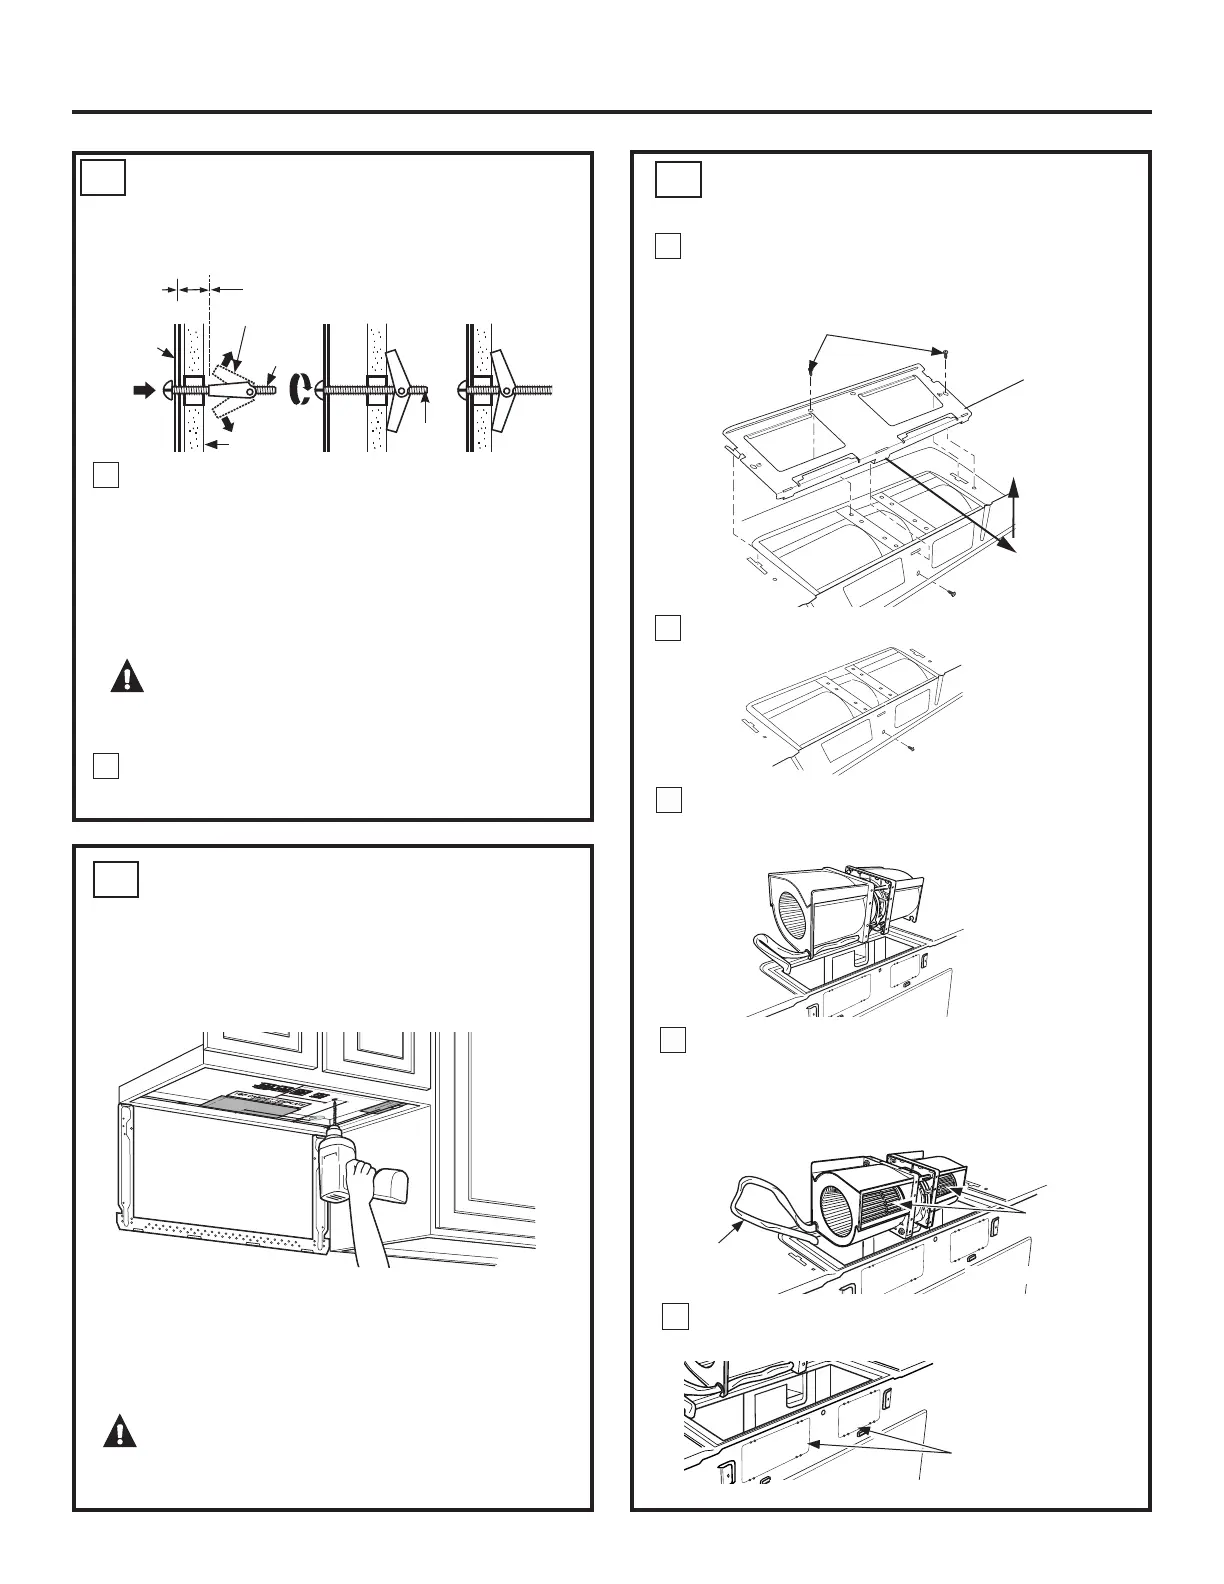
Remove the blower motor screws that holds the blower
plate to the microwave oven. Slide the plate toward the
back of the microwave and lift up to remove.
ADAPTING BLOWER FOR
OUTSIDE BACK EXHAUST
C4
Remove screw on the back of the unit.
21
USE TOP CABINET TEMPLATE
FOR PREPARATION OF TOP
CABINET
C3
Read the instructions on the TOP CABINET
TEMPLATE.
Tape it underneath the top cabinet.
Drill the holes, following the instructions on the
TOP CABINET TEMPLATE.
CAUTION::HDUVDIHW\JRJJOHVZKHQ
GULOOLQJKROHVLQWKHFDELQHWERWWRP
Wall
Mounting
Plate
Spacing for Toggles More
Than Wall Thickness
Toggle
Bolt
Toggle Wings
7RXVHWRJJOHEROWV
Bolt
End
Installation Instructions
You need to drill holes for the top support screws and
a hole large enough for the power cord to fit through.
Place the mounting plate against the wall and insert
the toggle wings into the holes in the wall to mount
the plate.
NOTE: Before tightening toggle bolts and wood screw,
make sure the tabs on the mounting plate touch
the bottom of the cabinet when pushed flush against
the wall and that the plate is properly centered under
the cabinet.
CAUTION:%HFDUHIXOWRDYRLGSLQFKLQJ
ILQJHUVEHWZHHQWKHEDFNRIWKHPRXQWLQJSODWHDQG
the wall.
Tighten all bolts. Pull the plate away from the wall
to help tighten the bolts.
3
4
Blower Plate
Blower Motor Screws
The fan needs to be turned 180 degrees to the right
to be in the correct orientation, keeping the blower
part of the fan where the air comes out at the top
of the fan. The wire needs to be reinsterted into the
cage housing once it has been oriented correctly.
4
Back of Microwave
Fan Blades
Wires
3
ATTACH THE MOUNTING PLATE
TO THE WALL cont
C2
Screw
Carefully remove fan from cavity. Remove the wire
from the notch at the bottom of the fan after it is
removed from the cavity.
5
Remove the knockout plates in the back of the unit
with snips.
Back of mircrowave
Knockout Plates:
Snip all 4 webs on
each knockout panel
and remove the metal
knockouts for rear airflow.
Please take care to
remove any sharp edges
created from removing
the knockout plates.
 Loading...