14
Instrucciones de Instalación
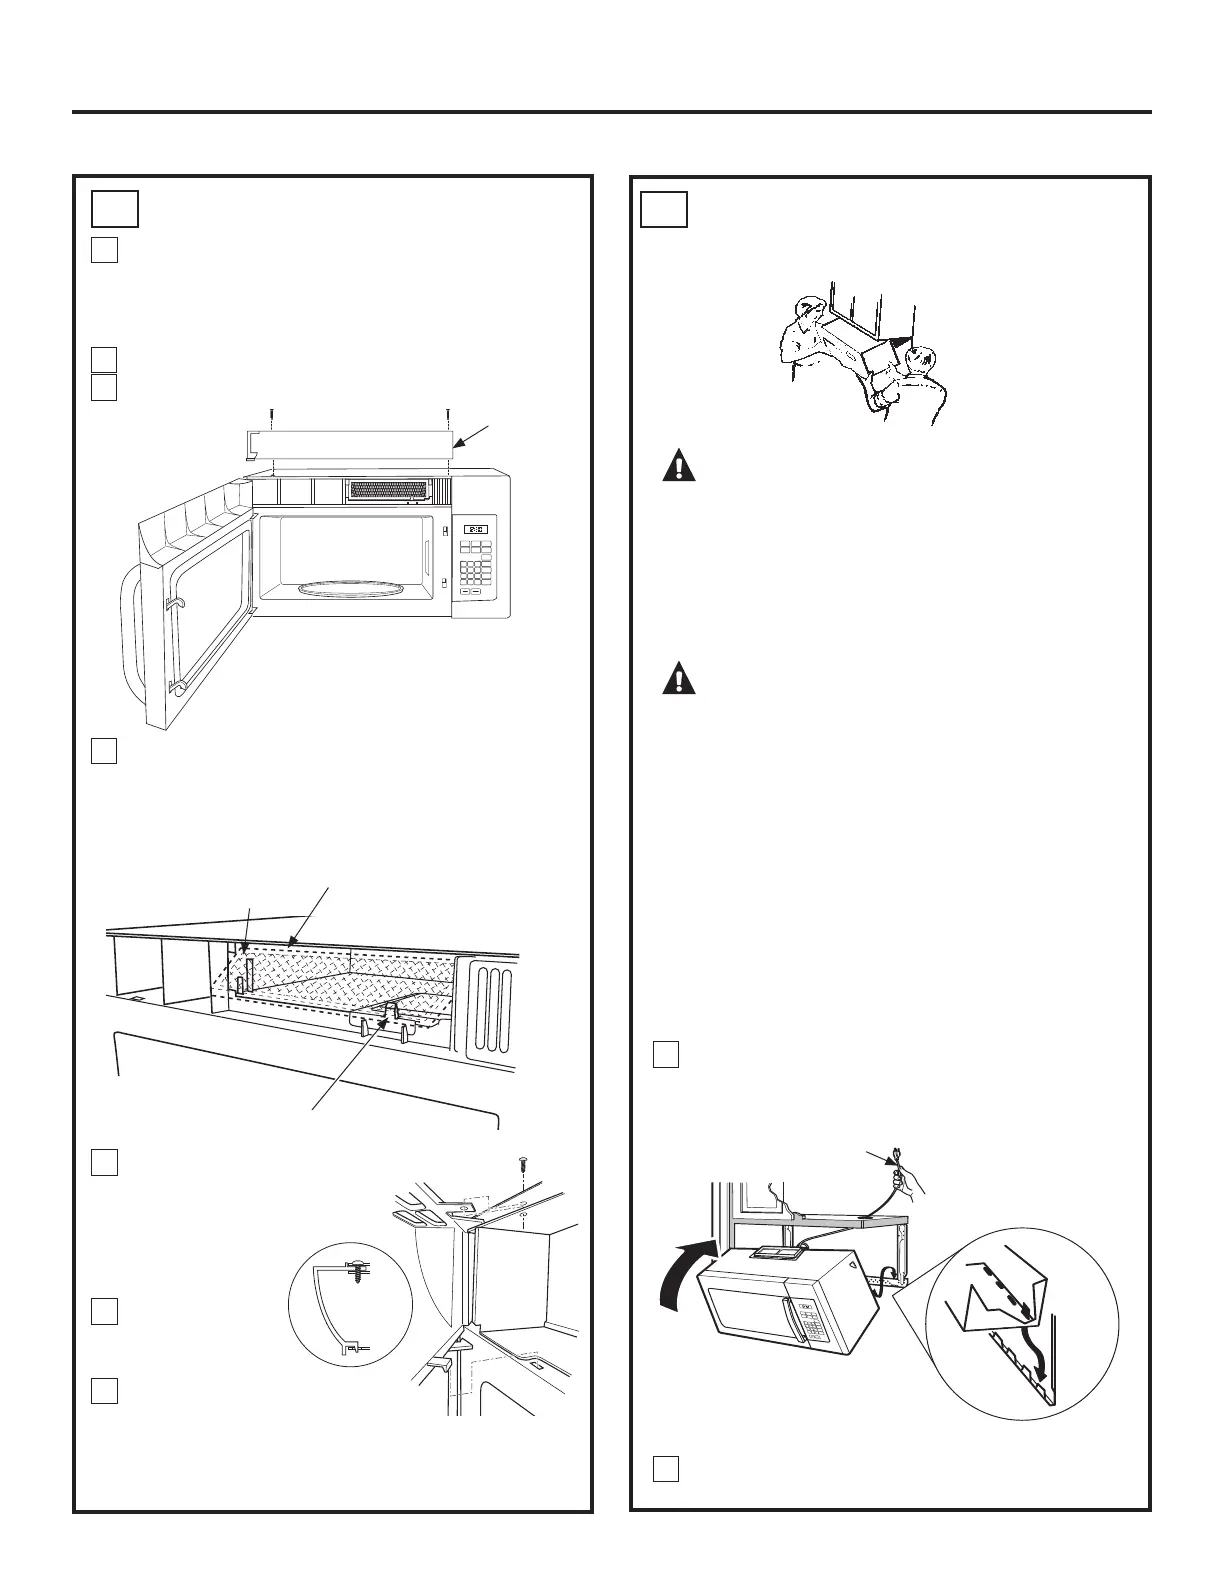
A4
PRECAUCIÓN: $ILQGHHYLWDUHO
riesgo de lesión personal (lesión en la espalda u
RWUDVOHVLRQHVGHELGRDXQSHVRH[FHVLYRGHOKRUQR
PLFURRQGDVRGDxRVVREUHODSURSLHGDGGHEHUi
contar con la ayuda de dos personas para instalar
HVWHKRUQRPLFURRQGDV
IMPORTANTE: No tome ni use la manija durante la
instalación.
ADVERTENCIA: Riesgo de Descarga
Eléctrica. Puede ocasionar lesiones o la muerte: Si
LQVWDODODXQLGDGFRQHQFLPHURVGHPHWDOFXEUDHO
DJXMHURGHOH[WUHPRGHOFDEOHGHVXPLQLVWURGH
FRUULHQWHFRQDLVODQWHSDUDHOFDEOHGHOVXPLQLVWUR
de corriente.
IMPORTANTE: Si no se usan bloqueos de filtro, se
podrán producir daños en la caja debido al ajuste
excesivo de los tornillos.
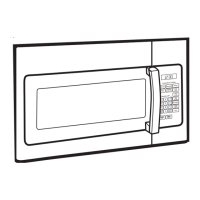
MONTE EL HORNO MICROONDAS
NOTA: Al montar el horno microondas, haga pasar
el cable de corriente a través del agujero de la parte
inferior del gabinete superior. Mantenga el mismo
apretado siguiendo los Pasos 1 a 3. Evite cortes en el
cable o que se levante el horno microondas por tirar
del cable.
Levante el horno microondas, incline el mismo hacia
adelante, y enganche las ranuras en el extremo
inferior trasero sobre las cuatro lengüetas inferiores
de la placa de montaje
Gire el frente del horno contra la parte inferior del
gabinete.
1
2
Po
pc
o
r
n
Co
n
v
e
n
ie
n
ce
Co
o
k
i
n
g
E
xp
r
e
ss
Co
o
k
P
o
t
a
t
o
S
ta
r
t
P
au
s
e
Ca
n
ce
l
Of
f
B
e
ve
r
a
g
e
R
eh
e
a
t
Se
t
C
l
o
c
k
T
u
r
n
t
ab
l
e
Su
r
f
a
c
e
L
i
gh
t
V
e
n
t
A
d
d
30
S
e
c
.
P
o
we
r
L
e
v
e
l
0
8
5
2
7
4
1
9
6
3
C
o
o
k
T
i
m
e
Defro
s
t
W
e
igh
t/
T
i
me
T
i
m
er
O
n
/O
f
f
Cable de Corriente
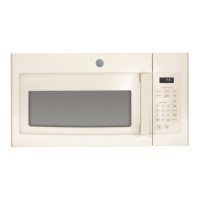
CÓMO INSTALAR EL FILTRO DE
CARBÓN
A3
Filtro (con detalles color ceniza
para mostrar las ranuras)
Lengüeta Inferior
Ranuras del
Microondas para un
Filtro en Cada Lado
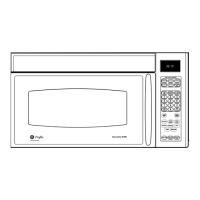
Retire los 2 tornillos en la parte superior del horno
microondas, justo arriba del panel de la rejilla, usando
un destornillador Phillips.
Si los dos tornillos no están accesibles, lea la sección
A6.
Abra la puerta.
Retire el rejilla.
Inserte la parte superior del filtro arriba y en las ranuras a
ambos lados de la parte interior de la abertura superior.
Una vez que haya despejado la lengüeta inferior, empuje
la parte inferior del filtro hasta que esté correctamente
colocada detrás de la lengüeta.
2
1
3
4
Popcorn
Convenience Cooking
Express Cook
Potato
Start
Pause
Cancel
Off
Beverage
Reheat
Set
Clock
Turntable
Surface
Light
Vent
Add
30 Sec.
Power
Level
0
8
5
2
7
4
1
9
6
3
Cook
Time
Defrost
Weight/Time
Timer
On/Off
Reemplace la
rejilla, insertando
la pestaña superior
de la rejilla en las
ranuras de la caja
como se muestra.
Reemplace los
dos tornillos
superiores.
Reemplace los
dos tornillos
superiores.
5
6
7
Rejilla
Rejilla
Rejilla
 Loading...