17
USE LA PLANTILLA DEL GABINETE
SUPERIOR PARA LA PREPARACIÓN
DEL GABINETE SUPERIOR
Es necesario que haga agujeros para los tornillos
de soporte de la parte superior, un agujero lo
suficientemente grande para que el cable de corriente
pueda pasar, y un disyuntor lo suficientemente grande
para el adaptador del escape.
B2
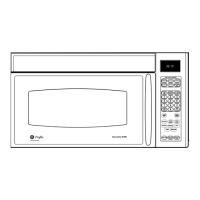
Lea las instrucciones sobre la PLANTILLA DEL
GABINETE SUPERIOR
Pegue la misma debajo del gabinete superior.
Haga los agujeros siguiendo las instrucciones en la
PLANTILLA DEL GABINETE SUPERIOR.
PRECAUCIÓN: Use gafas de
VHJXULGDGDOUHDOL]DUDJXMHURVHQODSDUWHLQIHULRU
GHOJDELQHWH
Instrucciones de Instalación
AJUSTE EL MOTOR DEL CALENTADOR
AJUSTE EL MOTOR DEL
CALENTADOR (cont.)
B3
B3
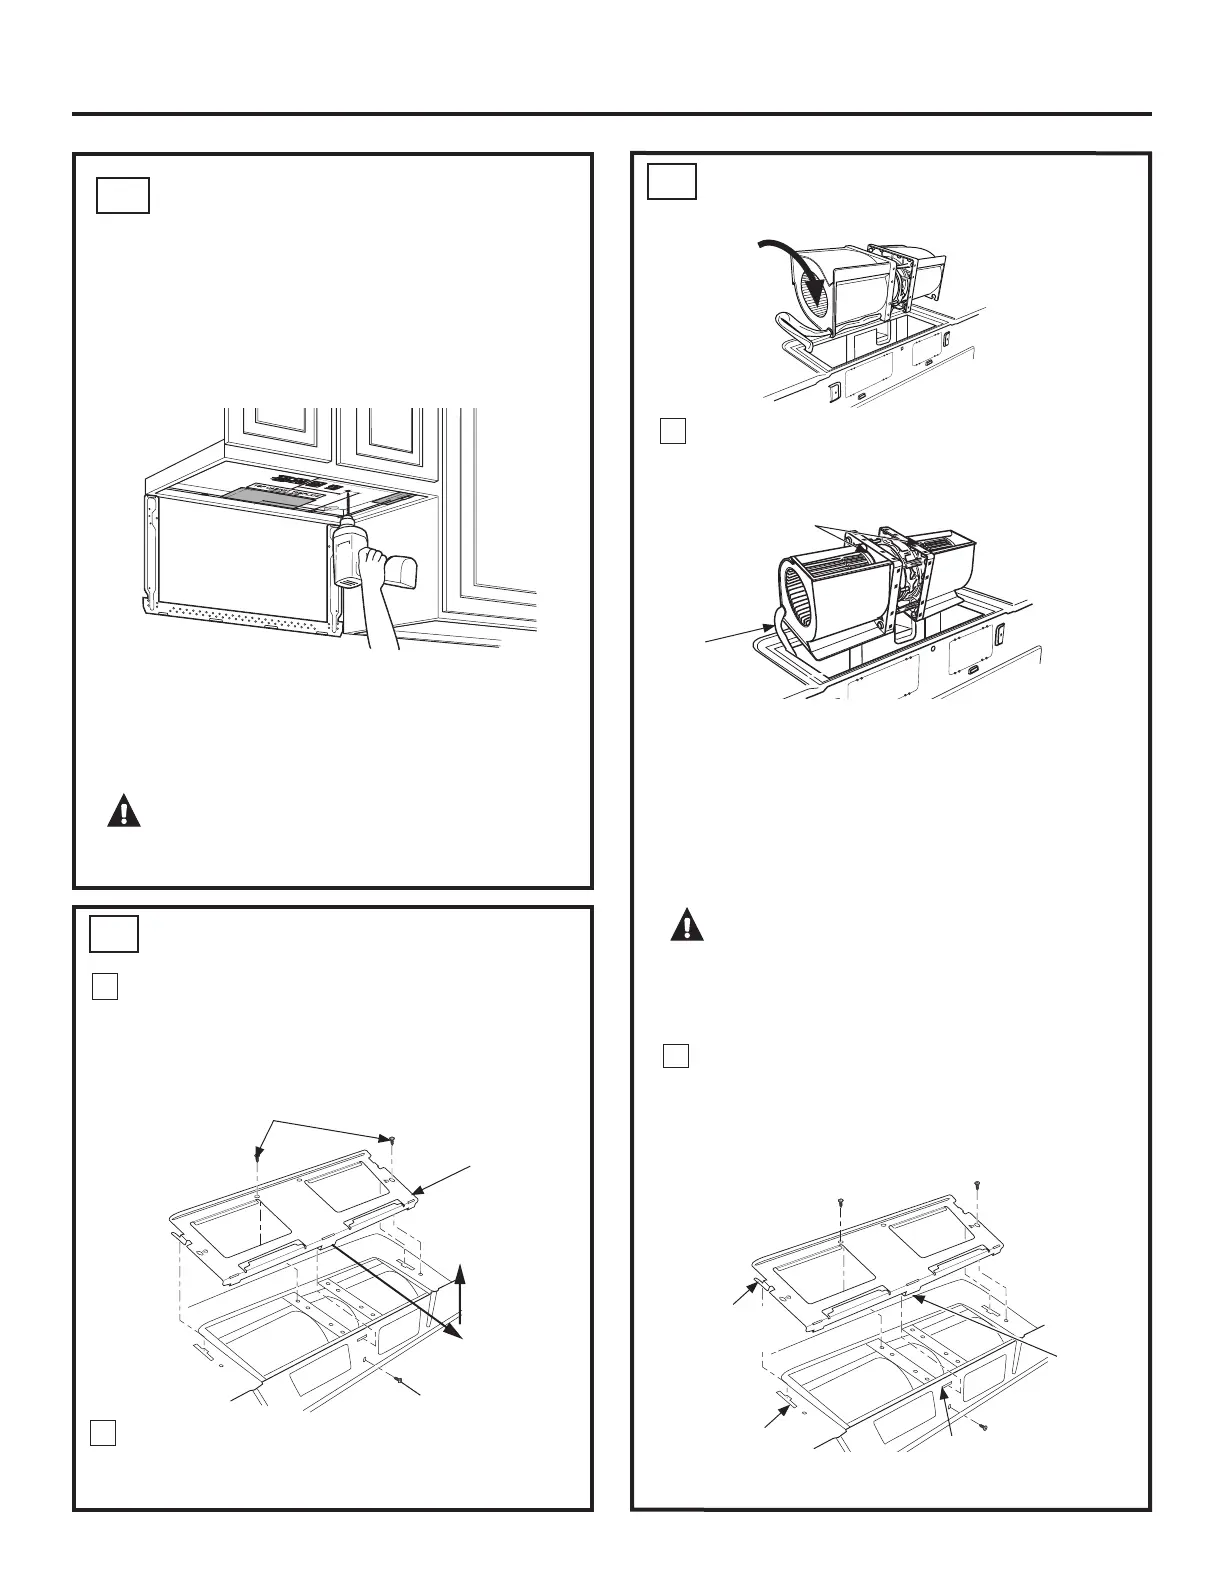
Retire los tornillos que sostienen la unidad del
calentador y los tornillos que aseguran el plato
calentador. Retire el plato calentador de la caja
externa, deslizando la misma hacia la parte trasera
del horno microondas y empujando hacia arriba.
Plato
Calentador
Tornillos del Motor
del Calentador
Tornillo del Motor
del Calentador
2
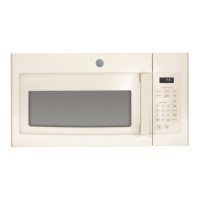
Con cuidado empuje hacia usted la unidad del
calentador. Los cables se extenderán lo suficiente
como para permitirle ajustar la unidad del calefactor.
Haga rodar el calentador de modo que las aberturas
de las paletas del ventilador enfrenten la parte
superior del horno. Vuelva a colocar el calentador en
la abertura.
Deslice el plato calentador nuevamente hacia el
microondas, colocando las lengüetas laterales en
las ranuras y empujando suavemente hasta que
la lengüeta trasera quede ubicada en la ranura
trasera. Reemplace los 3 tornillos.
NOTA: Asegúrese de que los cables permanezcan
dirigidos hacia las aberturas de la estructura del motor.
Para evitar daños sobre el cableado del motor del
ventilador, inserte el motor cuidadosamente de forma
tal que el cableado del motor del ventilador no tenga
contacto con el soporte del cable de encendido del
microondas.
3
4
Parte trasera
del Microondas
Gire 90°
Parte trasera
del Microondas
Paletas del
Ventilador
Cables
ADVERTENCIA: Existe riesgo de
descargas eléctricas que pueden ocasionar lesiones
RODPXHUWH1RHPSXMHQLH[WLHQGDHOFDEOHDGRGHOD
XQLGDGGHOVRSODGRU$VHJ~UHVHGHTXHORVFDEOHV
no posean cortes.
Lengüeta
Lateral
Ranura Lateral
Ranura Trasera
Lengüeta
Trasera
1
 Loading...