GEK - 105560
32
visualized by applying a voltage greater than 10 V to the line and the buses. The readout should be 0
mHz.
7.4.1 Voltage unit test
The setting by defect is used for the voltage difference; In this case 15 V.
Apply continuous voltage to input 52b (simulates open circuit breaker).
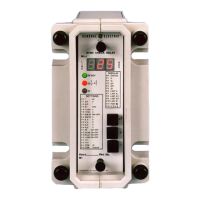
The Close enable contact should be closed and the red LED 52 lit up.
Reduce the voltage in the buses until the relay drops. At 44 V this drop should clearly occur, at which
time the voltage difference is 16 V (60 V - 44 V = 16 V), which is greater than the 15V of the setting.
When two independent supplies are not available, it is recommended to use a variable autotransformer
in order to be able to charge the bus voltage when so desired. If only voltages other than 60 V (63.5 V
or 110 V for example) are available, the test can also be done although keeping in mind that the relay
will trip when the voltage difference is less than the set value.
If a variable autotransformer is not available this unit can be tested by applying, for instance, 220 V to
the line and 127 V to the bus by means of a simple 220/127 V transformer. In this case, Close enable
will not be given, given that the voltage difference is very large. In order to generate Close enable, the
same voltage (220 V for example) is simply applied to the line and bus inputs.
7.4.2 Angle unit test
For the angle difference, the default setting of 15º should be kept.
Apply continuous voltage to input 52b (simulates open circuit breaker).
Apply 60 V to the line and bus inputs (these should be in phase).
The Close enable contacts should be closed and the red LED 52 (Close enable) lit up.
Lag the bus voltage until the relay drops. This drop should clearly occur at 17º, greater than the set
15º.
When two independent supplies are not available, the test is done by reversing the polarity of the bus
voltages, which means lagging it to 180º, and in which case the relay will not trip.
7.5 UNDERVOLTAGE UNIT
In order to carry out these tests the undervoltage unit should be enabled and the synchronism unit
disabled. This is done by putting setting 4-1 on OFF, setting 4-2 on ON and settings 4-3 and 4-4 on
OFF.
Apply 40 V both to line and bus. The middle segments corresponding to the line and bars will light up
on the relay screen when the relay is in readout in the idle position.
The relay should not trip.
Reduce the voltage to 20 V. The lower segments on the screen will be activated. The relay should
operate and the red LEDs 52 (Close enable) and 27 (undervoltage) lit up.
If there is no variable power supply available, the test can be done by applying and removing a known
voltage (for example 63 V).
 Loading...