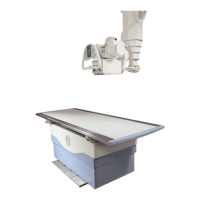
PROTEUS XR/a
GE MEDICAL SYSTEMS Operator Manual
REV 11 DIRECTION 2259724-100
6-8
3. Slide the clamping lock apart to insert a cassette between the clamps
(B).
4. Place the cassette in the tray and center the cassette with either the
centring scale or the centering notches in the clamp (C).
5. Push the clamping lock against the cassette(C).
6. Press down on the clamping lock handle (D). Push tray into receptor.
Note: To prevent damage to the cassette clamps locking assembly
always close it prior to inserting (pushing) the cassette tray into the
Bucky.
Note: Normally the cassette tray does not have to be completely removed
from the Bucky in order to load a cassette. Cassette may be
inserted in the tray by pulling the tray until movement is stopped by
the catch on the lower rear of the tray.
However, if it is desired to remove the tray from the Bucky, pull the
tray out until it is stopped by the catch, then press the catch
against the tray bottom and hold it while sliding the tray out.
Note: If select Table, not Table top, as the image receptor on the System
Console (refer to section “5-3-1 Technique Selection” in Chapter 5)
when taking exposure either with or without AEC, the cassette tray
must be inserted all the way into the Table Bucky. If the cassette
tray is not inserted all the way into the Table Bucky, the exposure
will be prohibited either with or without AEC.
6-4-3 Cassette Removal
To remove a cassette from the manual cassette tray, pull the tray out
fully by its handle. Pull up on the tightening lever and pull it back away
from the cassette. The cassette is now free to be removed.
6-4-4 Alignment
It is important that the X-ray tube unit be transversely centered accurately
with the center of the Bucky. Density cut off at the edges of the film and
appearances of grid patterns indicate inaccurate transverse alignment.
With an anti-diffusion grid vertical alignment is not critical, and tilted tube
techniques may be used without undue cut-off.
The center of the cassette tray handle is marked to indicate the
longitudinal center of the Bucky to the X-ray beam. Depending on the
position of the tabletop, the Bucky handle may need to be pulled out to
allow the collimator light to shine on it.
FOR TRAINING PURPOSES ONLY!
NOTE: Once downloaded, this document is UNCONTROLLED, and therefore may not be the latest revision. Always confirm revision status against a validated source (ie CDL).

 Loading...