PROTEUS XR/a
GE MEDICAL SYSTEMS Operator Manual
REV 11 DIRECTION 2259724-100
7-15
7-8 Eclipse Proteus Collimator
During operation of Eclipse Proteus Collimator, ensure that it is not damaged due
to collision, and adhere to the temperature range according to the Eclipse
Proteus Collimator Specifications.
7-8-1 Control Panel
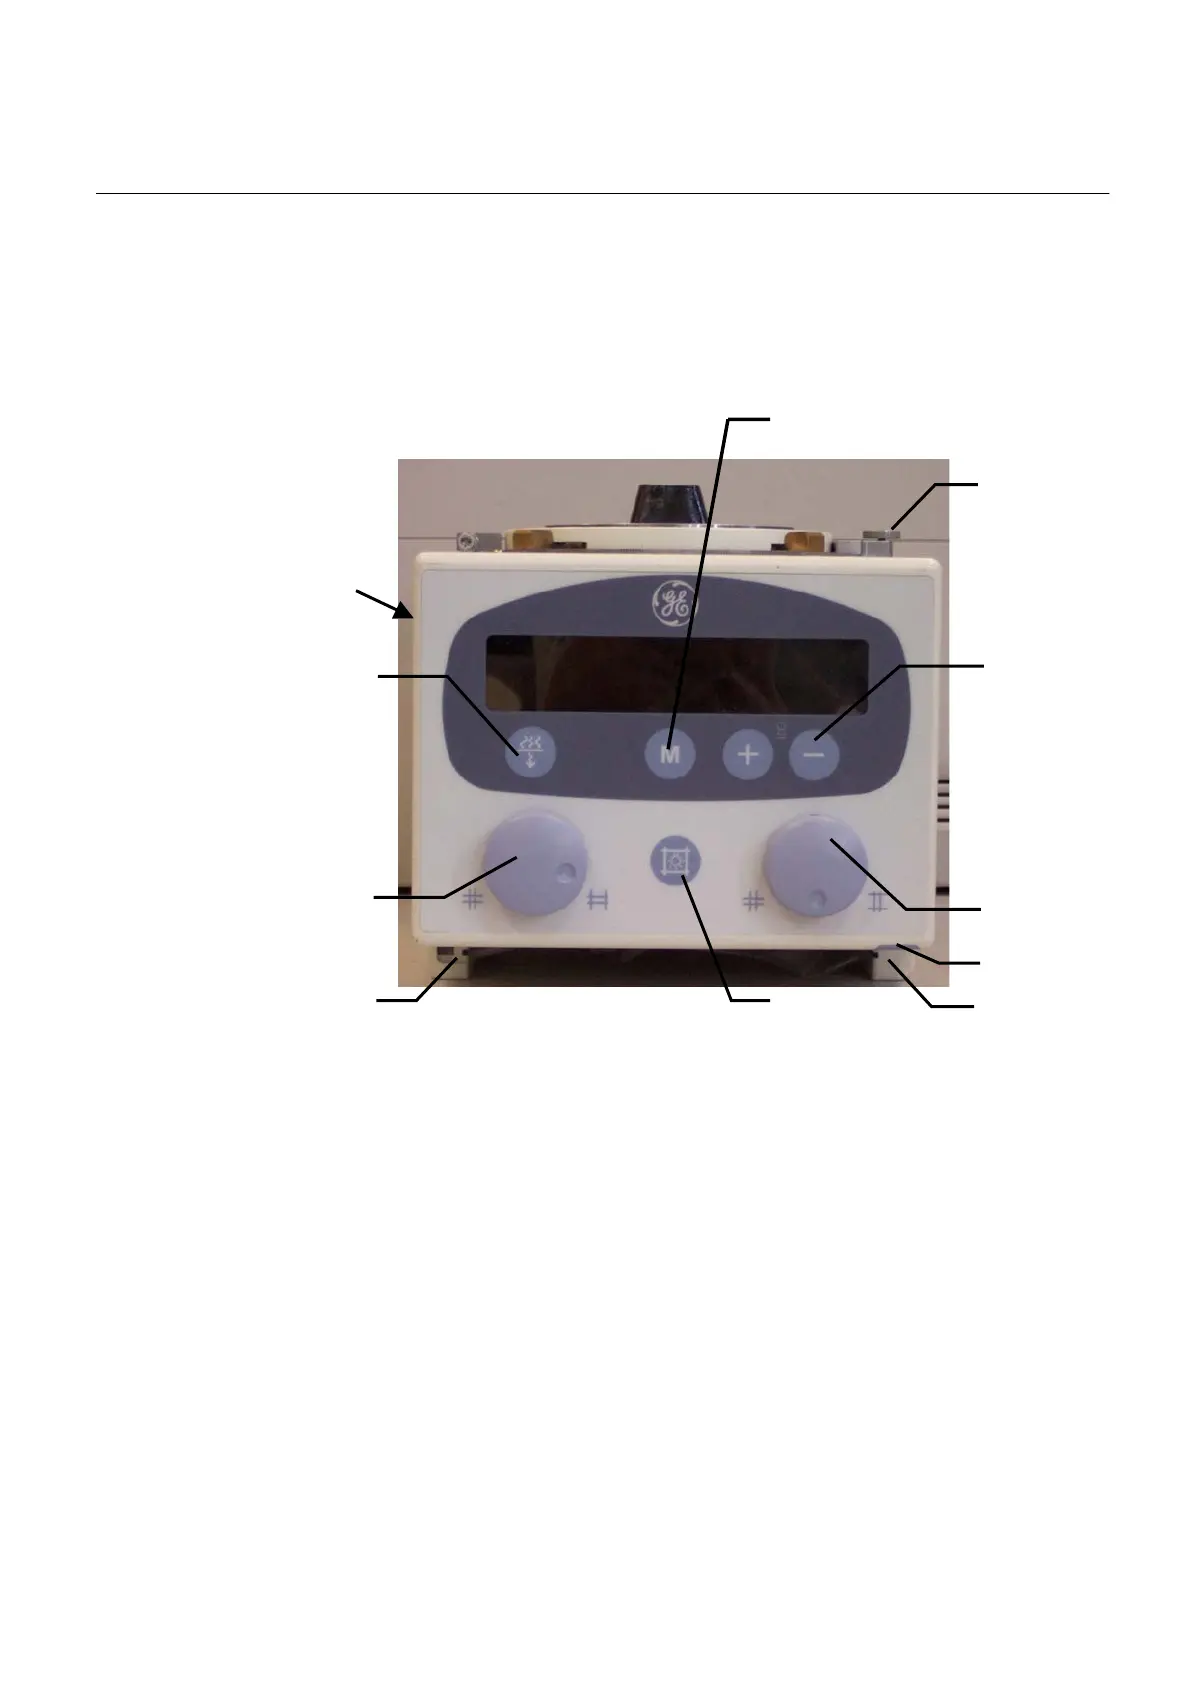
ILLUSTRATION 7-15
ECLIPSE PROTEUS COLLIMATOR
(1) Locking screw for ±90º of the collimator around the center beam axis. The
collimator stops only in 0° and ±90º position.
(2) Adjusting knob for format height collimation (Turning to the left closes the
collimator, turning to the right opens the collimator)
(3) Adjusting knob for format width collimation (Turning to the left closes the
collimator, turning to the right opens the collimator)
(4) X-ray field illumination (light localizer) and bucky centering light on/off. Cutoff
also performed automatically via a time switch.
(5) Measuring tape grip for SID measurement
- Take reading at bottom edge of collimator.
- The measuring tape has both a cm and an inch
graduation
(6) In manual or auto collimator mode, M button for resetting last exposure
format used when current blade width and height are larger than last setting
(7) Two accessory rails
(8) +, - key: I SID adjusting
- Press “+” key in manual collimator mode,
Collimator SID is set to 100cm, 150cm, and 180cm.
- Press “- “key in manual collimator mode,
Collimator SID is set to 180cm, 150cm, and 100cm.
(9) No use
1
2
3
4
5
7
7
8
9
Lamp housing
of light
localizer
6
FOR TRAINING PURPOSES ONLY!
NOTE: Once downloaded, this document is UNCONTROLLED, and therefore may not be the latest revision. Always confirm revision status against a validated source (ie CDL).

 Loading...