Repair
30 309574L
Motor Brushes
Brush Removal
2. Relieve pressure, page 9.
3. Remove motor cover, screw, and washers. Remove
inspection covers, screws, and gaskets from each
end of motor.
6. Inspect commutator for excessive pitting, burning, or
gouging. Black color on commutator is normal. Have
commutator resurfaced by qualified motor repair
shop if brushes wear too quickly.
7. Repeat for other side.
Brush Installation
Replace brushes worn to less than 1/2 in. (13
mm). Brushes wear differently on each side of
motor; check both sides. Brush Repair Kit 234037
is available.
1. Turn main power OFF . Disconnect power
supply.
WARNING
Read warnings, page 6. Wait 5 min for stored voltage
to discharge (E-30 and E-XP2 models only).
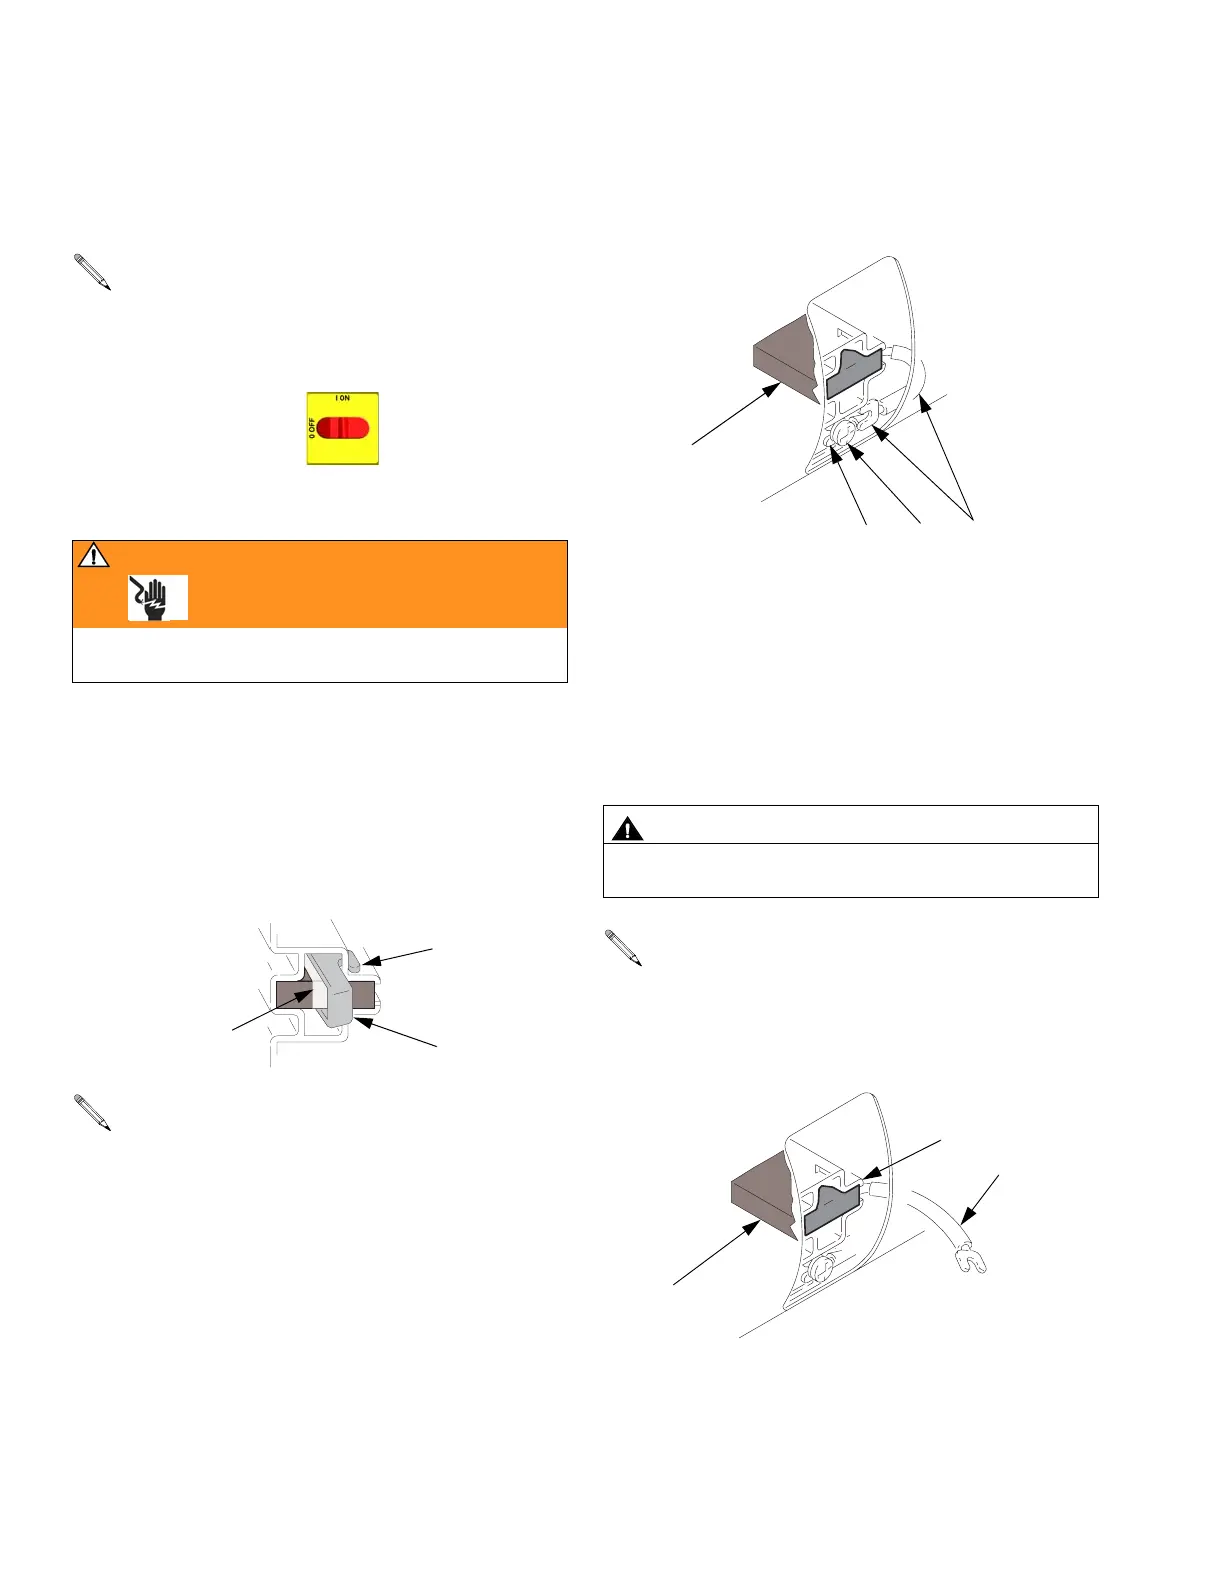
4. Push in spring clip (C) to release hooks (H) from
brush holder. Pull out clip and spring (S).
One brush has a wire on top for brush wear sig-
nal. Note which side of motor it is on. Unplug at
spade connector provided.
H
C
01227-2
S
5. Loosen terminal screw (R). Pull away brush lead (L),
being careful motor lead terminal (T) remains in
place. Remove and discard brush (B).
CAUTION
When installing brushes, follow steps carefully.
Improper installation damages parts beyond use.
Install brush with wires on same side of motor as
before. Plug spade terminal into connector.
1. Install new brush (B) so lead (L) is in long slot (D) of
holder.
RLT
B
01227-4
D
B
01227-5
L

 Loading...