34
3 INSTALL THE UNIT
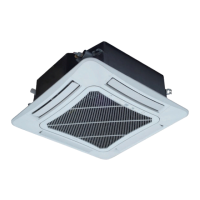
3�1 Install the rear panel
(1) Always mount the rear panel horizontally.
Due to the water tray of indoor unit has been
adopted the both-way drainage design, the outlet
of water tray should be adjusted slightly down
when installing, that is taking the outlet of the water
tray as the center of a circle, the included angle
between the evaporator and level should be 0 or
more, that is good for condensing water drainage.
(2) Fix the rear panel on the wall with screws.
(Where is pre-covered with plastic granula )
(3) Be sure that the rear panel has been xed rmly enough to withstand the weight of an adult of 60kg,
further more, the weight should be evenly shared by each screw.
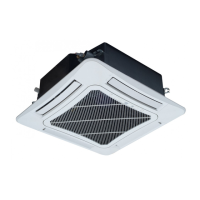
3�2 Install the piping hole
①
Ake the piping hole (Ф55) in the wall at a slight downward slant to the
outdoor side.
②
Insert the piping-hole sleeve into the hole to prevent the connection piping
and wiring from being damaged when passing through the hole.
3�3 Install the water drainage pipe
(1) For well draining, the drain hose should be placed at a downward slant.
(2) Do not wrench or bend the drain hose or ood its end by water.(As
show in Fig.6)
(3) When the long drainage hose passing through indoor, should wrap
the insulation materials.
Note:
When connecting the electric wire if the wire length is not enough,
please contact with the authorized service shop to buy a exclusive
electric wire that is long enough and the joint on the wire are not allowed.
● The electric wiring must be correctly connected, wrong connection
may cause spare parts malfunction.
● Tighten the terminal screw in order to prevent loose.
● After tighten the screw, slight pull the wire and conrm
whether is it rm or not.
● If the earth wire is wrong connection, that may cause
electric shock.
● The cover plate must be fixed, and tighten the
connection wire, if it is poor installed, that the dust, moisture
may enter in or the connection terminal will be affected by
outside force, and will cause re or electric shock.
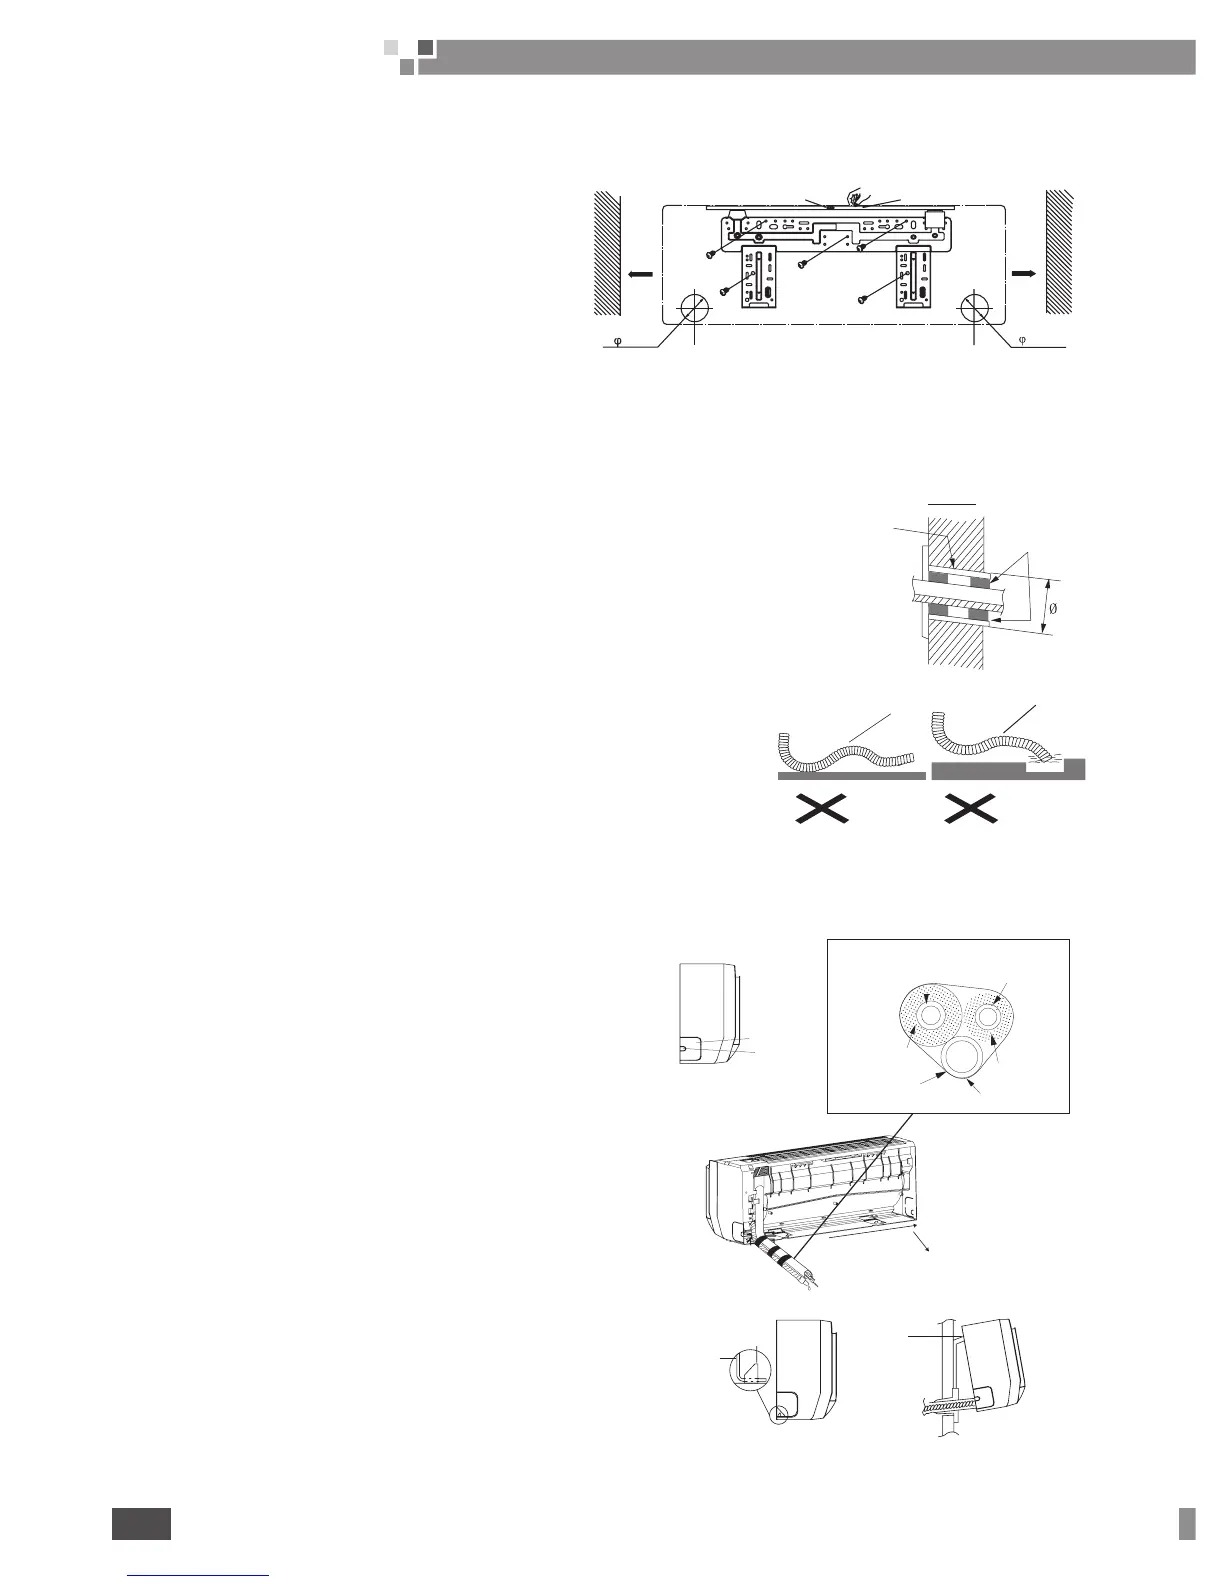
3�4 Install the unit
● The piping can be lead out from right, right rear, left ,left
rear.
(1) When routing the piping and wiring from the left or
right side of indoor unit, cut off the tailings from the chassis
in necessary(Show in Fig.7)
1) Cut off the tailings 1 when routing the wiring only;
2) Cut off the tailings 1 and tailings 2 when routing both
the wiring and piping.
(2) Take out the piping from body case, wrap the piping
electric wire, water pipe with tape and pull them through the
piping hole (As show in Fig.8)
(3) Hang the mounting slots of the unit on the upper tabs
of the rear panel and check if it is rm enough.(As show in
Fig.9)
(4) The height of the installed location should be 2.5 m or more from the oor.
mm051
mm55
mm55
mm051
Wall
Wall
Mark on the middle of it
Gradienter
Left
Right
(Rear piping hole)
(Rear piping hole)
Space
to the
wall
above
Space
to the
wall
above
Fig. 5
 Loading...