84
for North America
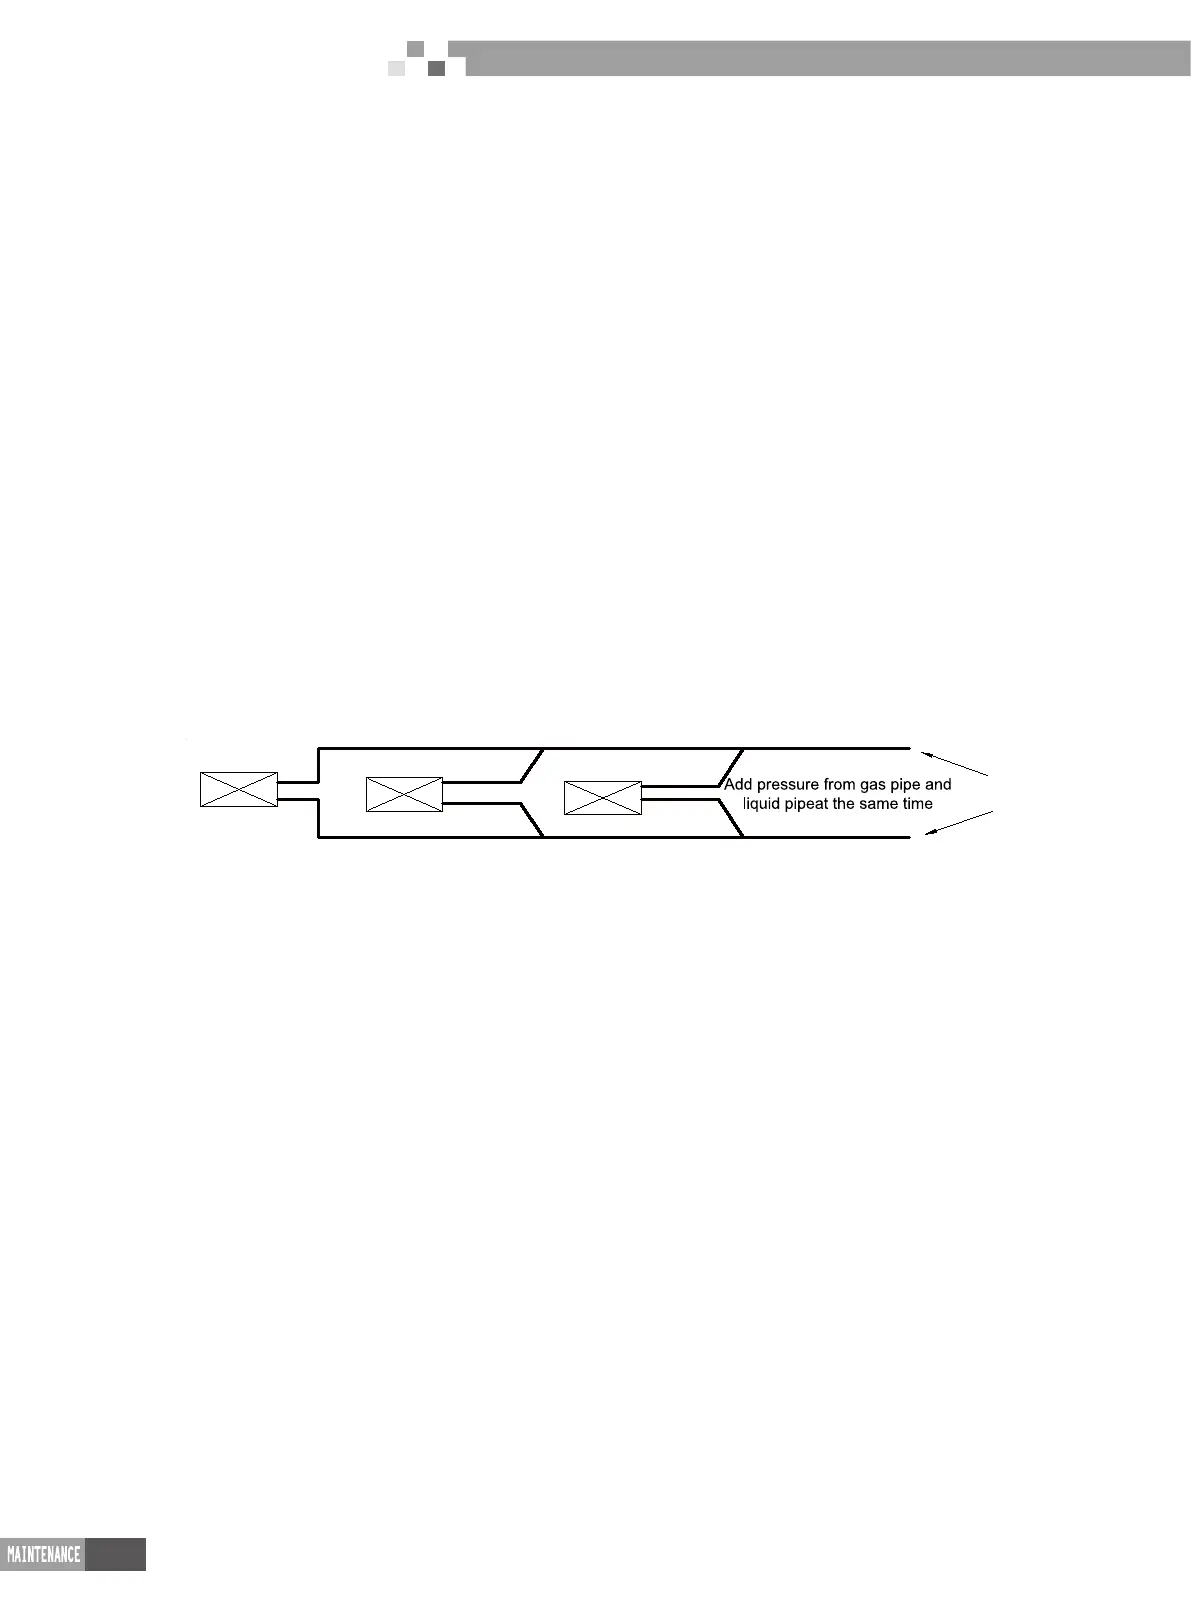
Step 1: Increase pressure slowly to 0.5MPa, stop for 5min and then check the gas leakage.
Big leakage may be found out;
Step 2
:
Increase pressure slowly to 1.5MPa, stop for 5min to check the airtightness. Small
leakage may be found out;
Step 3:
Increase pressure slowly to 4.15MPa for R410A slowly (3.0MPa for R22
refrigerant system), stop for 5min and perform the strength test. Minor leakage or
sand hole may be found. Increase pressure to test pressurem, keep it for 24h and
observe whether the pressure is decreasing. If not, the pressure is qualified.
5.4.3 Cautions
a
.The test manometer range for R410A should be 4.5MPa above (3.5MPa above for R22
refrigerant system);
b
.Record the data on manometerk, ambient temperature and test time at the same time;
c
d
.Pressure should be kept the same.
e
.If it needs to keep pressure for a long time, decrease the pressire lower than 0.55MPa
pr below. Long-time high pressure can lead to leakage at the welding position, which
may cause risk.
f
Note: Before airtightness test, all welding lines can’t be insulated and bundled.
6 Exploded View of Unit and Parts’ List
6.1 Exploed view for outdoor unit and parts’ list
(1) Model: GMV-HY36WLT/A-T(U)\GMV-HY48WLT/A-T(U)
Exploded view:
.Pressure modification: when temperature changes 1℃, the temperature will change
0.01MPa correspondingly.
.Before the airtightness for the pipeline of refrigerant is finished, do not allow to insulate
and bundle the welding positions and connection position of bellmouth of indoor unit.
Photovoltaic Direct-driven VRF
 Loading...