EasyManuals Logo
Home>HIKVISION>Security Camera>DS-2CD2432F-I

HIKVISION DS-2CD2432F-I Installation Manual

HIKVISION DS-2CD2432F-I
131 pages
To Next Page IconTo Next Page
To Previous Page IconTo Previous Page
Page #104 background imageLoading...
Page #104 background image
Installation Manual of Network Camera
103
Tilt Adjust Nut
Pan Adjust Nut
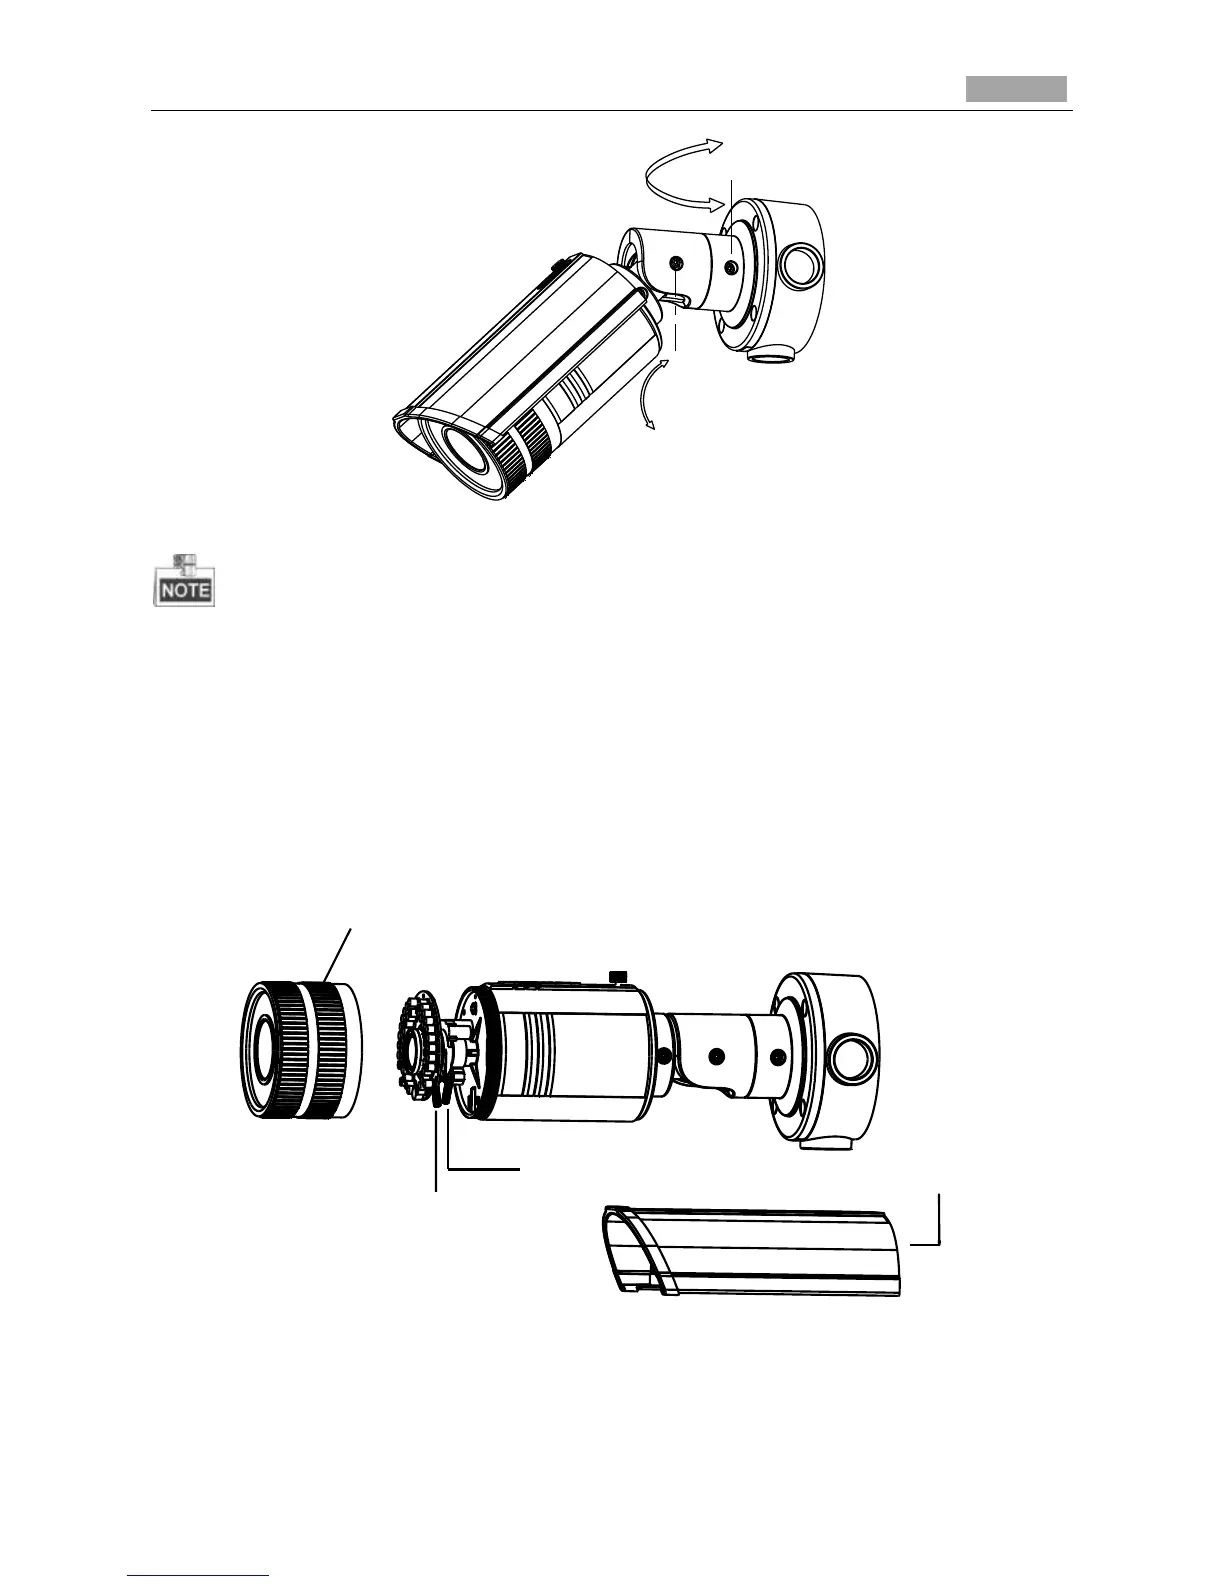
Figure 4-38 Adjust Monitoring Angle
Please loosen the screws slightly until you can adjust the camera and do not remove the
screws from the bracket.
After the monitoring angle is adjusted, you may need to install a water-proof rubber case
(purchased separately) to the foldable position of the bracket to protect it from water.
8. Loosen the lock screw on the sun shield and remove the sun shield.
9. Rotate to remove the front box from camera and adjust the zoom lever and focus lever to get
a clear image.
Zoom Lever
Remove the Sun Shield
Romove the Front Box
Focus Lever
Figure 4-39 Lens Adjustment
10. Reinstall the front box and the sun shield to finish the installation.
Lo-Call 1890 866 900
www.cctvireland.ie
shop@cctvireland.ie

Table of Contents

Other manuals for HIKVISION DS-2CD2432F-I

Questions and Answers:

Question and Answer IconNeed help?

Do you have a question about the HIKVISION DS-2CD2432F-I and is the answer not in the manual?

HIKVISION DS-2CD2432F-I Specifications

General IconGeneral
BrandHIKVISION
ModelDS-2CD2432F-I
CategorySecurity Camera
LanguageEnglish

Related product manuals