Installation Manual of Network Camera
4.4.2 Installation
Steps:
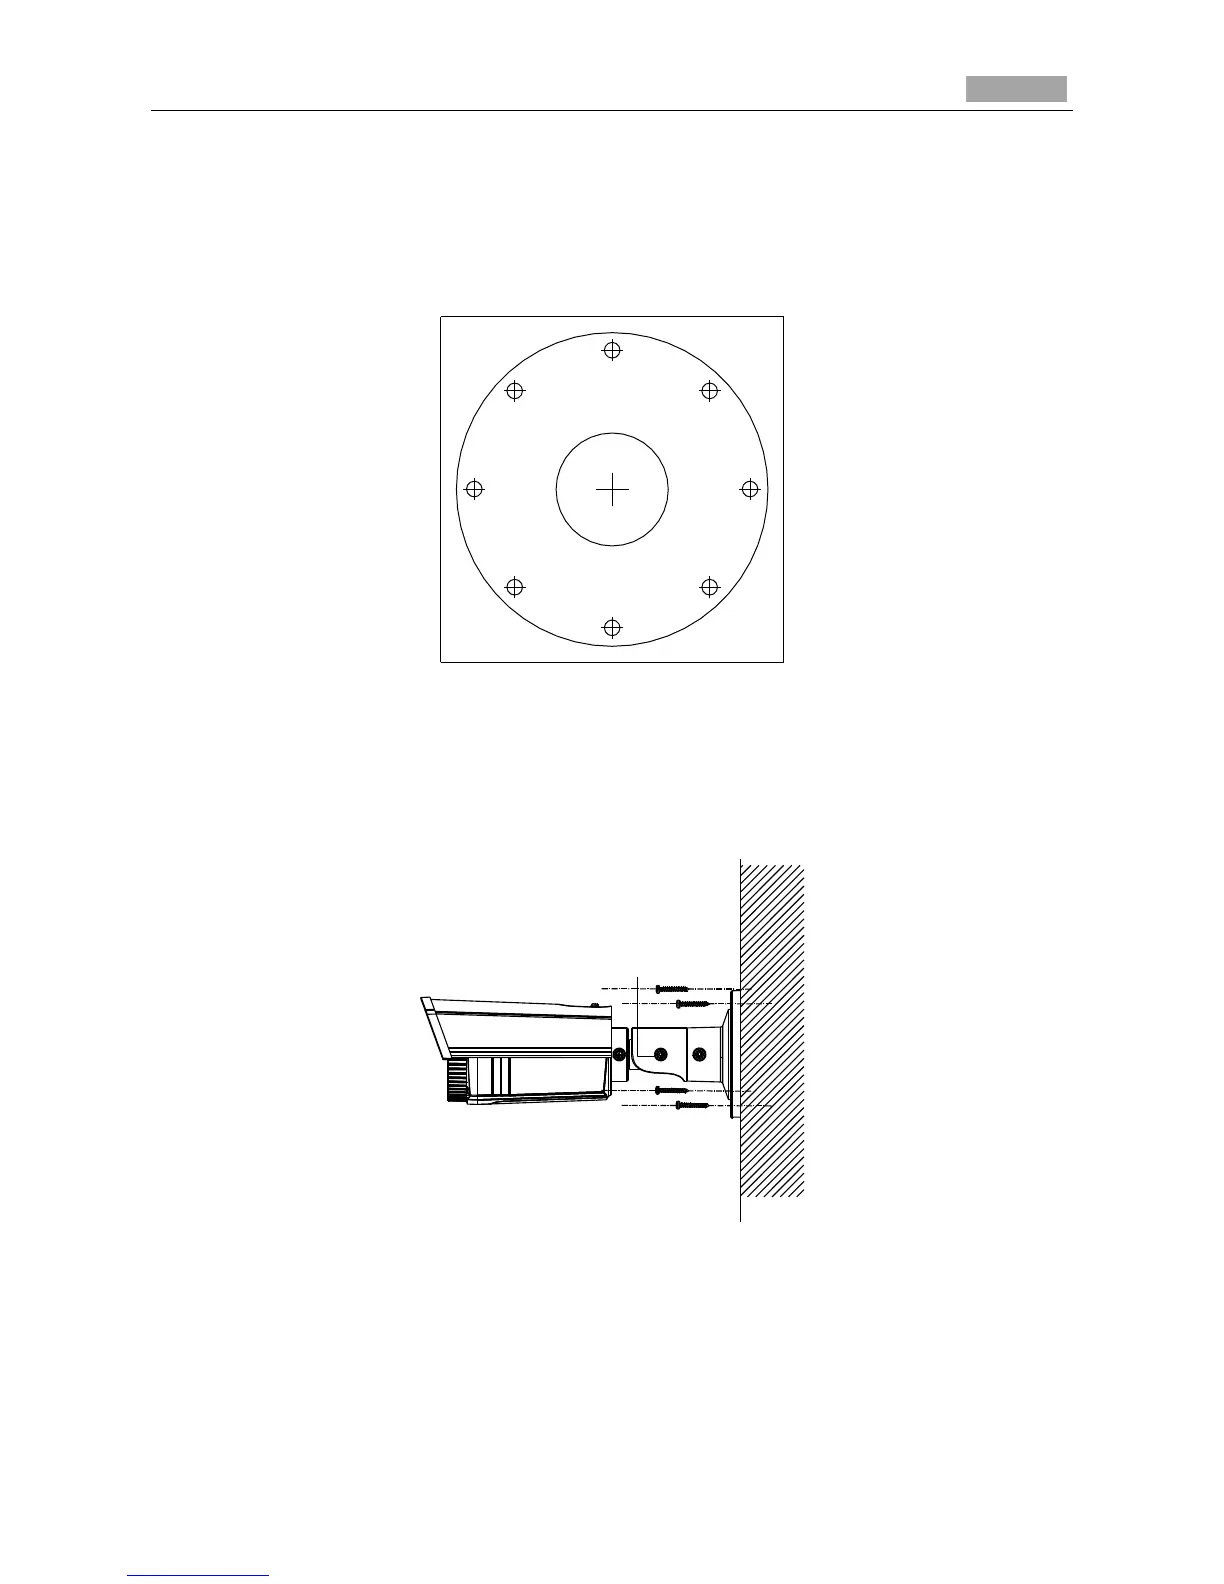
1. Drill the cable hole and the screw hole in the ceiling according to the supplied drill template.
2:Screw Hole for
Mounting Base
1:Screw Hole for
Bracket
2
1
Ceiling Mounting
2
2
2
1
1
1
Figure 4-20 The Drill Template
2. Hammer the supplied plastic expansion bolt into the screw holes.
3. Route the cables to the cable hole and connect the corresponding power cable and video cable
4. Fix the camera to the wall with the supplied screws
Figure 4-21 Fix the Camera to the Ceiling
5. Adjust the surveillance angle.
1). Loosen No.1 adjusting screw to adjust the panning position [0° ~ 360°].
2). Tighten No.1 adjusting screw.
3). Loosen the No.2 adjusting screw to adjust the tilting position [0° ~ 100°].
 Loading...