EasyManuals Logo
Home>HIKVISION>Security Camera>E Series

HIKVISION E Series Quick Guide

HIKVISION E Series
40 pages
To Next Page IconTo Next Page
To Previous Page IconTo Previous Page
Page #27 background imageLoading...
Page #27 background image
E Series Network Speed Dome·Quick Guide
26
Lock Screw
Lock
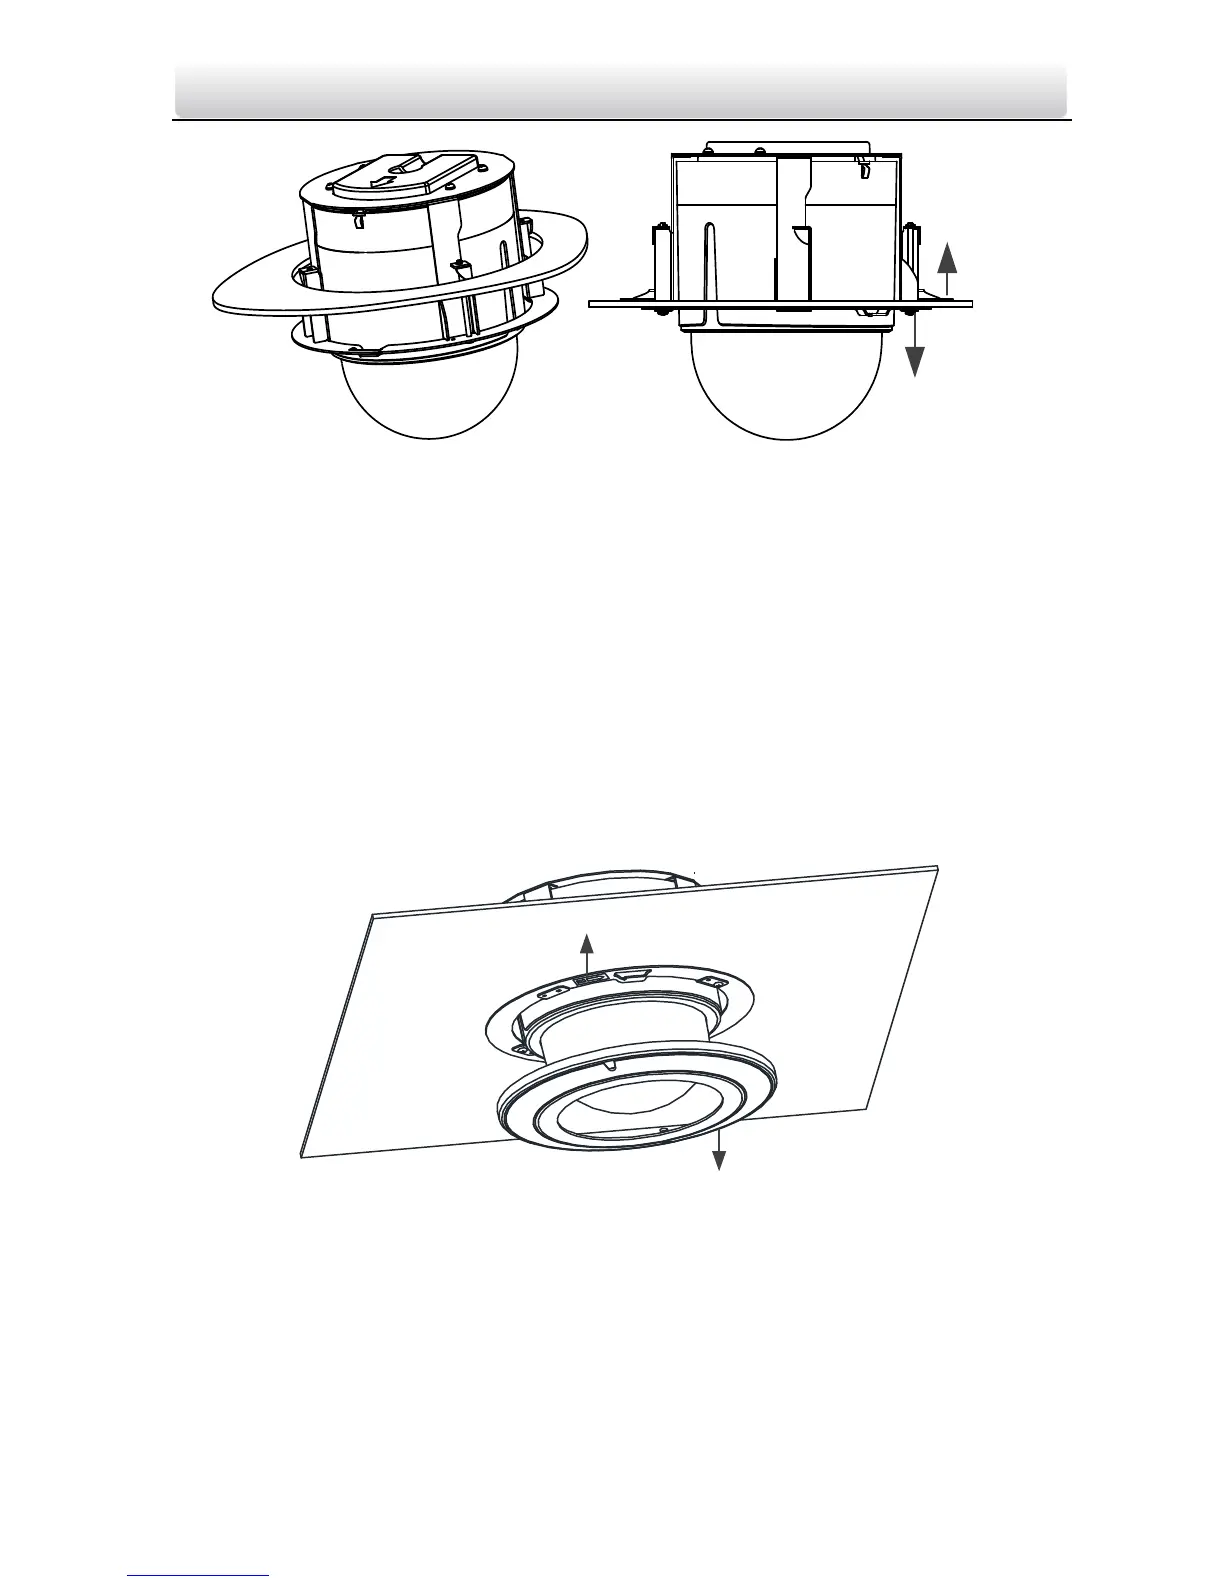
Figure 2-29 Install the back box
7. Install the trim ring.
Steps:
1). Attach the trim ring to the lower dome and align the triangular notch of the trim ring with
the arrow label on the in-ceiling mount.
2). After having firmly placed the trim ring to the ceiling, rotate the trim ring in the direction of
arrow to secure the trim ring in place.
Notes:
Please remove the protective film on the lower dome after the installation is finished.
In order to obtain clear video images, please wear the anti-static gloves when you install the
speed dome.
Trim Ring
Arrow Label
Figure 2-30 Install the Trim Ring
2.3 Ceiling Mounting
Notes:

Other manuals for HIKVISION E Series

Questions and Answers:

Question and Answer IconNeed help?

Do you have a question about the HIKVISION E Series and is the answer not in the manual?

HIKVISION E Series Specifications

General IconGeneral
BrandHIKVISION
ModelE Series
CategorySecurity Camera
LanguageEnglish

Related product manuals