The height of the space above the ceiling must be more than 250mm.
The ceiling must be with the thickness between 5 and 40mm.
The ceiling must be strong enough to withstand more than 4 times the weight of the dome and
its accessories.
2.3.1 Mini Network Speed Dome
Steps:
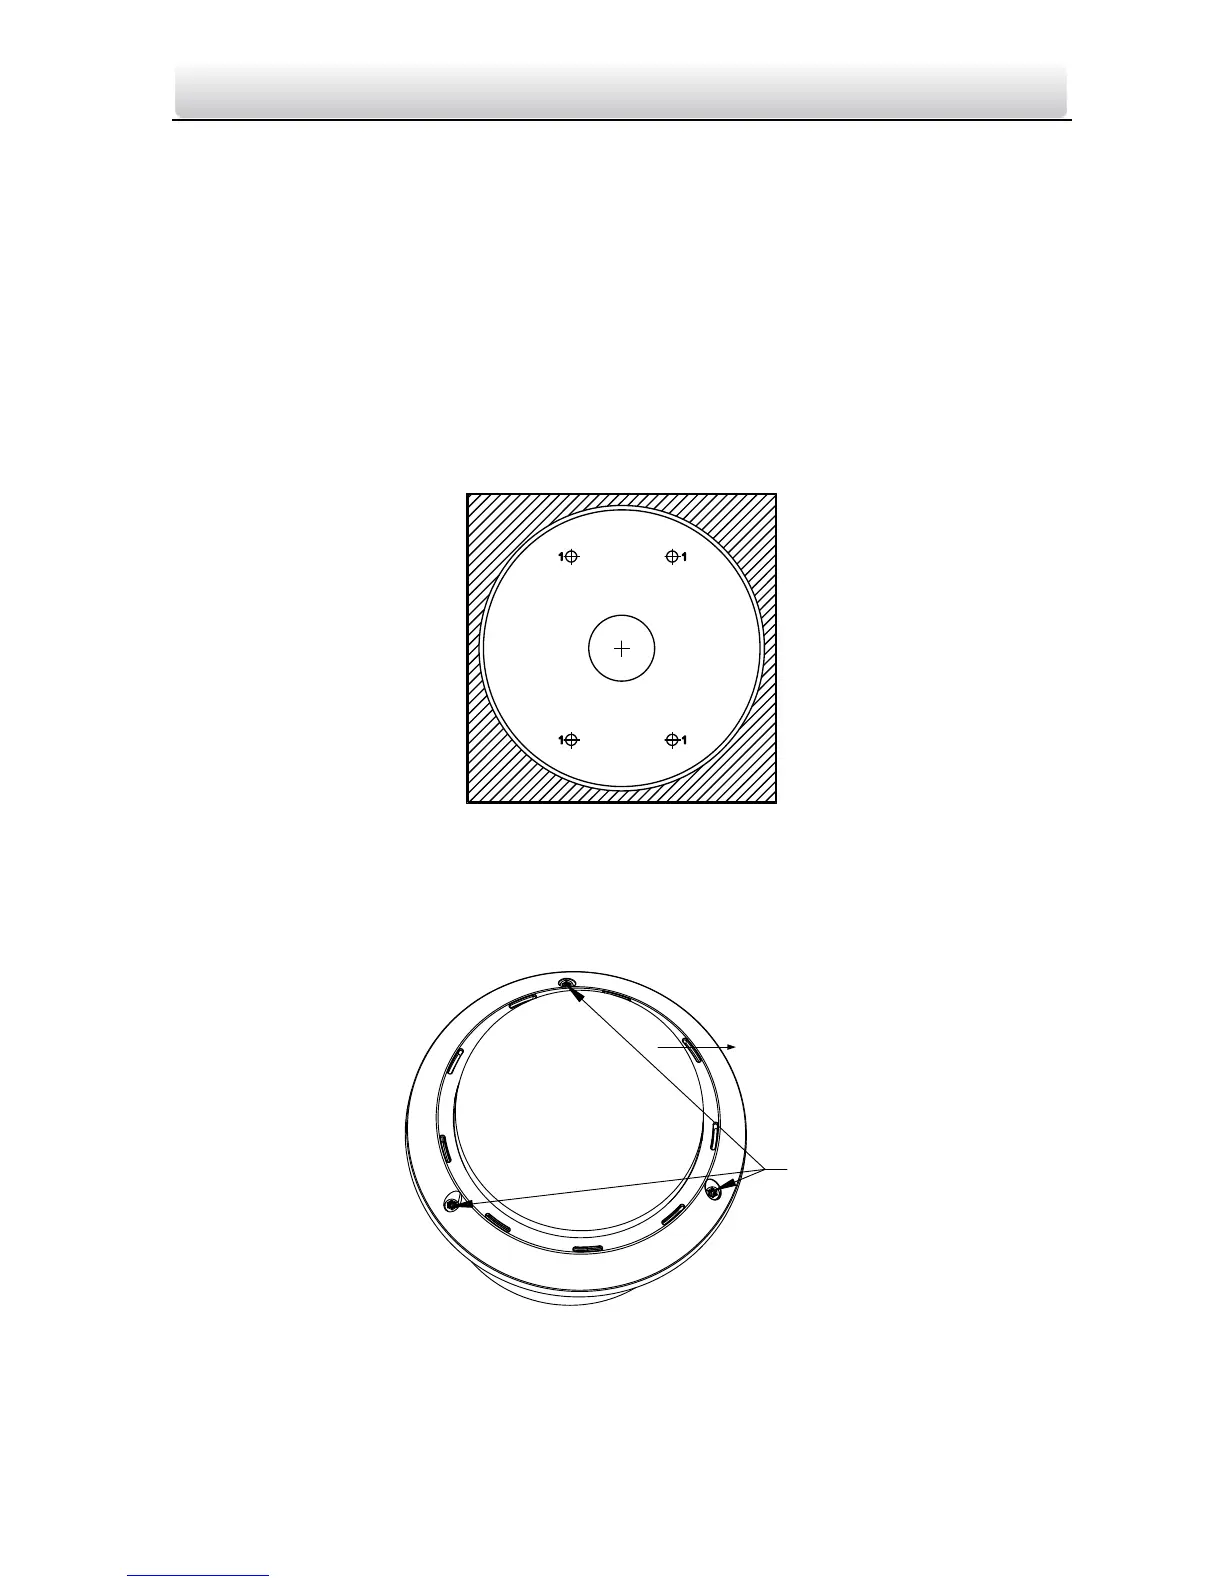
1. Drill Screw holes in the ceiling.
1). Attach the drill template to the ceiling where you need to install the speed dome.
2). Drill screw holes and a cable hole(optional) according to the drill template.
Figure 2-31 Drill Template
2. Dissemble the speed dome.
1). Loosen three screws as shown in the following figure.
2). Remove the lower dome.
Figure 2-32 Dissemble the Speed Dome
3. Remove the protective lens cover, foam and sticker from the dome drive as shown in Figure 2-33.
4. Attach lower dome to the back box, and secure it with screws.
 Loading...