Digital Video Recorder User Manual
73
POS: recording triggered by POS and alarm.
Step 2 Choose the camera you want to configure in the Camera drop-down list.
Step 3 Check the checkbox of Enable Schedule.
Step 4 Configure the record schedule.
Edit the schedule
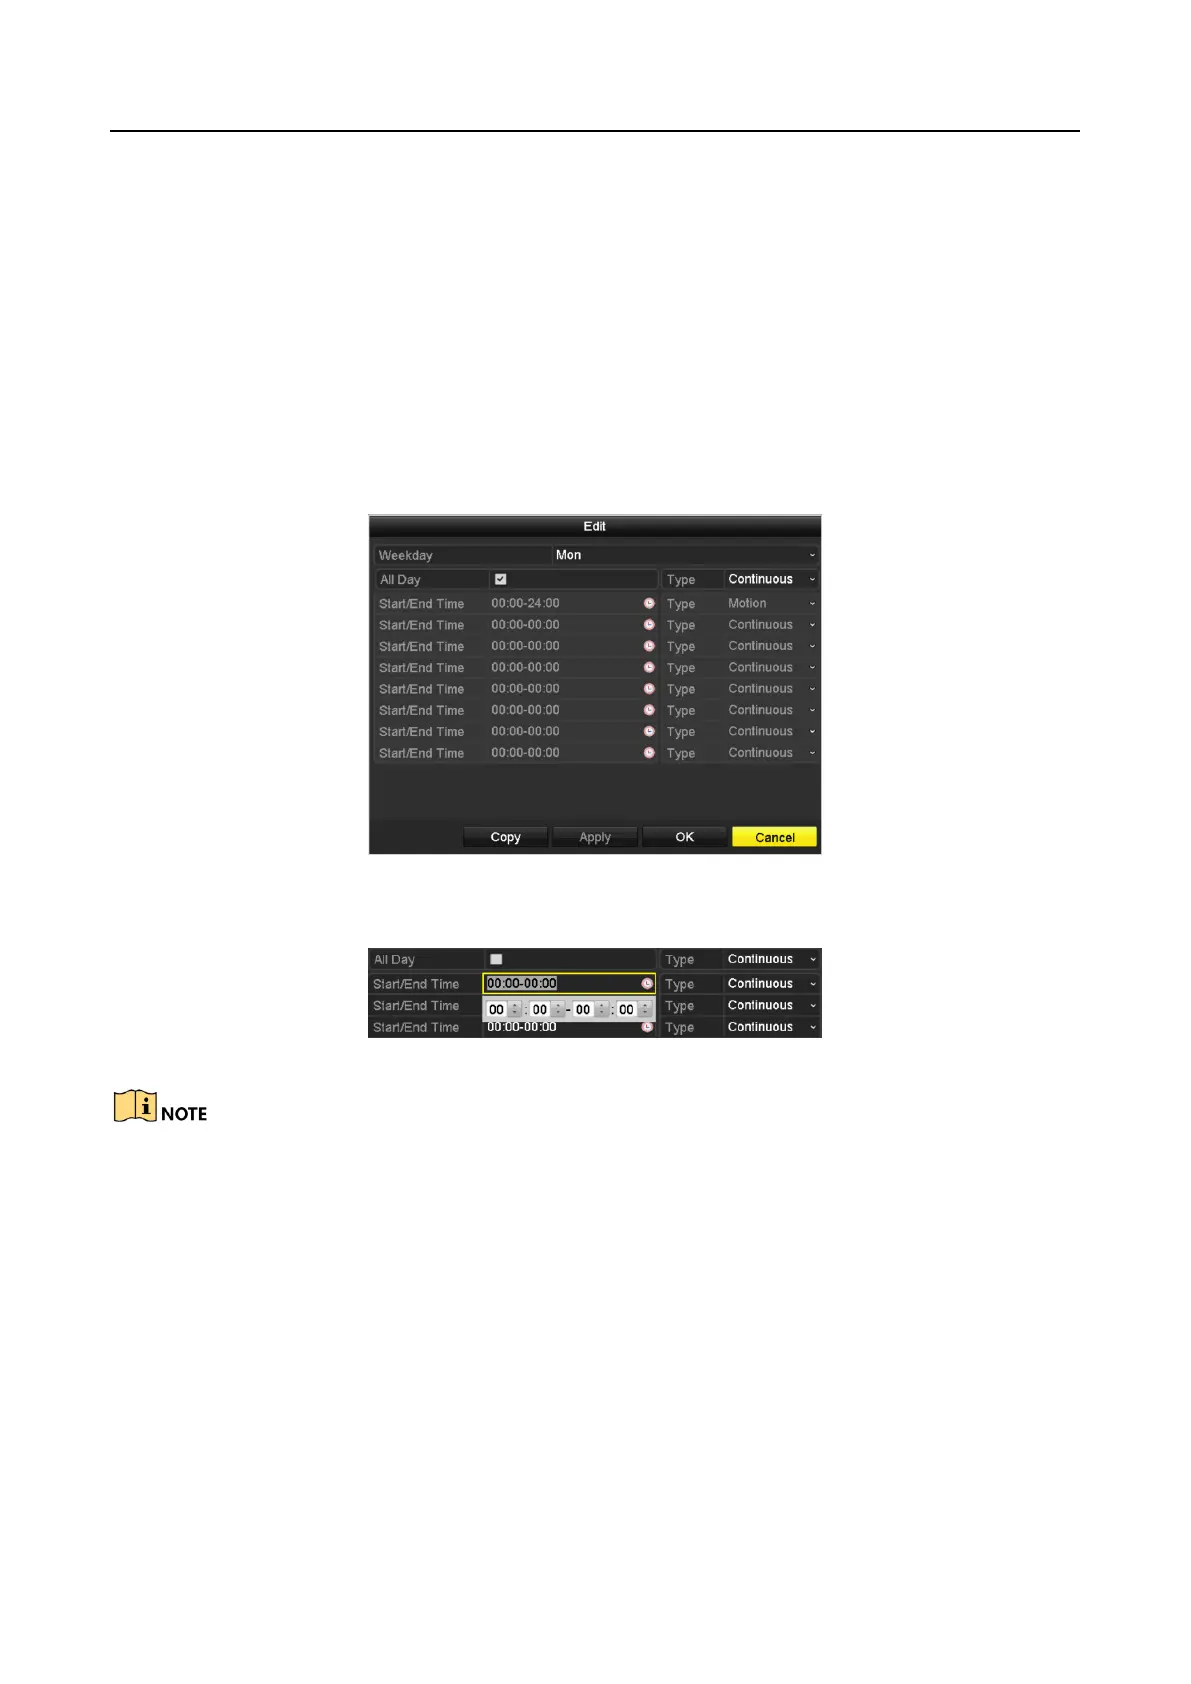
1) Click Edit.
2) In the message box, you can choose the day to which you want to set schedule.
3) To schedule an all-day recording, check the checkbox after the All Day item.
Figure 5-9 Edit Schedule- All Day
4) To arrange other schedule, leave the All Day checkbox blank and set the Start/End time.
Figure 5-10 Edit Schedule- Set Time Period
Up to 8 periods can be configured for each day. And the time periods cannot be overlapped
with each other.
To enable Event, Motion, Alarm, M | A (motion or alarm), M & A (motion and alarm), and
POS triggered recording, you must configure the motion detection settings, alarm input
settings or VCA settings as well. For detailed information, refer to Chapter 8.1, Chapter 8.7
and Chapter 9.
5) Repeat the above steps 1)-4) to schedule recording for other days in the week. If the
schedule can also be set to other days, click Copy.
 Loading...