Note
The supported number of relays varies with dierent models. Relay 1 corresponds to the 1A and
1B of the terminal. Relay 2 corresponds to the 2A and 2B of the terminal.
4.
Set the barrier gate operaon and alarm operaon for the temporary vehicles, vehicles in the
blocklist, and vehicles in the allowlist.
-
Check Upload via SDK to arm and upload the vehicle informaon to the arming terminal via
SDK.
-
If the device has been connected to the alarm device, check Upload to Alarm Host. When the
barrier gate is open, the alarm device will be triggered to alarm.
5.
Oponal: You can click Close, Open, Unlock, or Lock to control the barrier gate remotely.
Note
The funcons of remote control of barrier gate vary with dierent models. The actual device
prevails.
6.
Click Save.
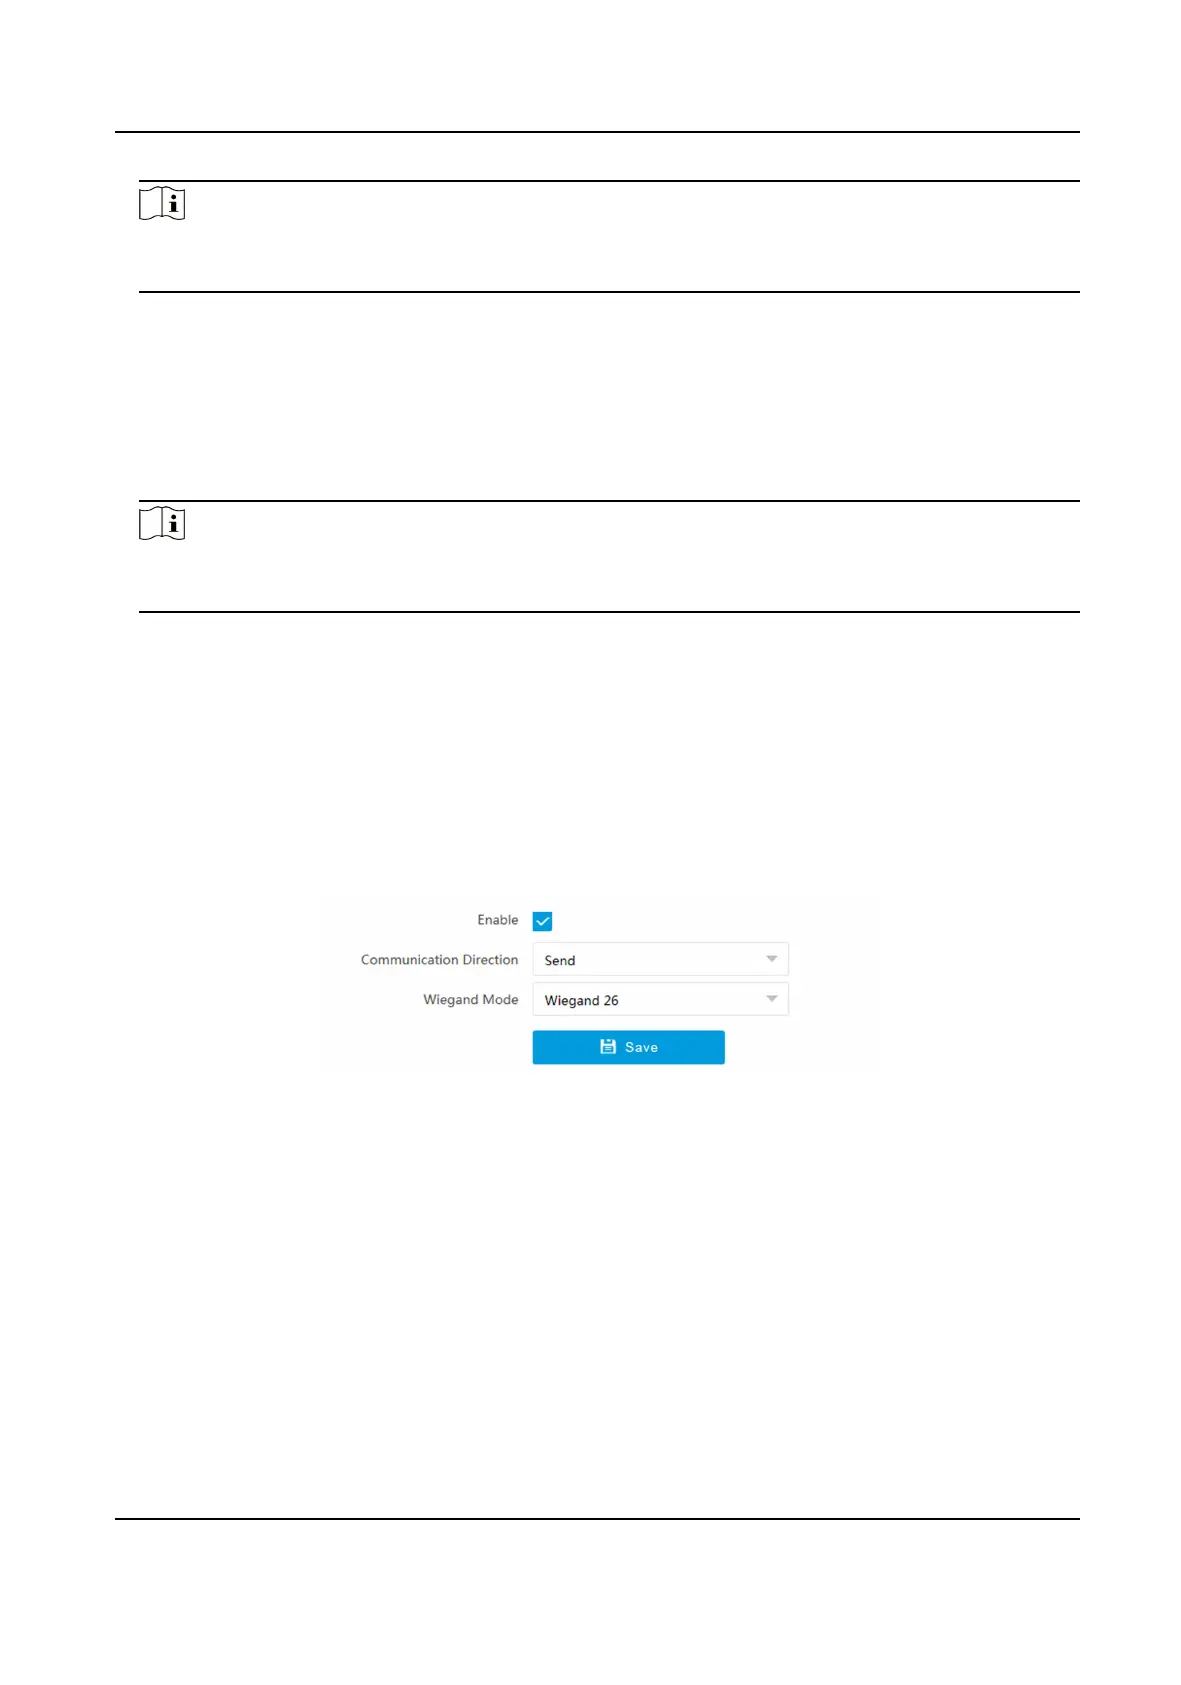
1.7.3 Set Wiegand Parameters
The barrier gate can be connected to the device via Wiegand interface.
Steps
1.
Go to Conguraon → Capture → Entrance and Exit → Wiegand Parameters .
2.
Check Enable.
Figure 1-28 Set Wiegand Parameters
3.
Select Communicaon Direcon.
Send
The barrier gate can be connected to the device via Wiegand 26 or Wiegand 34 mode.
4.
Select Wiegand Mode.
5.
Click Save.
Network Trac Camera Conguraon Manual
45

 Loading...