Cleaning and maintenance must be carried out only by qualified service personal. Before cleaning,
stop operation and switch off the power supply.
Please clean the filter once about every two weeks. By
doing so, the power rates are saved. In
case the air filter is full of dust, the air flow will decrease and the cooling capacity will be reduced.
Further, noise may occur. Be sure to clean the filter following the procedure below.
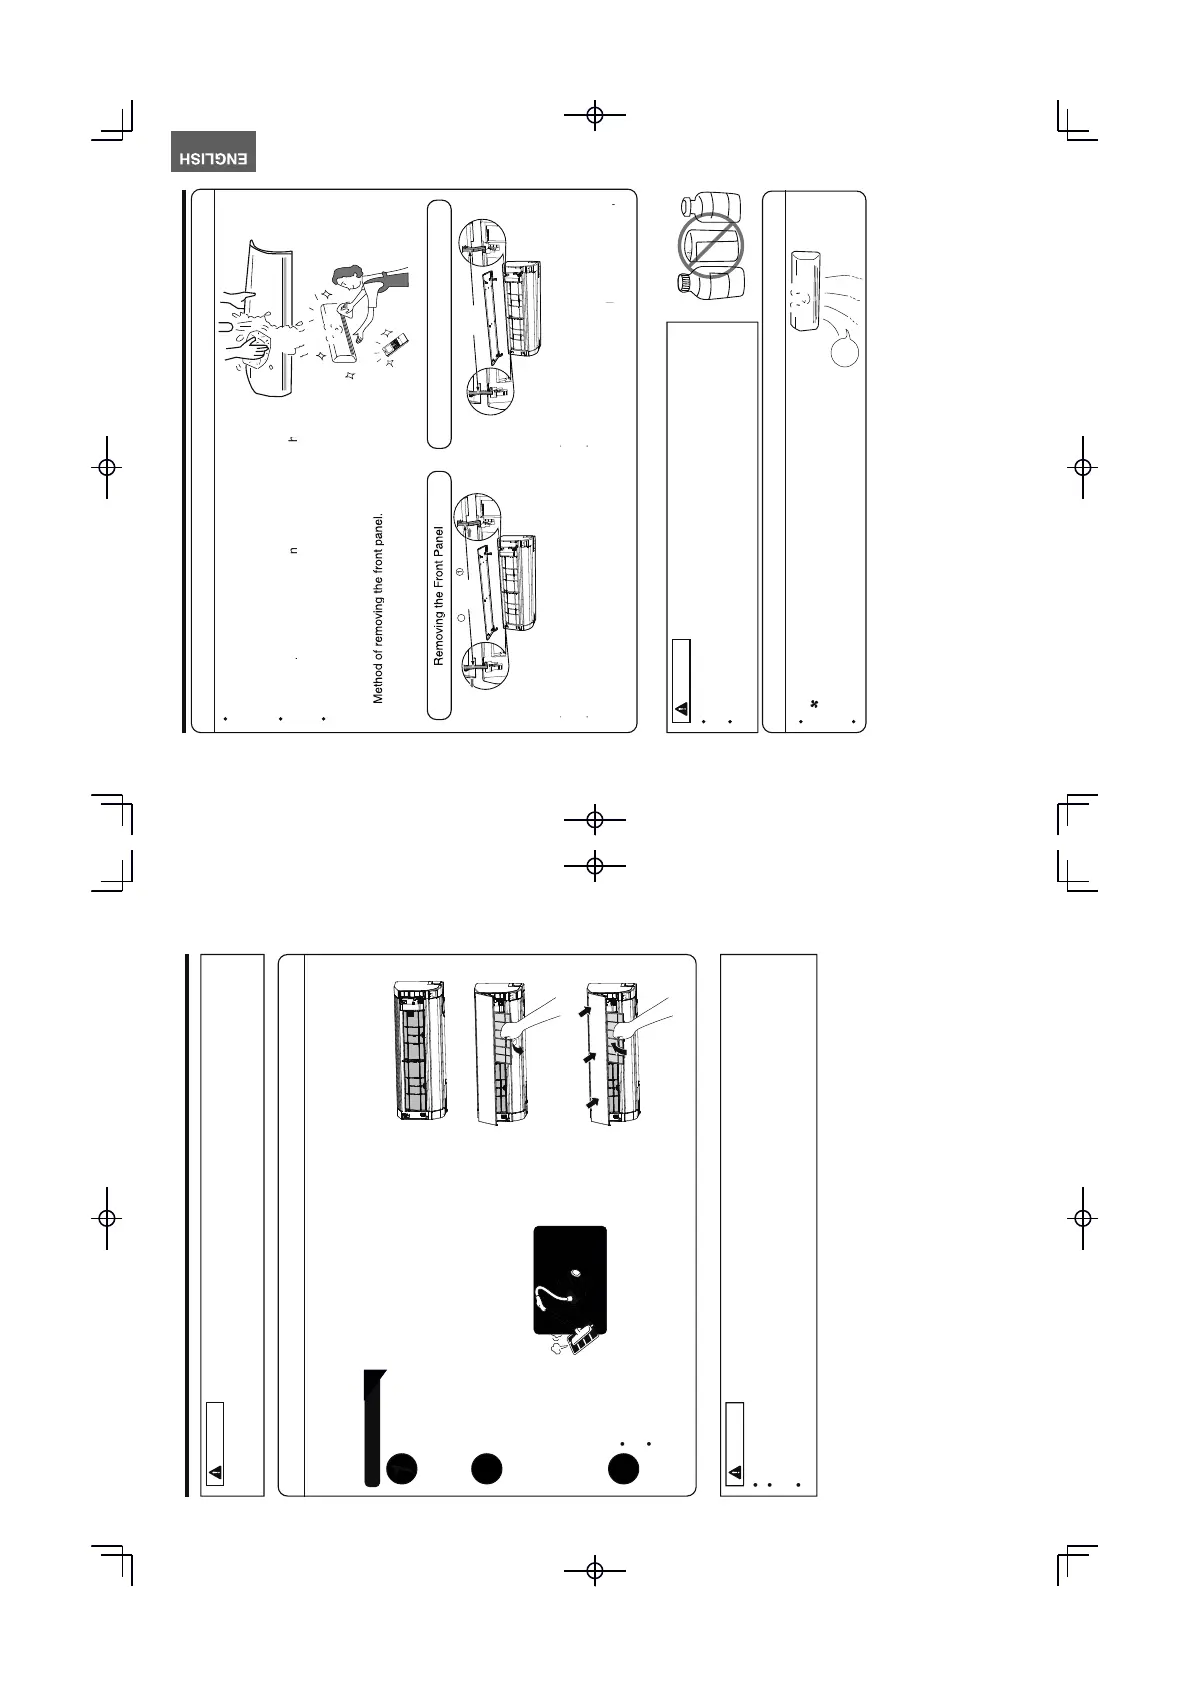
Open the front panel carefully and remove the filter.
Vacuum dust from the air filter using vacuum cleaner.
If there is too much dust, wash the filter with a detergent
and rinse it thoroughly. After that, dry it in the shade.
Set the filter with “FRONT” mark facing front, and
slot them into the original state.
After attaching the filters, push the front panel at
three arrow portions as shown in figure and close
Do not wash with hot water at more than 40°C. The filter may shrink.
When washing it, shake off moisture completely and dry it in the shade; do not expose it directly
to the sun. The filter may shrink.
Don't operate the unit without filter. Fault may occur if you continue.
2. CLEANING OF FRONT PANEL
Remove the front panel and wash with clean water.
Wash it with a soft sponge.
After using neutral detergent, wash thoroughly with
When front panel is not removed, wipe it with a soft
Wipe the water thoroughly.
If water remains at indicators or signal receiver of
indoor unit, it causes trouble.
Do not splash or direct water to the body of the unit when cleaning it as
this may cause short circuit.
Never use hot water (above 40°C), benzine, gasoline, acid, thinner or a
brush, because they will damage the plastic surface and the coating.
3. MAINTENANCE AT BEGINNING OF LONG OFF PERIOD
(FAN) and the fan speed to HI for about half a day
on a fine day, and dry the whole of the unit.
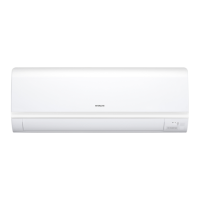
Be sure to hold the front panel with both hands to
Attaching the Front Panel
Push the end of the right-side arm outward to release
Move the left-side arm outward to release the left tab,
and then pull the panel towards you.
Insert the shaft of the left arm along the step on the
Securely insert the shaft of the right arm along the
step on the unit into the hole.
Push the end of the right-side arm outward to release
Push the end of the right-side arm outward to release
Move the left-side arm outward to release the left tab,
Move the left-side arm outward to release the left tab,
Insert the shaft of the left arm along the step on the
Insert the shaft of the left arm along the step on the
Securely insert the shaft of the right arm along the
Securely insert the shaft of the right arm along the
 Loading...