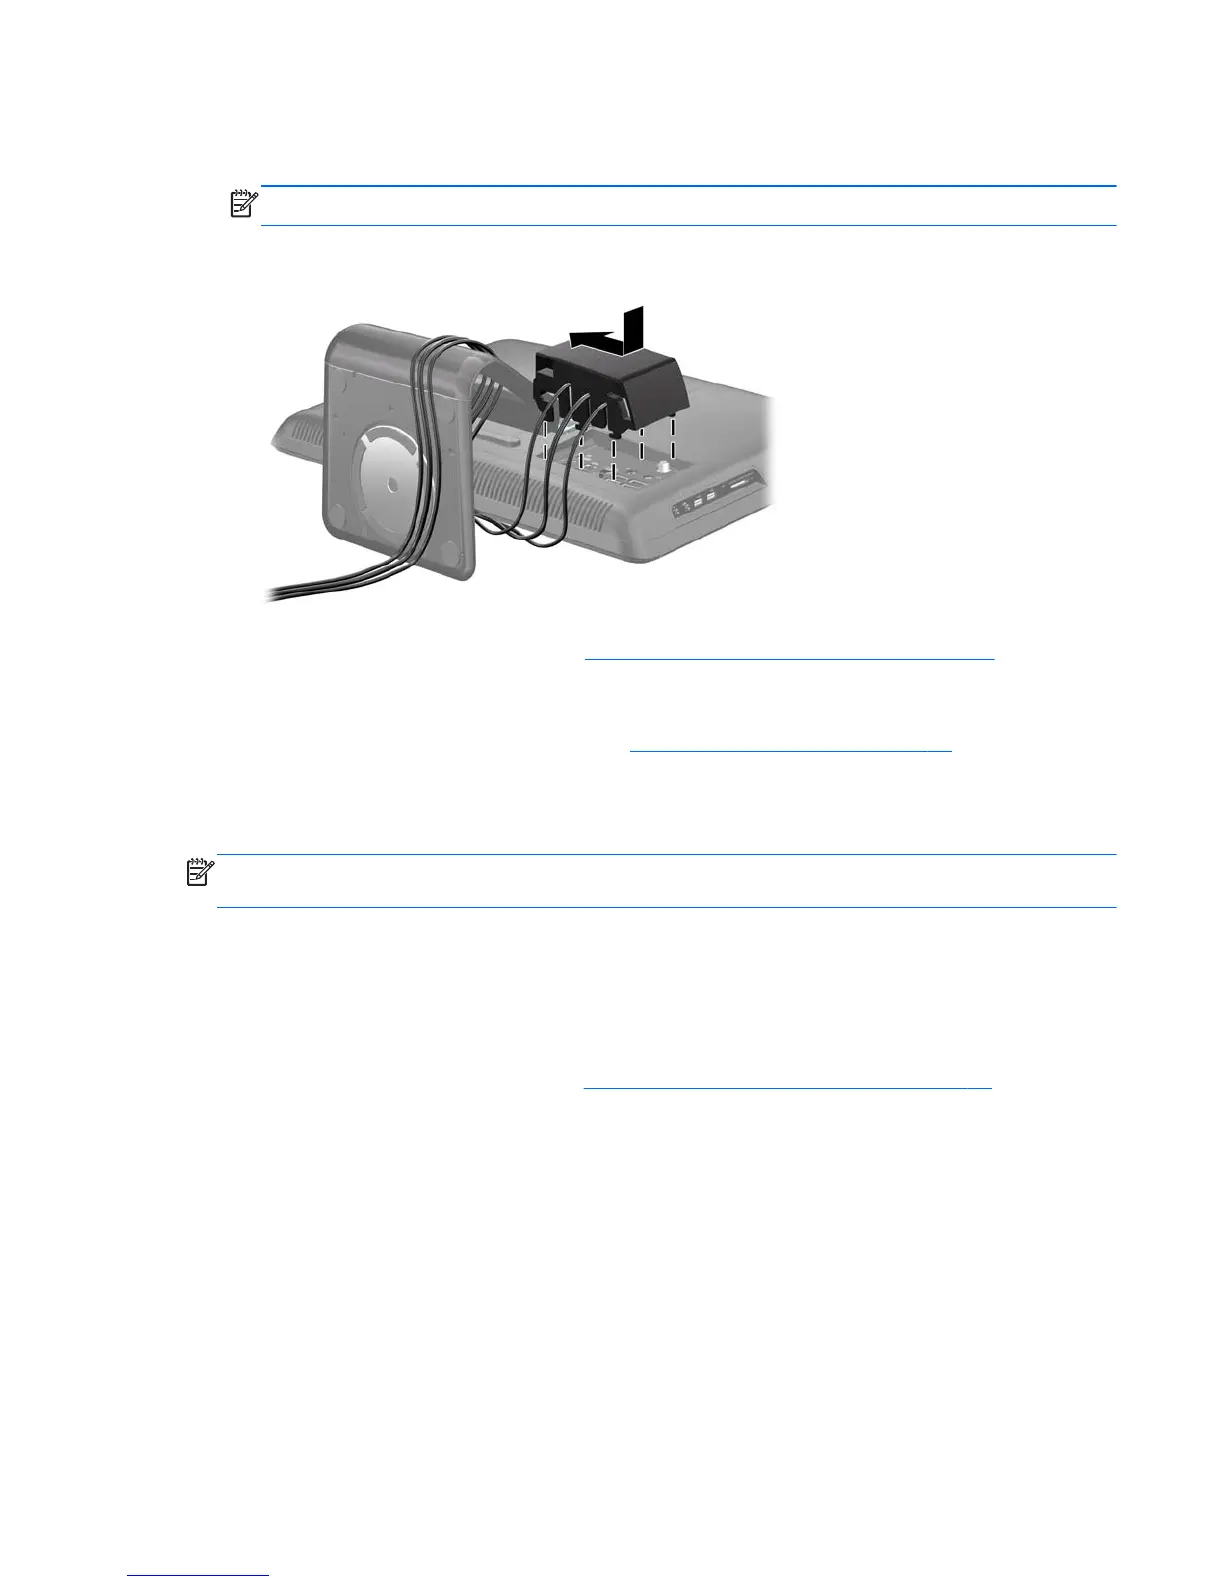
6. Insert the hooks on the port cover into the slots on the rear I/O panel and slide the port cover to
the left until it stops.
NOTE: Ensure that all peripheral device cables are routed through the slots in the port cover.
Figure 2-5 Installing the Port Cover
7. Replace the center access panel (see Replacing the Center Access Panel on page 13) and plug the
power cord into an electrical outlet.
8. To lock the port cover in place and secure the cable connections, install an optional security lock
in the slot on the center access panel. See
Installing a Security Lock on page 33.
Removing the Port Cover
NOTE: The port cover is an optional security device. It prevents access to the rear ports and secures
the cable connections when locked in place.
1. Remove/disengage any security devices that prohibit opening the computer.
2. Turn off the computer and unplug the power cord from the power outlet.
3. Place the computer face down on a soft flat surface. HP recommends that you set down a blanket,
towel, or other soft cloth to protect the screen surface from scratches or other damage.
4. Remove the center access panel (see
Removing the Center Access Panel on page 12).
ENWW
Removing the Port Cover
15
 Loading...