4. Disconnect the power cord from the power outlet and disconnect any external devices.
CAUTION: Regardless of the power-on state, voltage is always present on the system board as
long as the system is plugged into an active AC outlet. You must disconnect the power cord to
avoid damage to the internal components of the computer.
5. Place the computer face down on a soft flat surface. HP recommends that you set down a blanket,
towel, or other soft cloth to protect the screen surface from scratches or other damage.
6. Remove the center access panel (see
Removing the Center Access Panel on page 12).
7. Remove the drive access panel (see
Removing the Drive Access Panel on page 16).
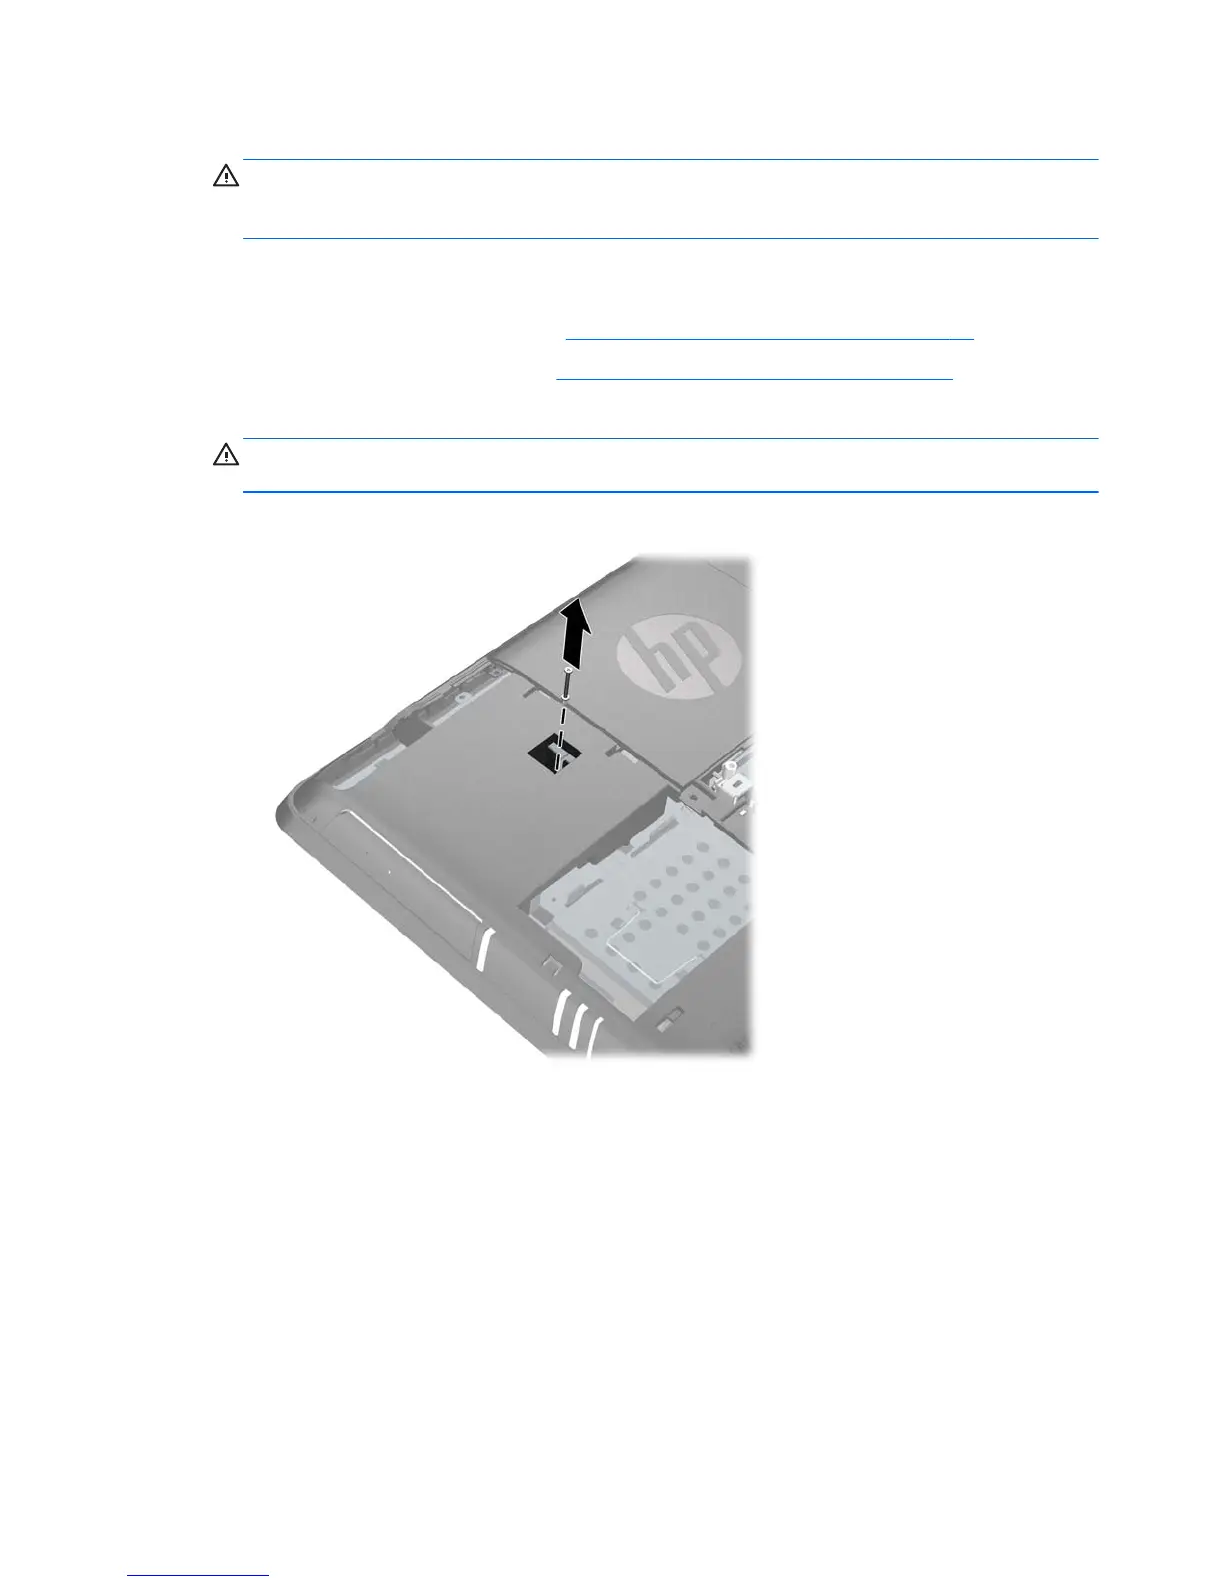
8. Remove the security screw next to the rear of the drive that secures the drive to the computer.
CAUTION: Hold onto the screw when removing it to make sure that the screw does not fall into
the inside of the unit.
Figure 2-13 Removing the Optical Drive Security Screw
24 Chapter 2 Hardware Upgrades ENWW
 Loading...